Trusted by:
Quick Guide on How to Create Certificates in Illustrator
Here’s the pictured guide to generate certificates in Illustrator faster than ever. Let’s create Illustrator certificates together!
AuthorSergey Butko
Updated: January 30, 2024
9 min read
Author
Sergey Butko
Updated: January 30, 2024
9 min read
Trusted by:
Adobe Illustrator isn't known as a digital certificate-generation tool in the creative industry. But, with some advanced options enabled, it can create a batch of files with ready certificates. How to do that (even if you're not an Adobe Creative Suite pro?).
No Illustrator courses or depth training needed. Here's the guide that will change your certificate design experience with Adobe Illustrator.
Can Certifier help you do that faster?
Some tools are designed to make life easier. And Certifier is definitely among one of them. It's a handy dedicated certificate generation solution made for situations just like this. Certifier provides an intuitive and fast way to produce certificates in bulk and deliver them to the right people. You don’t have to navigate through complex design software or manually distribute certificates. You can let Certifier do that for you.
Gather the necessary tools and set the stage
Before you get all creative with eye-catching certificates, here’s what you’ll need:
Adobe Illustrator
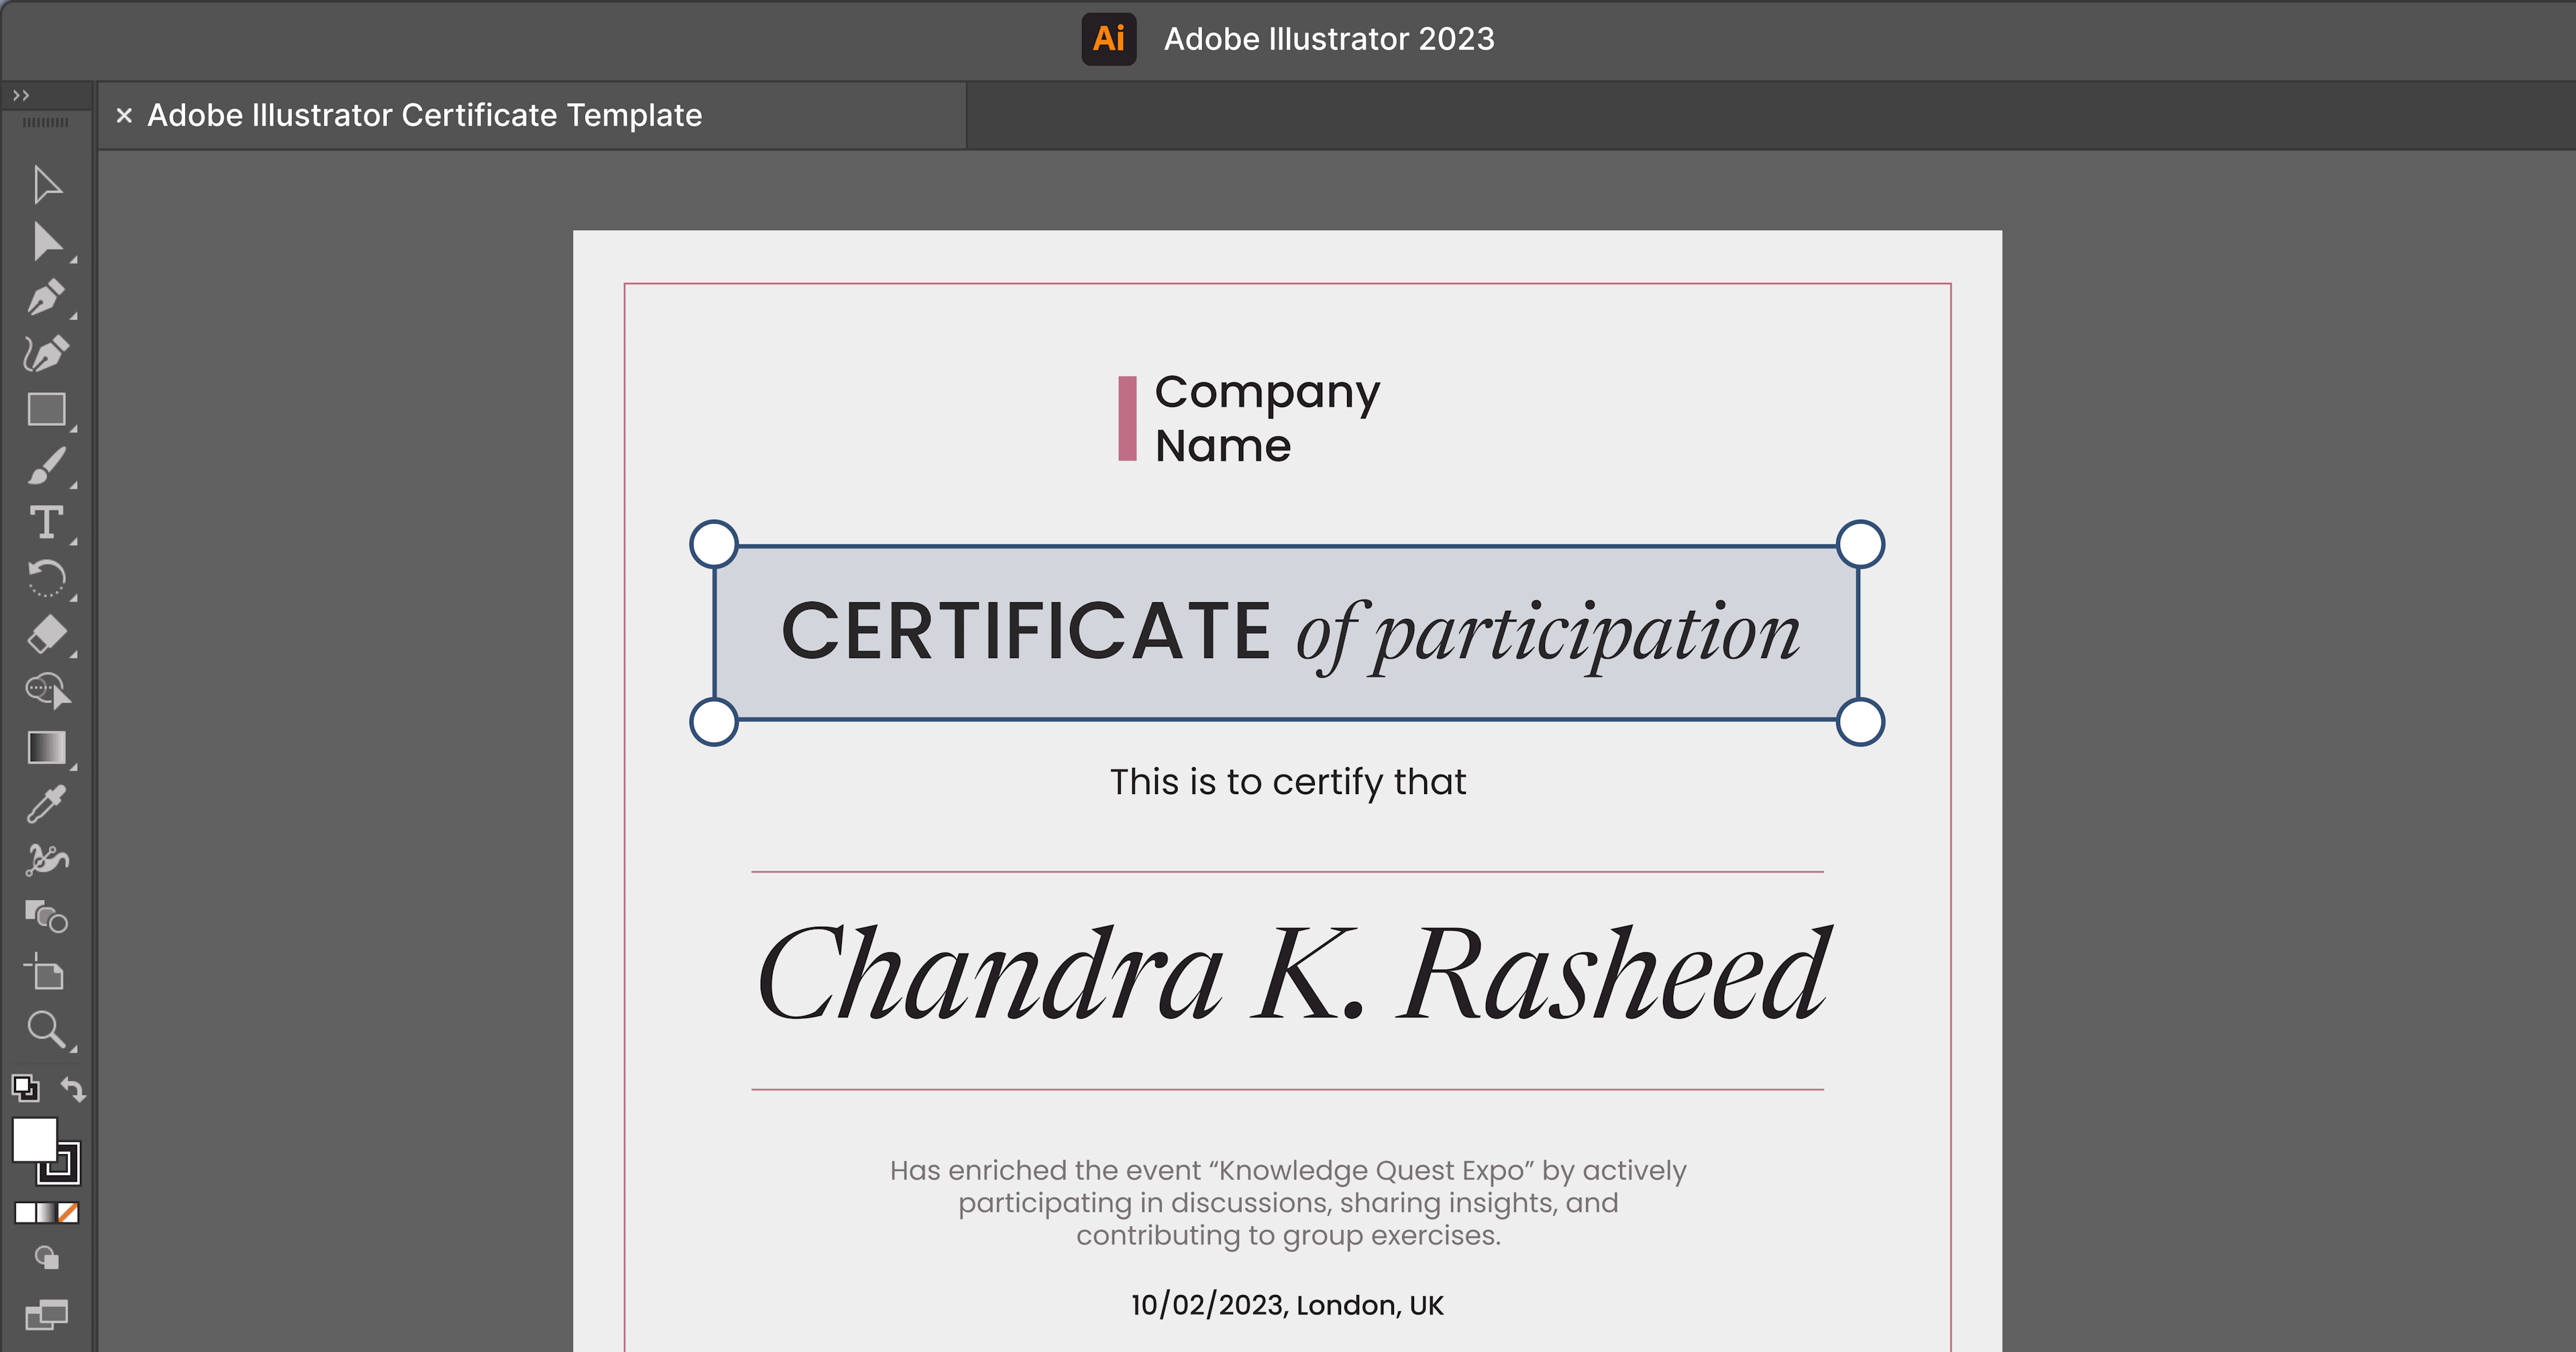
Certificate template
CSV file with the recipients’ data you want on the certificates (XML file is also supported)
Tip: If you’re still without the certificate template, you can choose one from the Certifier gallery. It has hundreds of professionally designed templates for every occasion. To make the certificate template work in Adobe Illustrator, you have to download it to Figma format. Then, import the file to Figma and export to a vector file (disable text outline) – SVG file. With just a few clicks, you get a ready-made certificate.
6 Steps to create certificates in Adobe Illustrator
The guide below shows you how to create certificates in Adobe Illustrator in the fastest way possible. Follow along.
#1 Fire up Adobe Illustrator
First things first, so let’s get Illustrator running.
Open up the tool (or download it from Creative Cloud).
If you want to design a certificate from scratch, create a new document. If not, go to the #2 step.
Tip: Remember that certificates have defined sizes in graphic design. The most popular ones are 8.5x11 inch (220x280 mm). Prepare the document before and adjust the document settings to the final purpose (e.g., whether you want to print them afterward).
#2 Upload the template
If you already have the digital certificate template ready – perfect! It’s going to be the foundation upon which all the other certificates will be crafted.
Once you have it, load it into Illustrator.
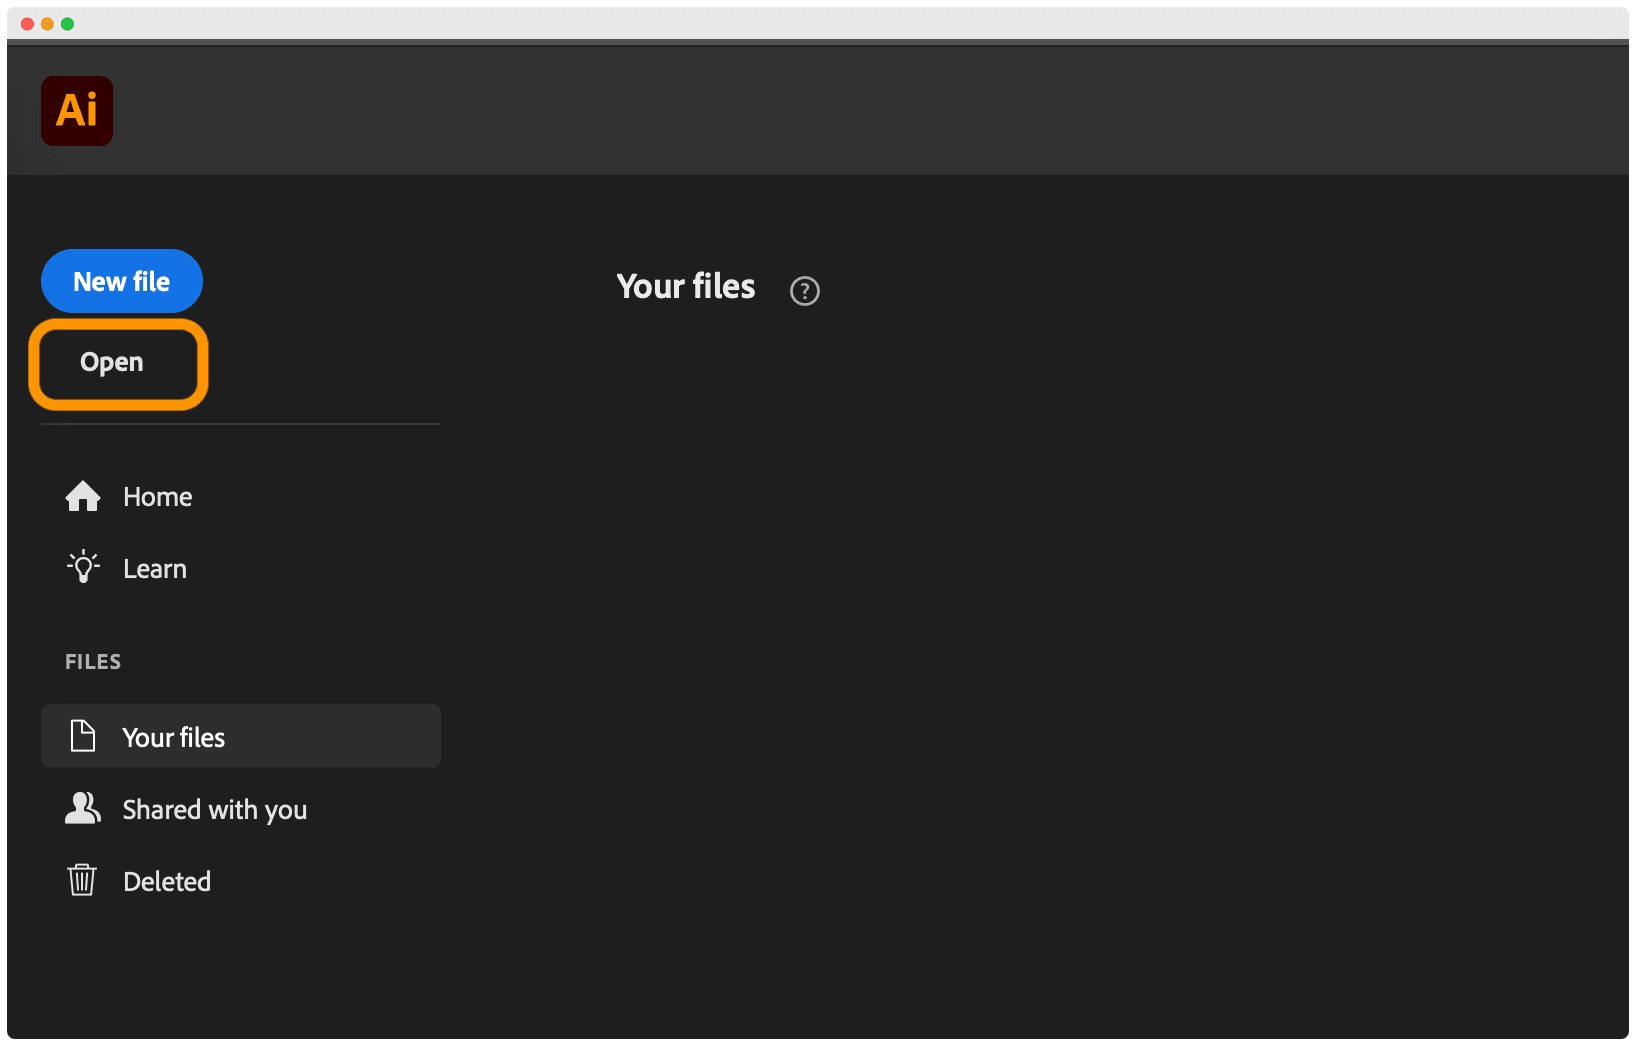
From the welcome Adobe Illustrator screen, choose Open.
Select the source file you want to load. We’re going to choose one of the beautiful certificate designs from the Certifier library.
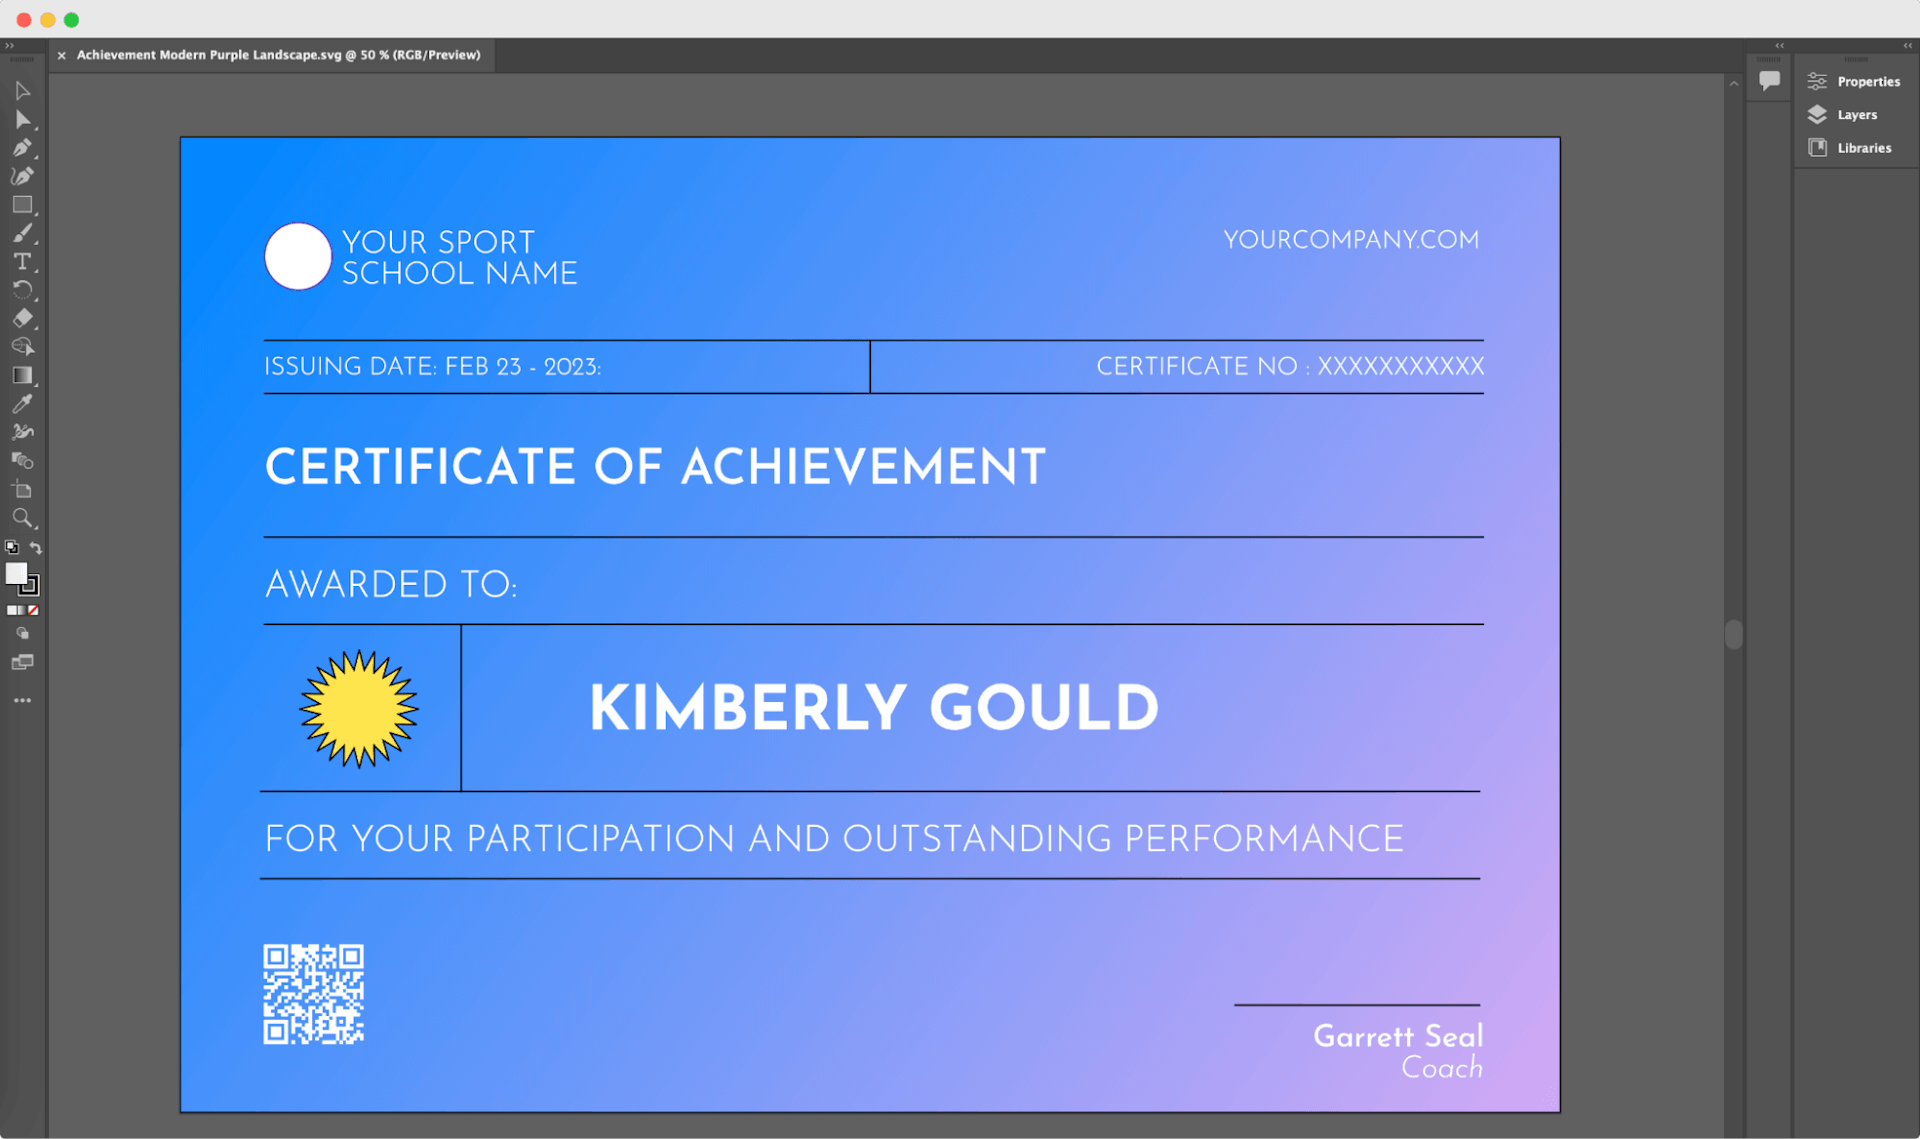
[Download this free certificate template here]
#3 Load your data
After you have opened your certificate template, you can begin loading data.
Navigate to Variables: Go to Window > Variables.
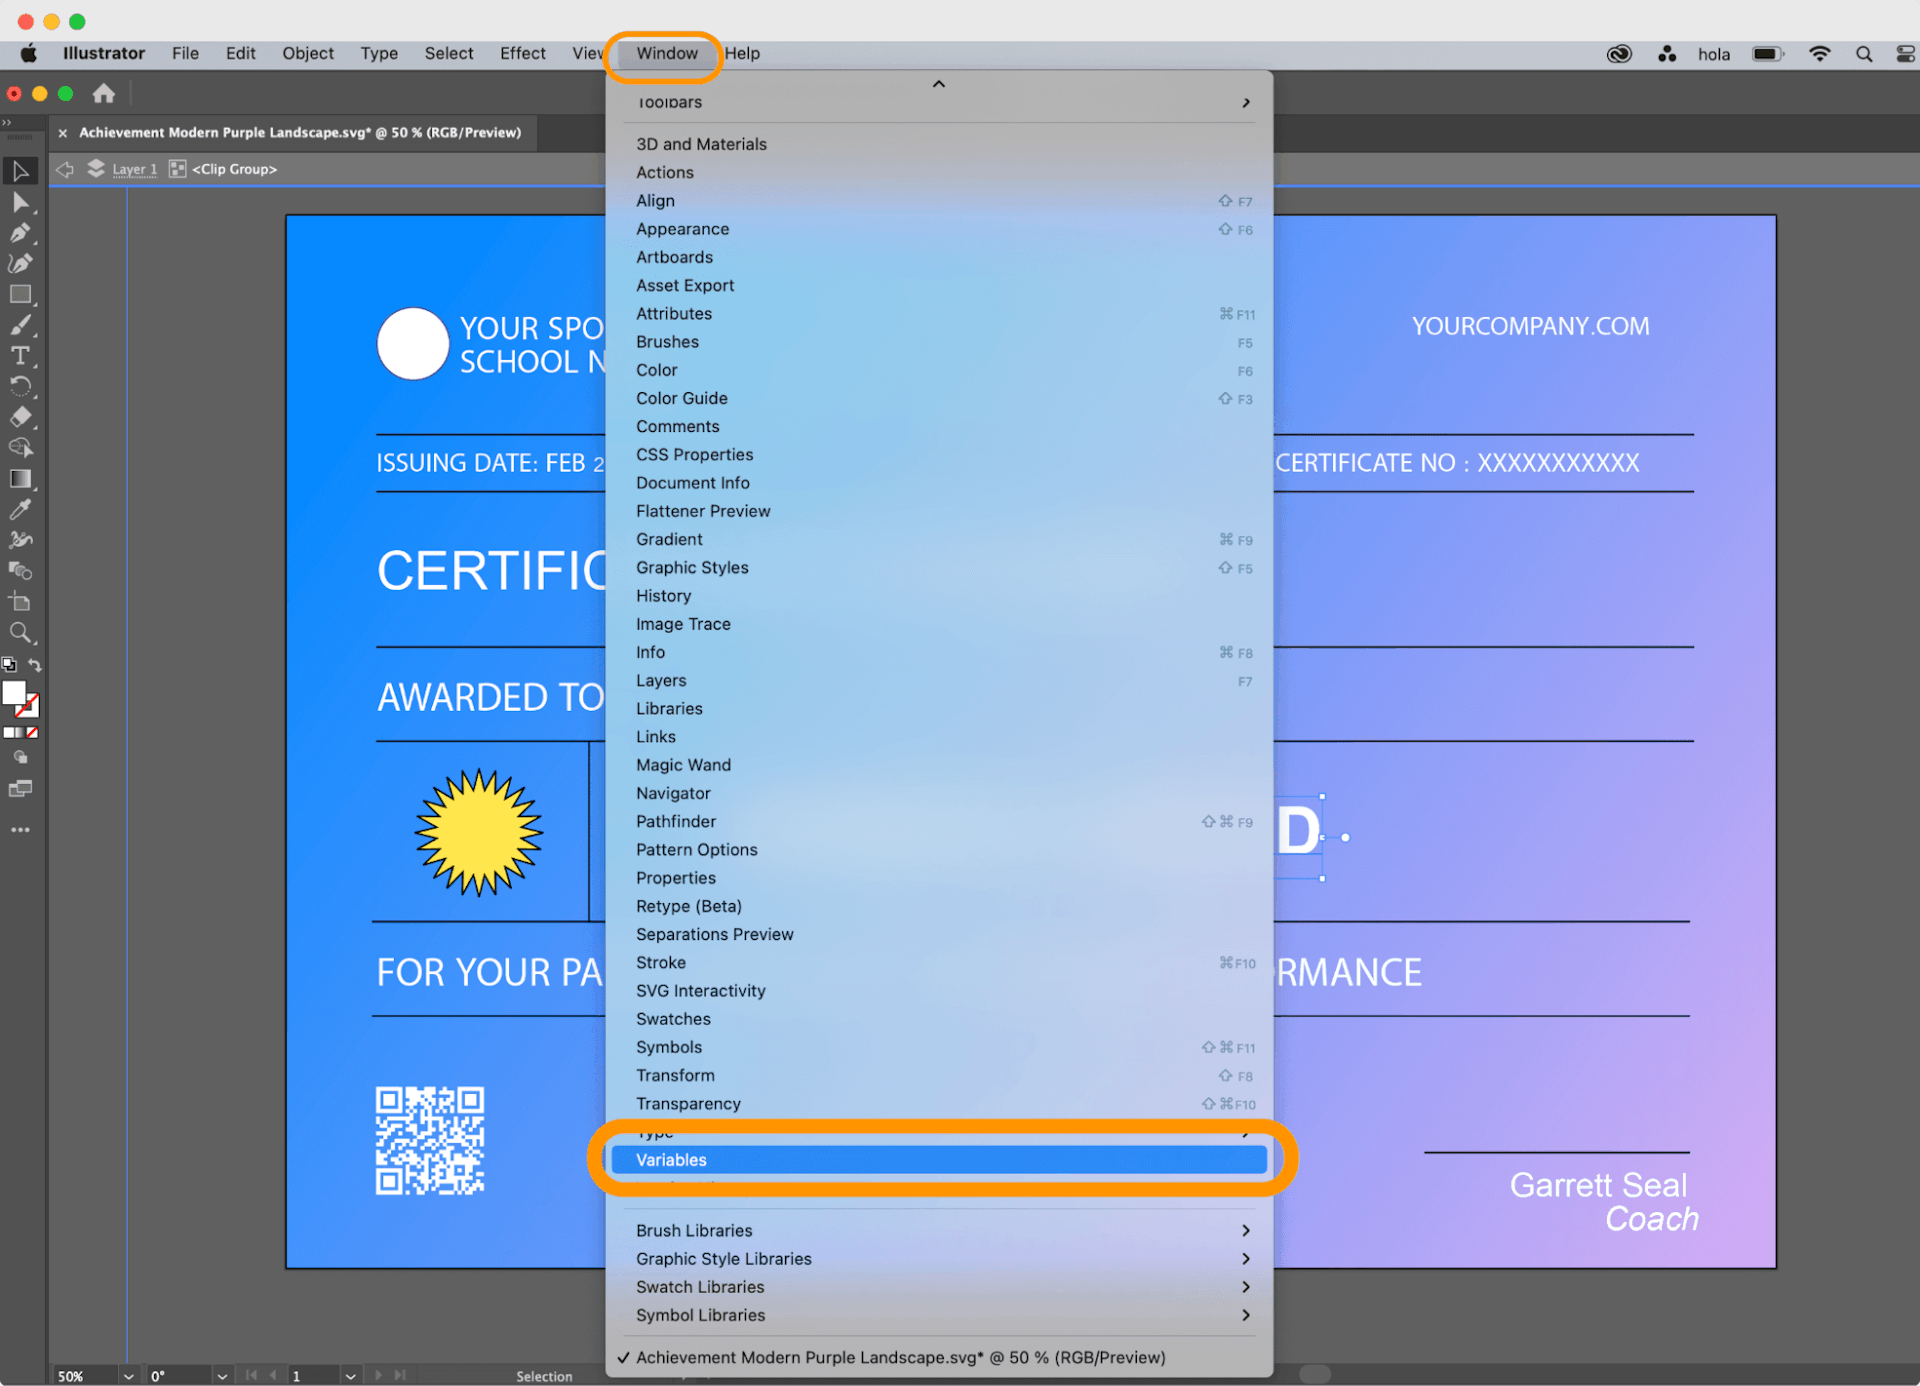
This will bring up a little pop-up window.
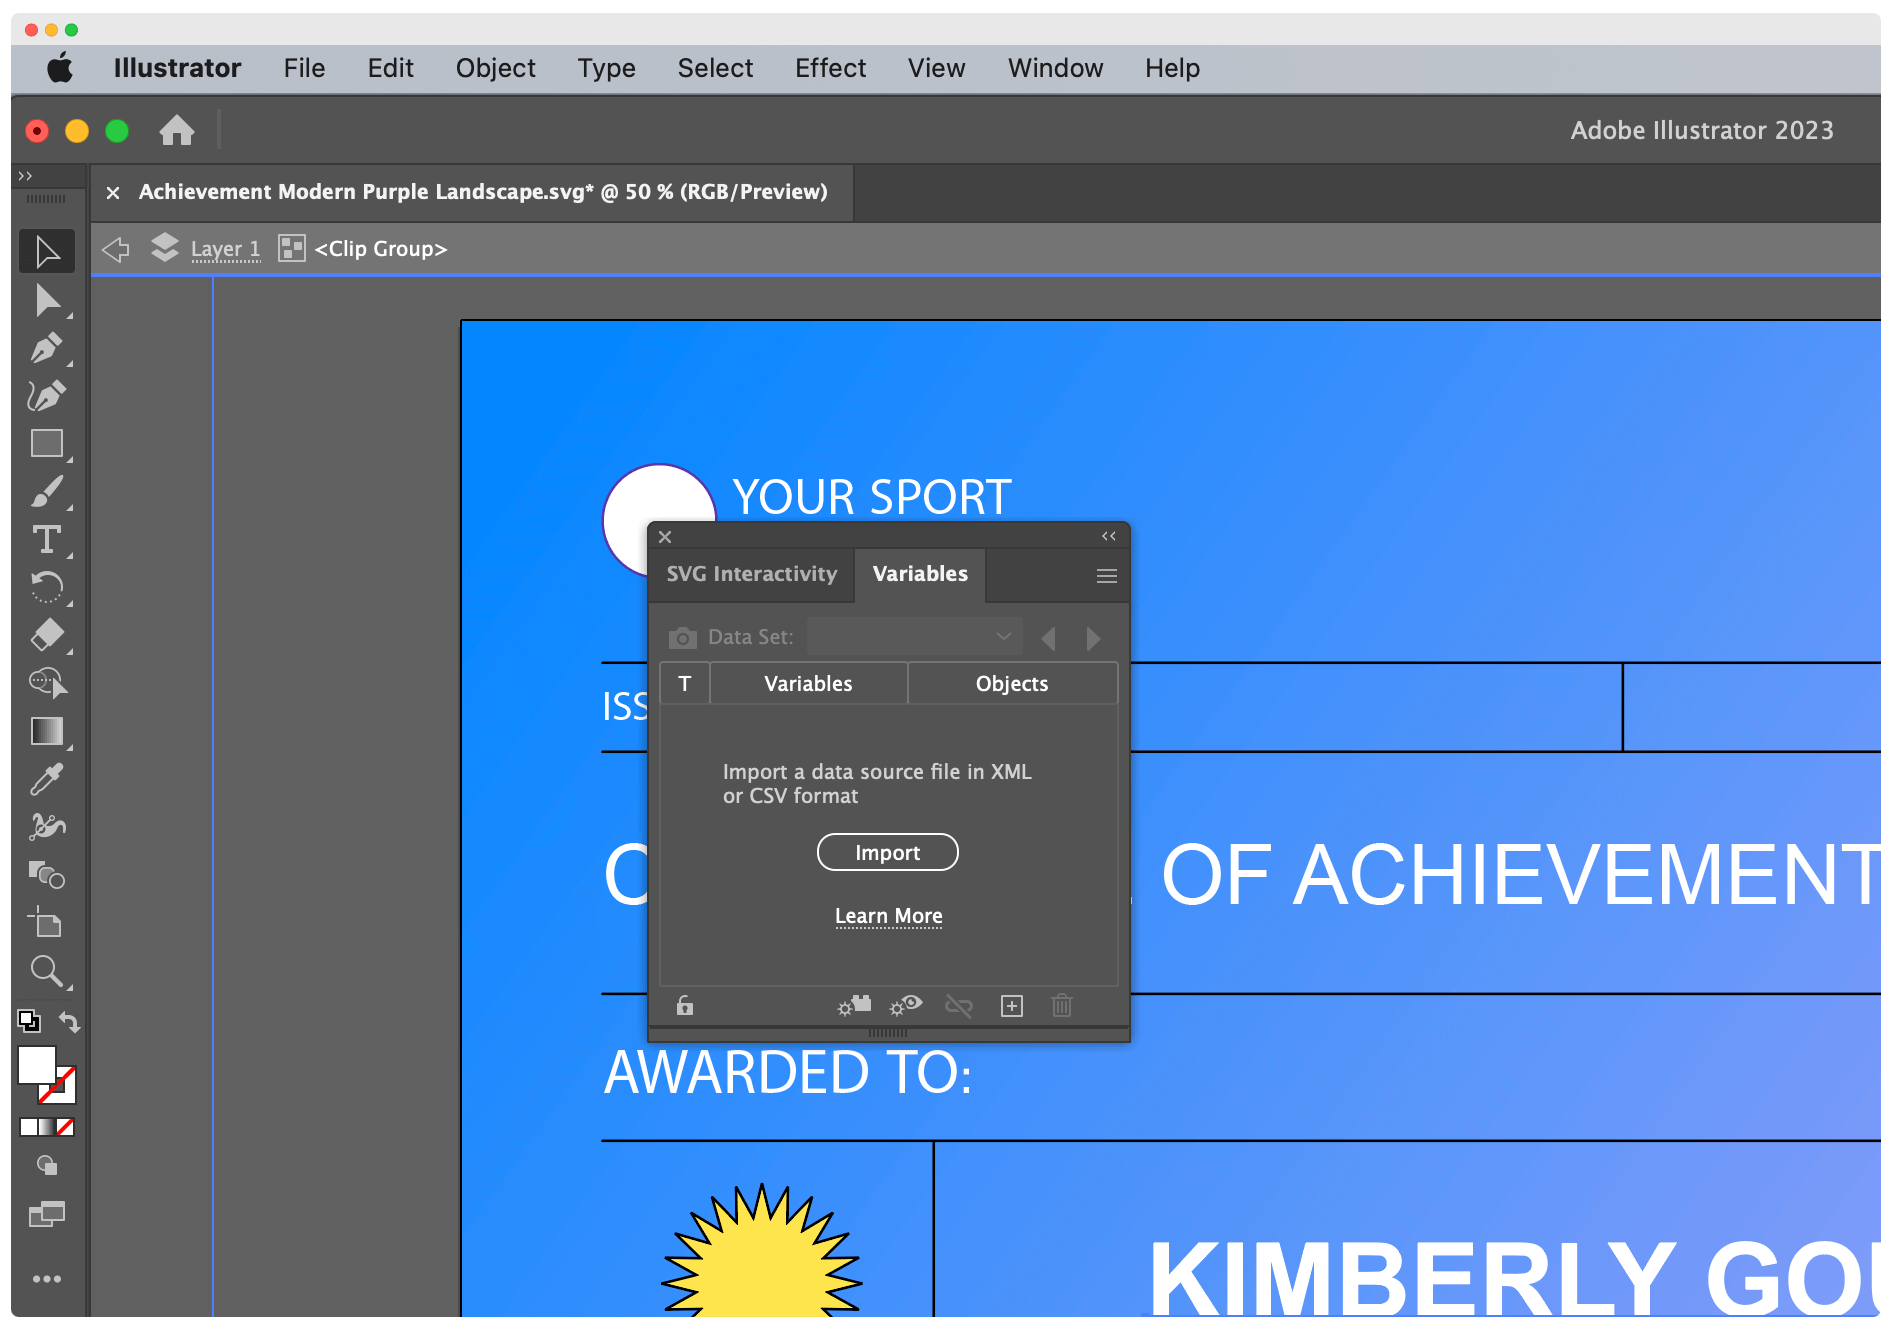
Click Import in the Variables panel menu and select your CSV file with the recipients’ data.
#4 Link your data with the certificate elements
This is where the automation begins.
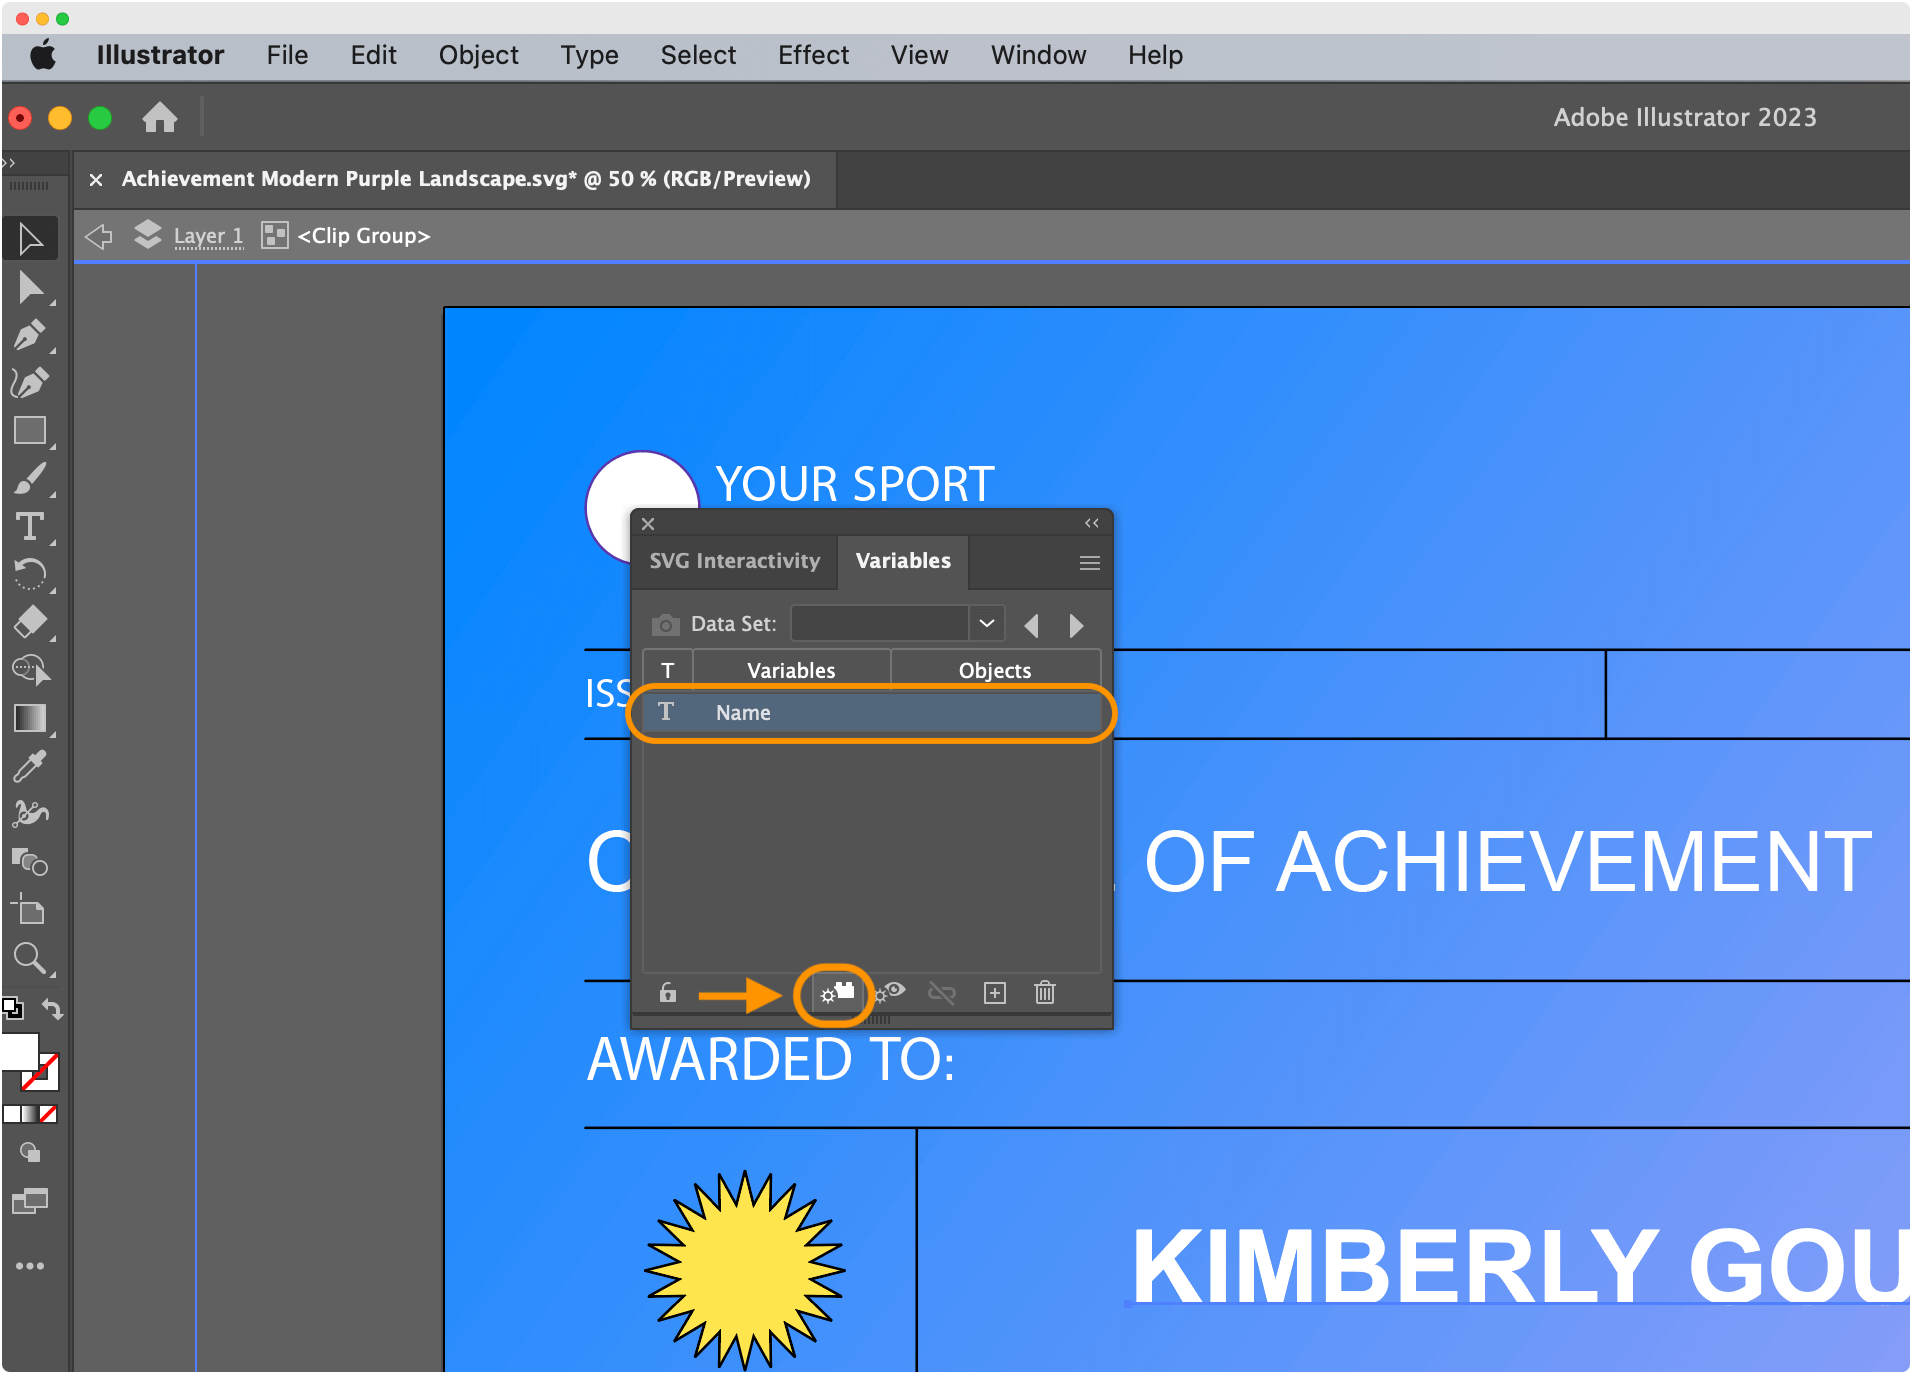
Select the element from the certificate content that you want to make a variable (in this case, the recipient’s name – Kimberly Gould) Note: If you change the name already into the vector graphics, change them to text back.
Pick the corresponding data on the Variables panel and click the Make Text Dynamic button. It’s this little icon that looks like a LEGO® element between the locker and the eye.
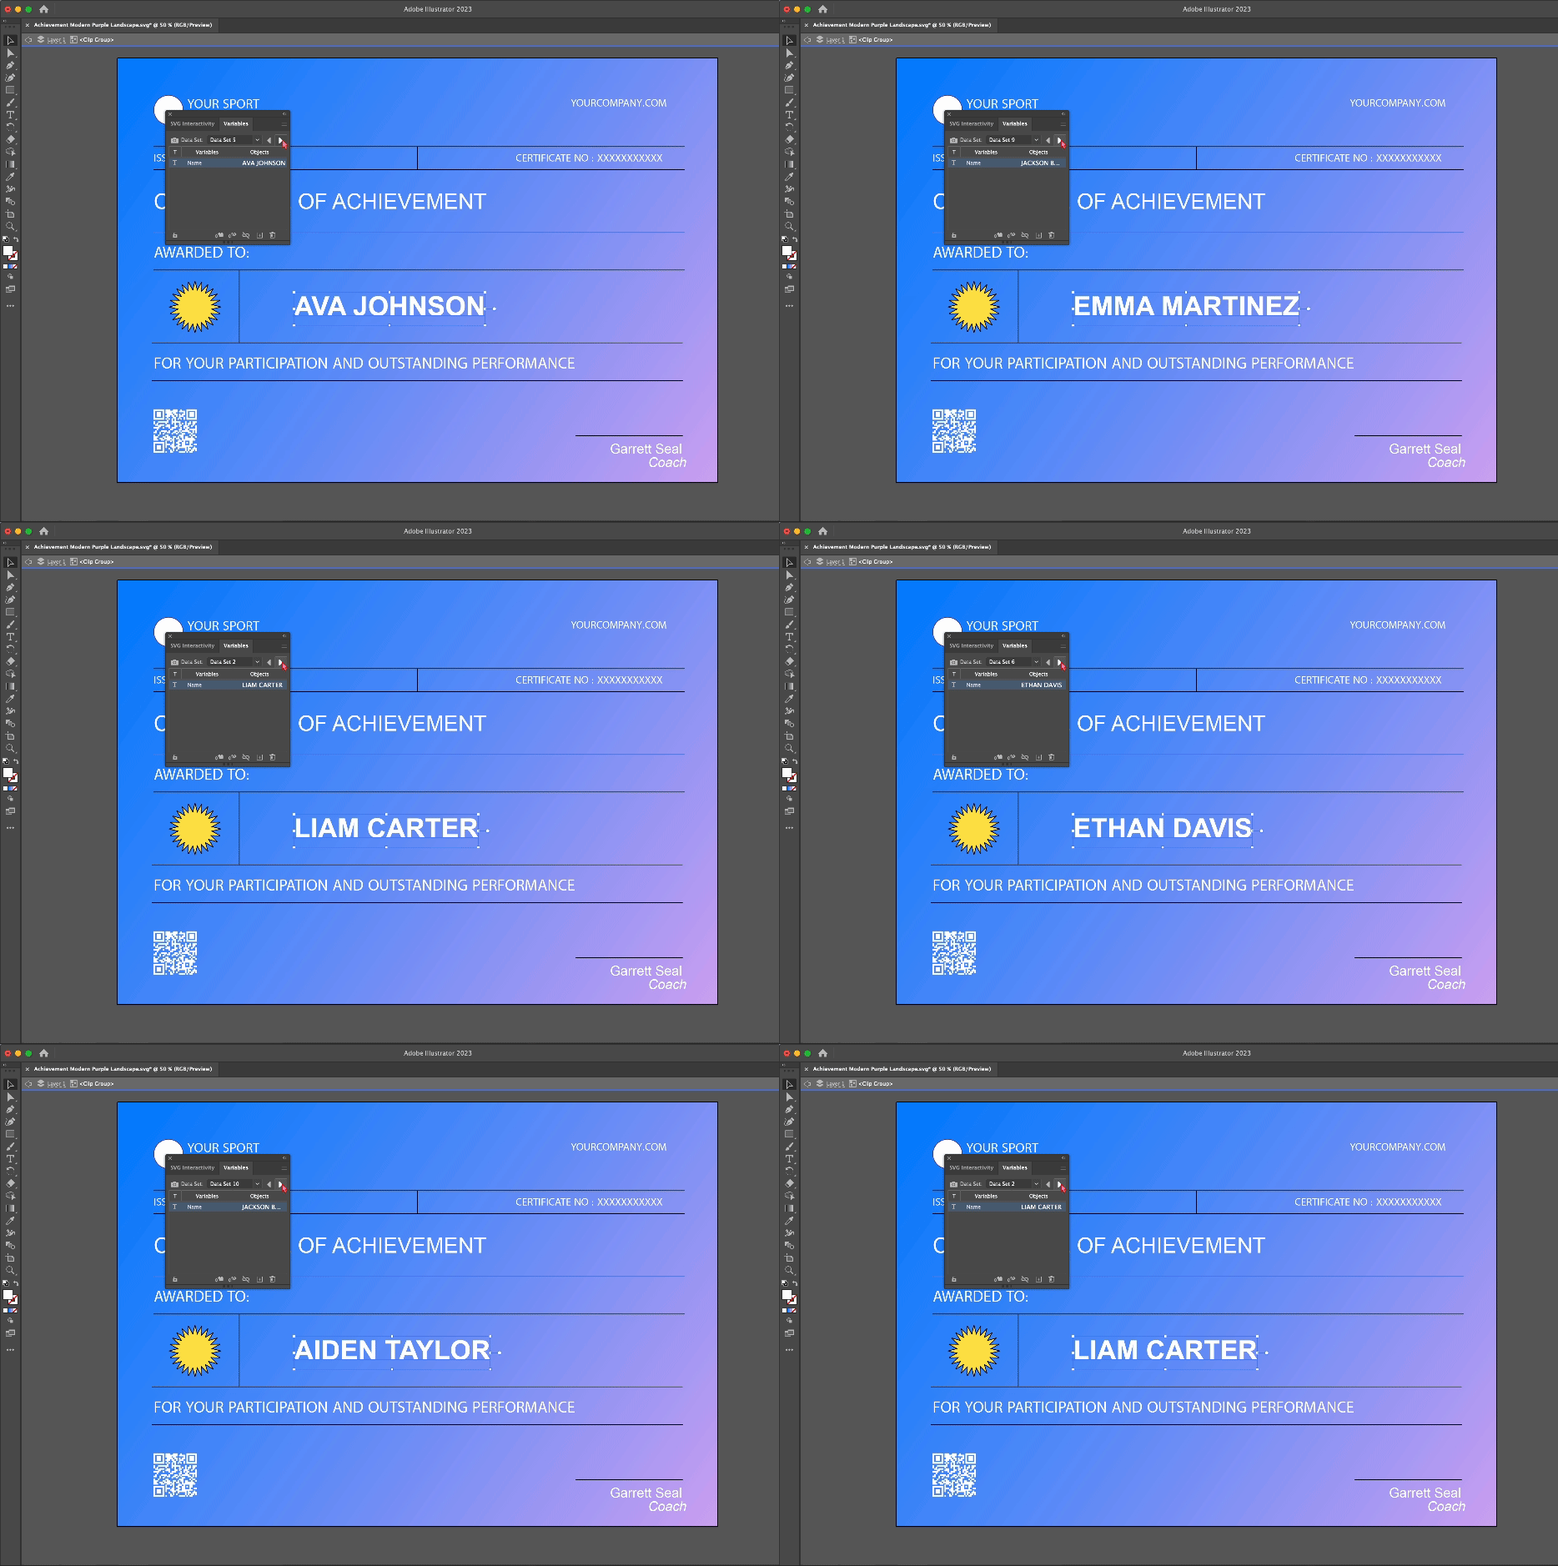
Done? See if the dynamic objects are changing according to the data in the CSV file by clicking the arrows next to the Data Set.
#5 Get ready to export
Now, we've got to automate exporting the certificates. To minimize the time spent on certificate generation in Illustrator, you can record the Action to export the certificates automatically.
Let’s start with setting up an action.
Go to Window > Actions.
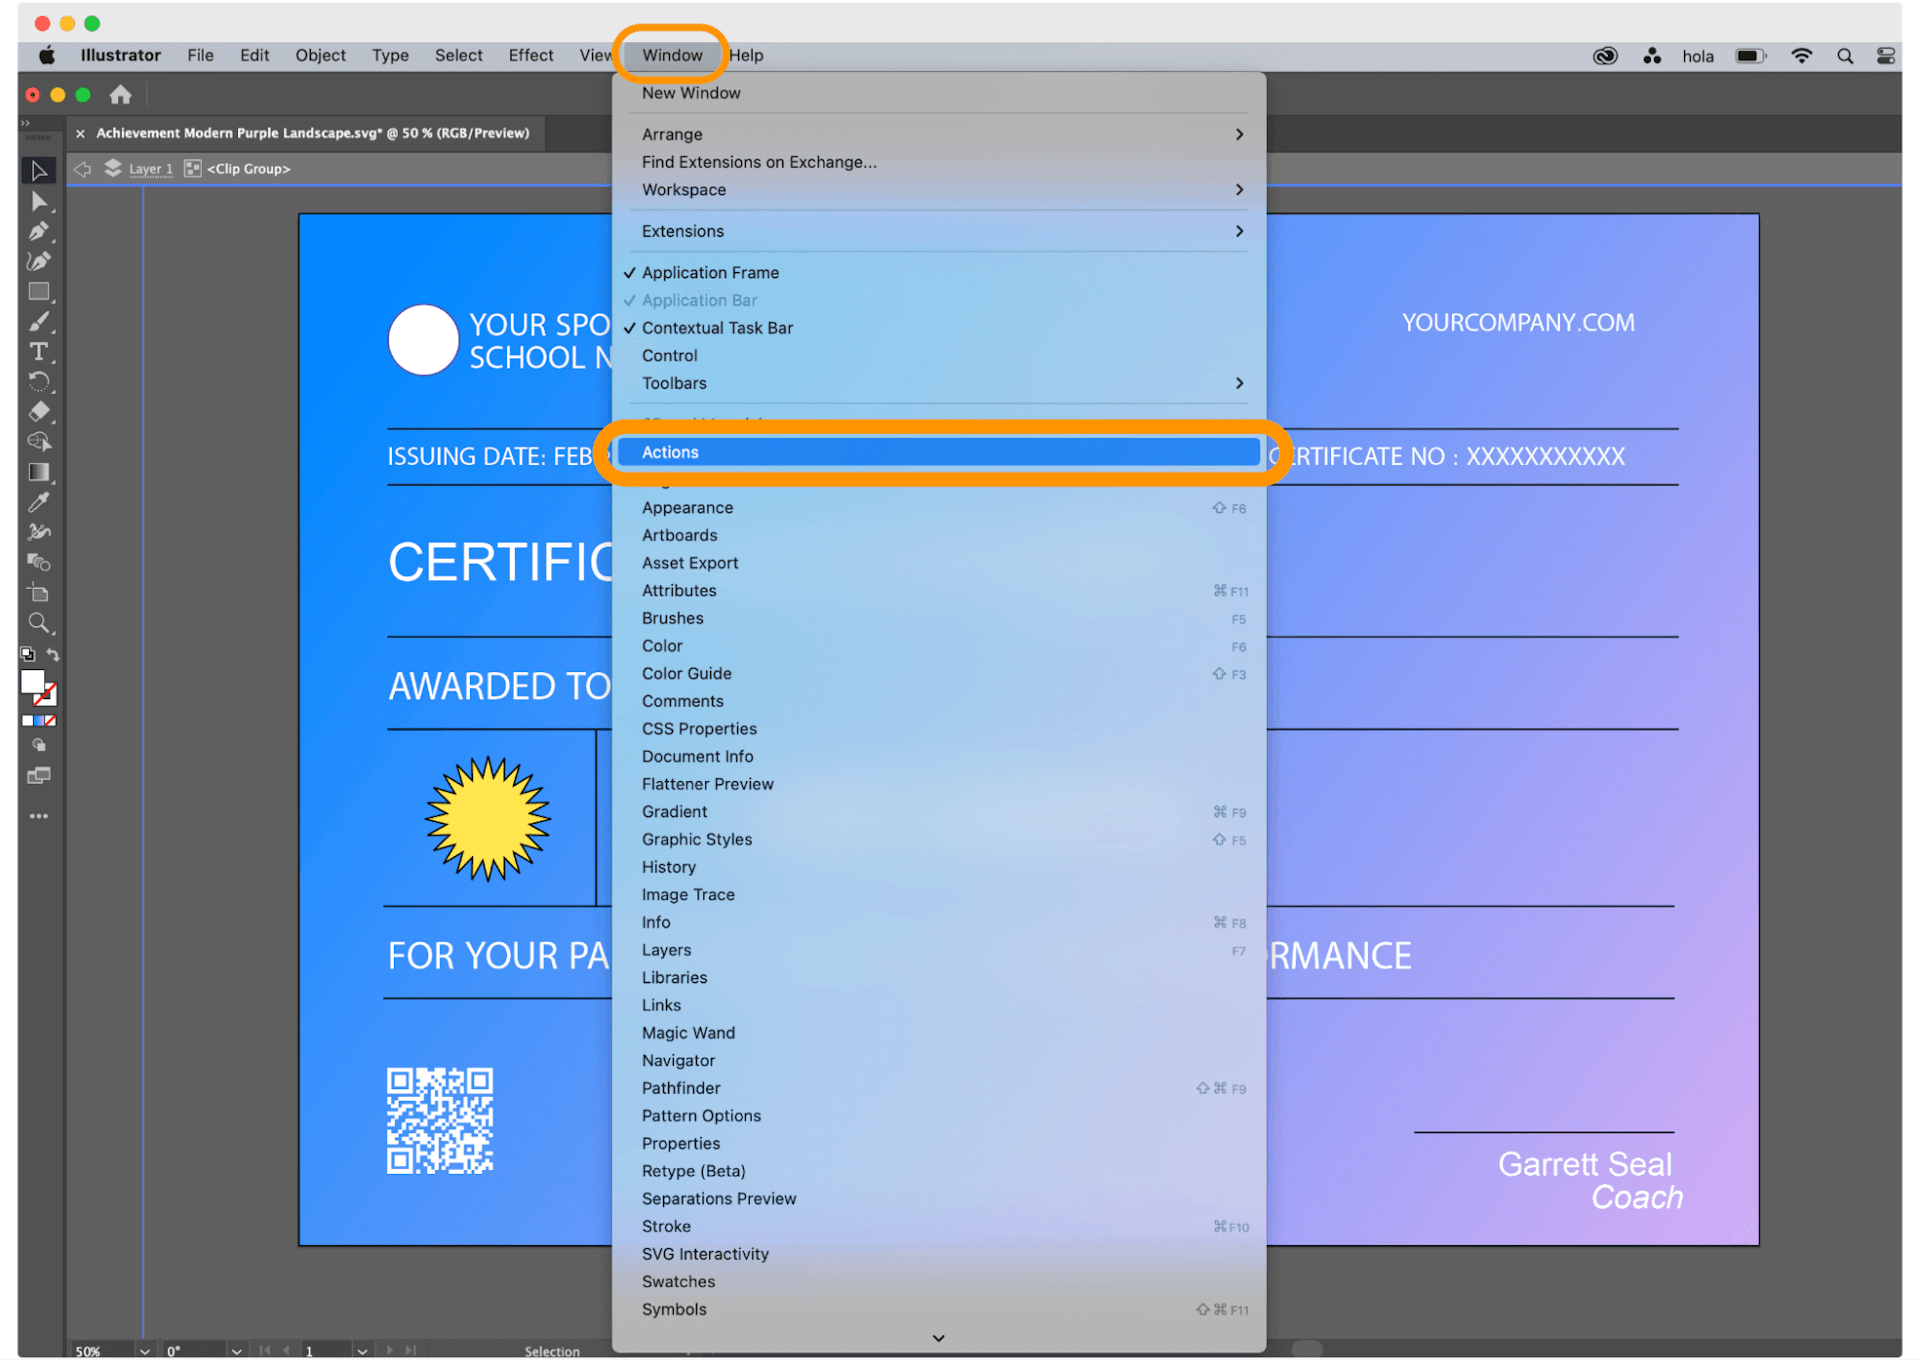
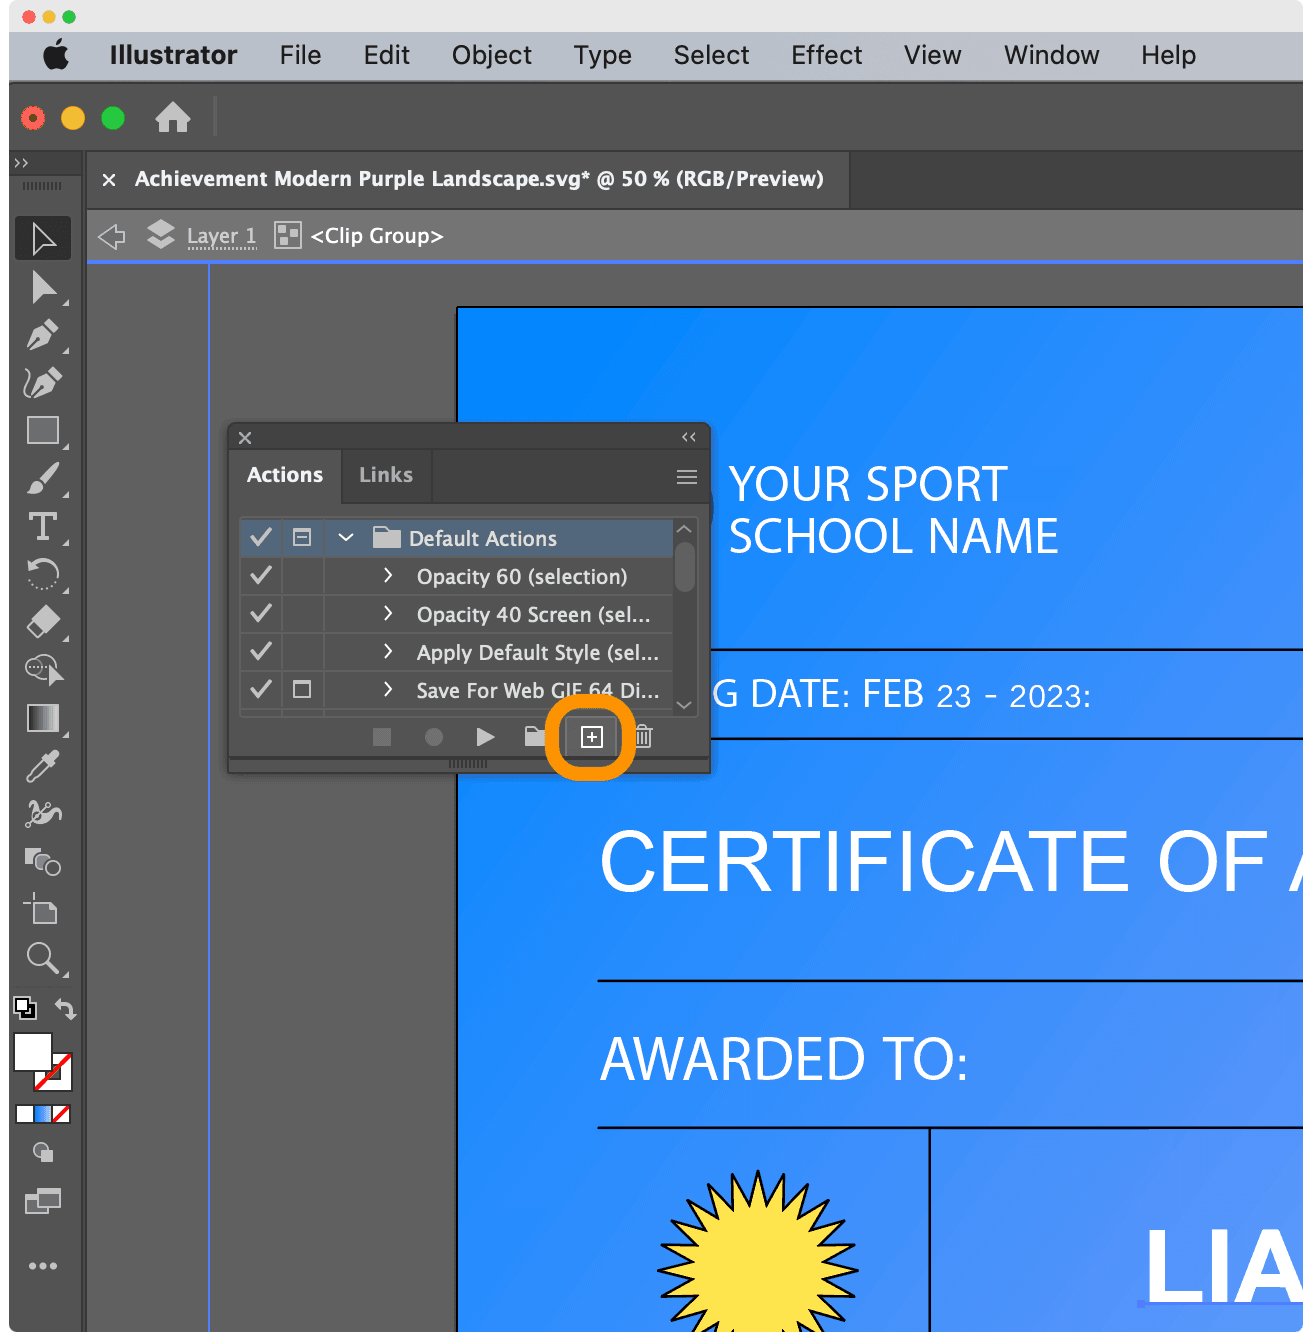
Click the plus icon to create a new action. You must now be careful – Illustrator will remember all your next steps to repeat it, so do not do anything unnecessary.
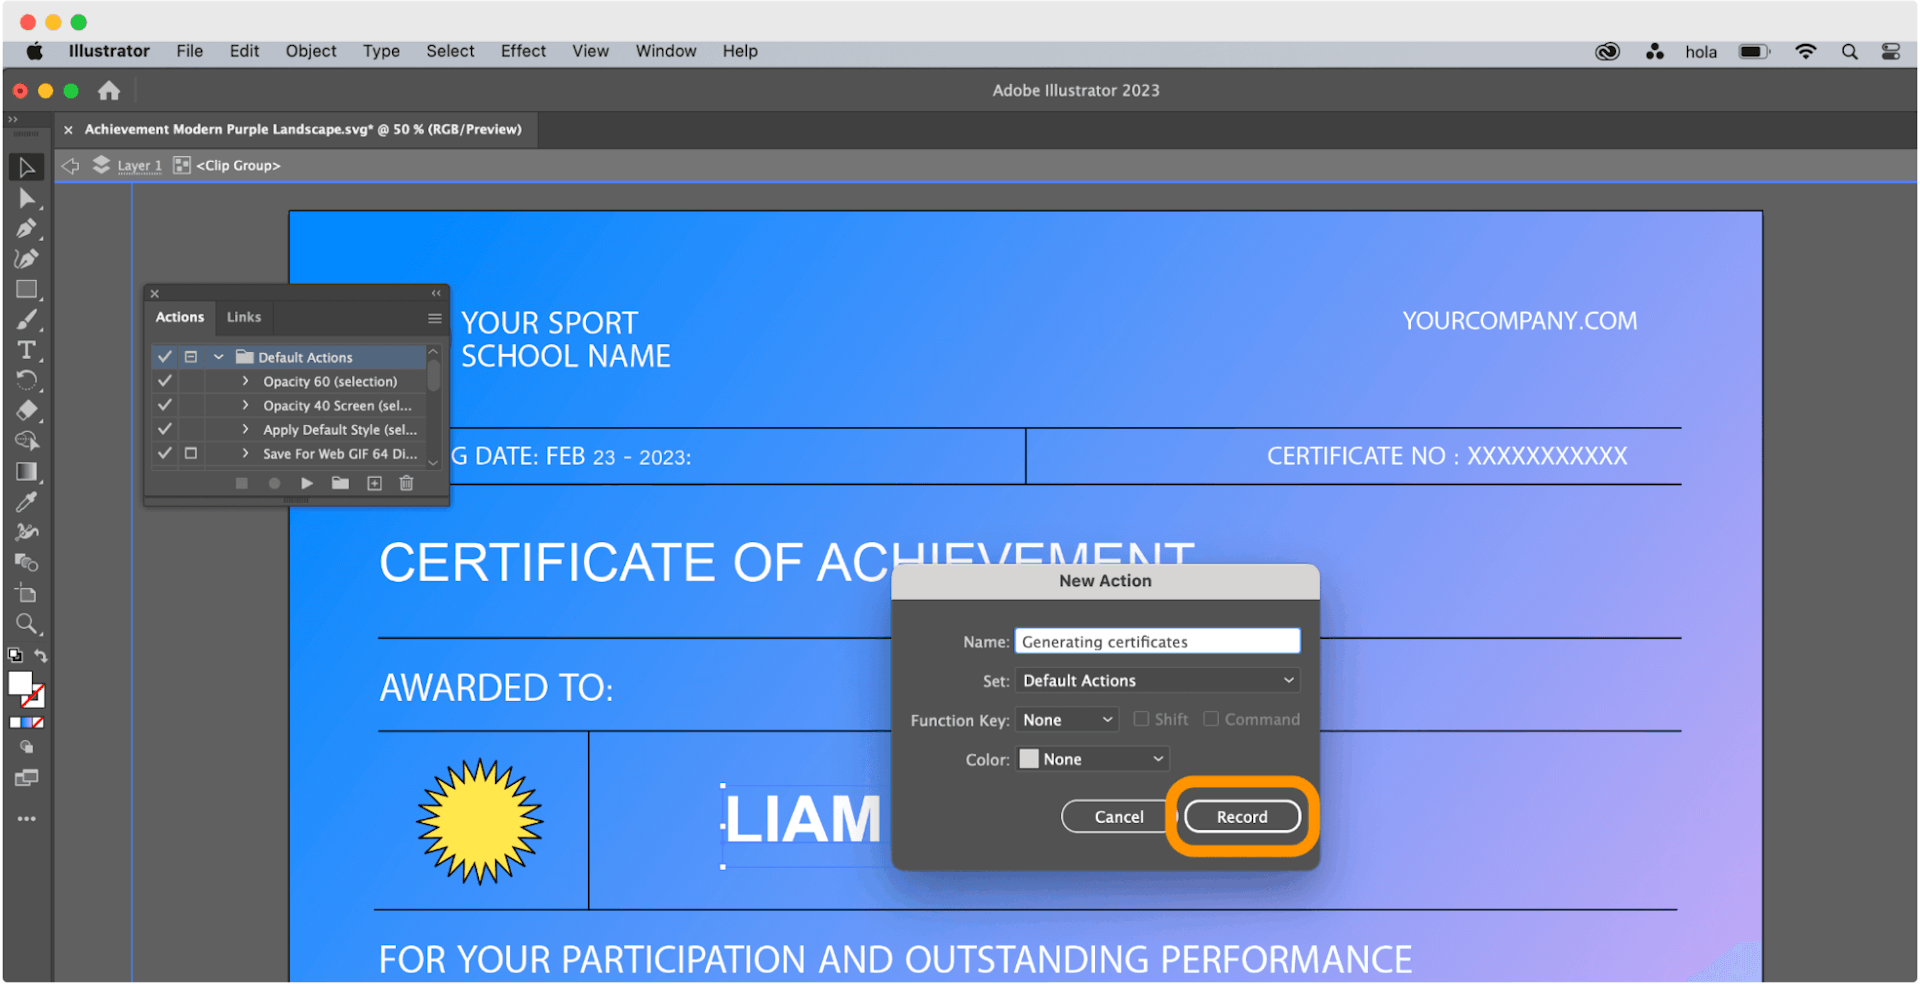
Name the action and click Record.
Here is the quick action you have to record: Go to File > Export > Export as. Choose your location, and then hit the stop recording button in the Actions panel.
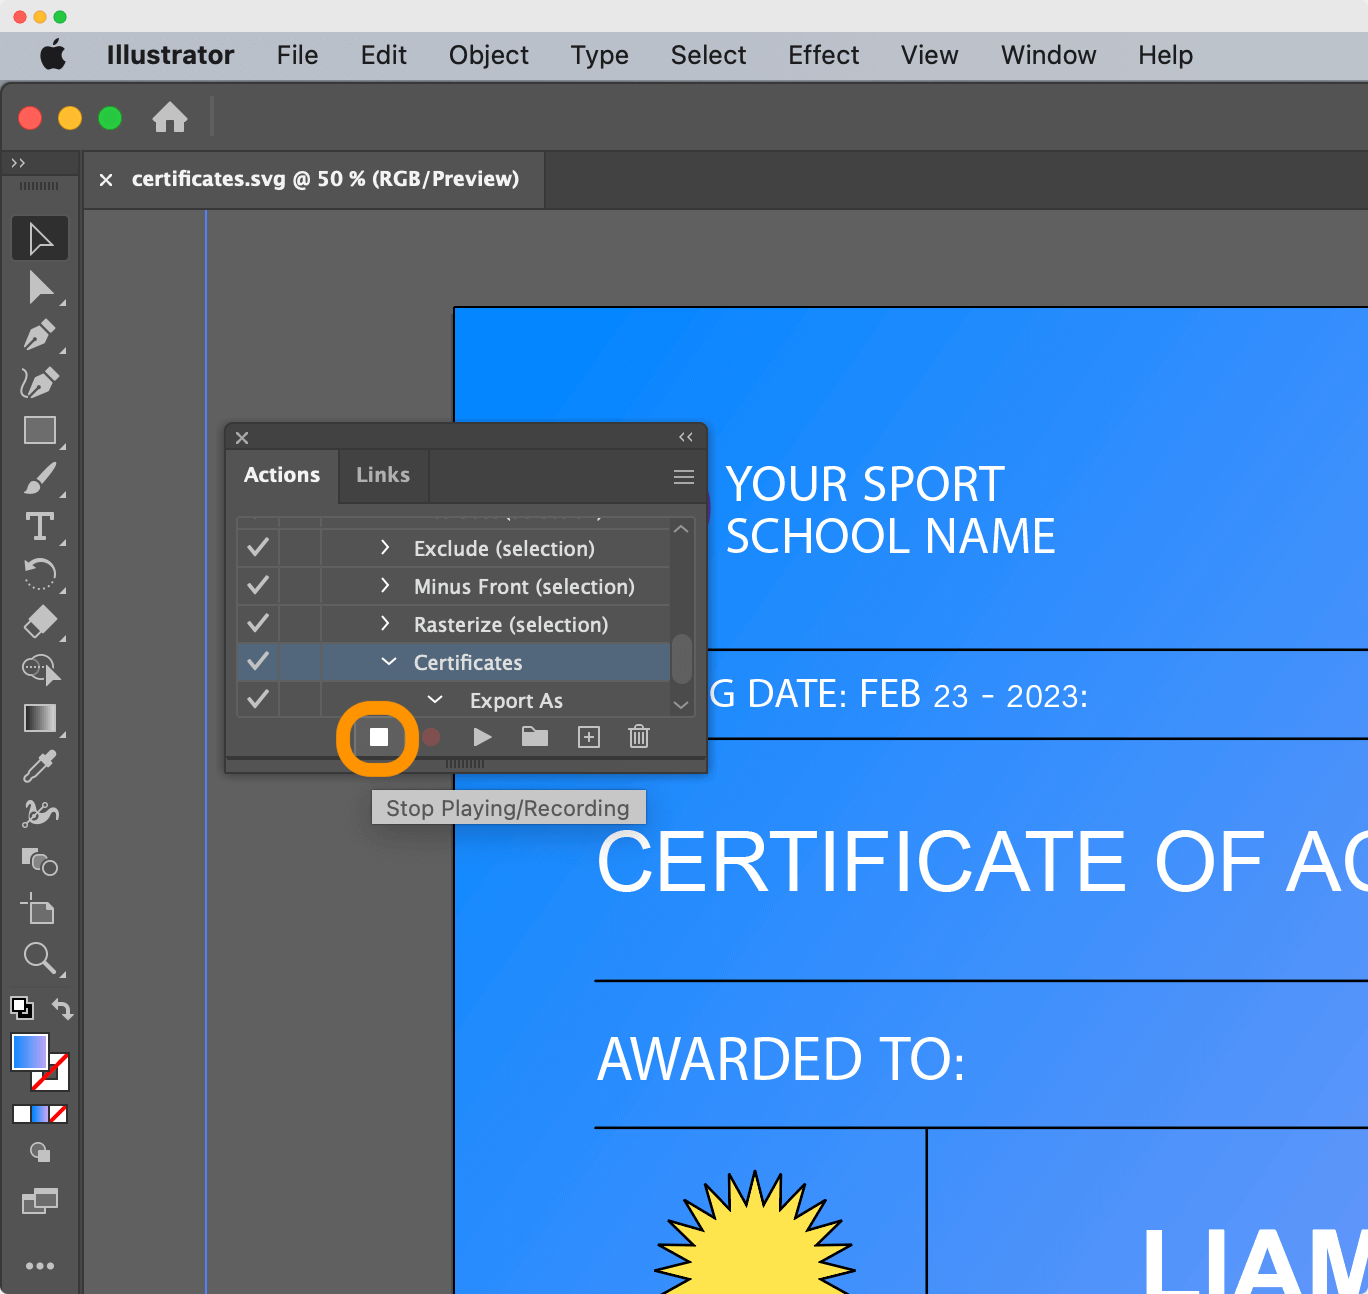
The action has been recorded, so you can start generating certificates in bulk now.
#6 Batch processing for the win
Batch is the additional option from the Actions panel menu that results in our main goal – all of your certificates will end up in a common file with changed names. No manual work is needed.
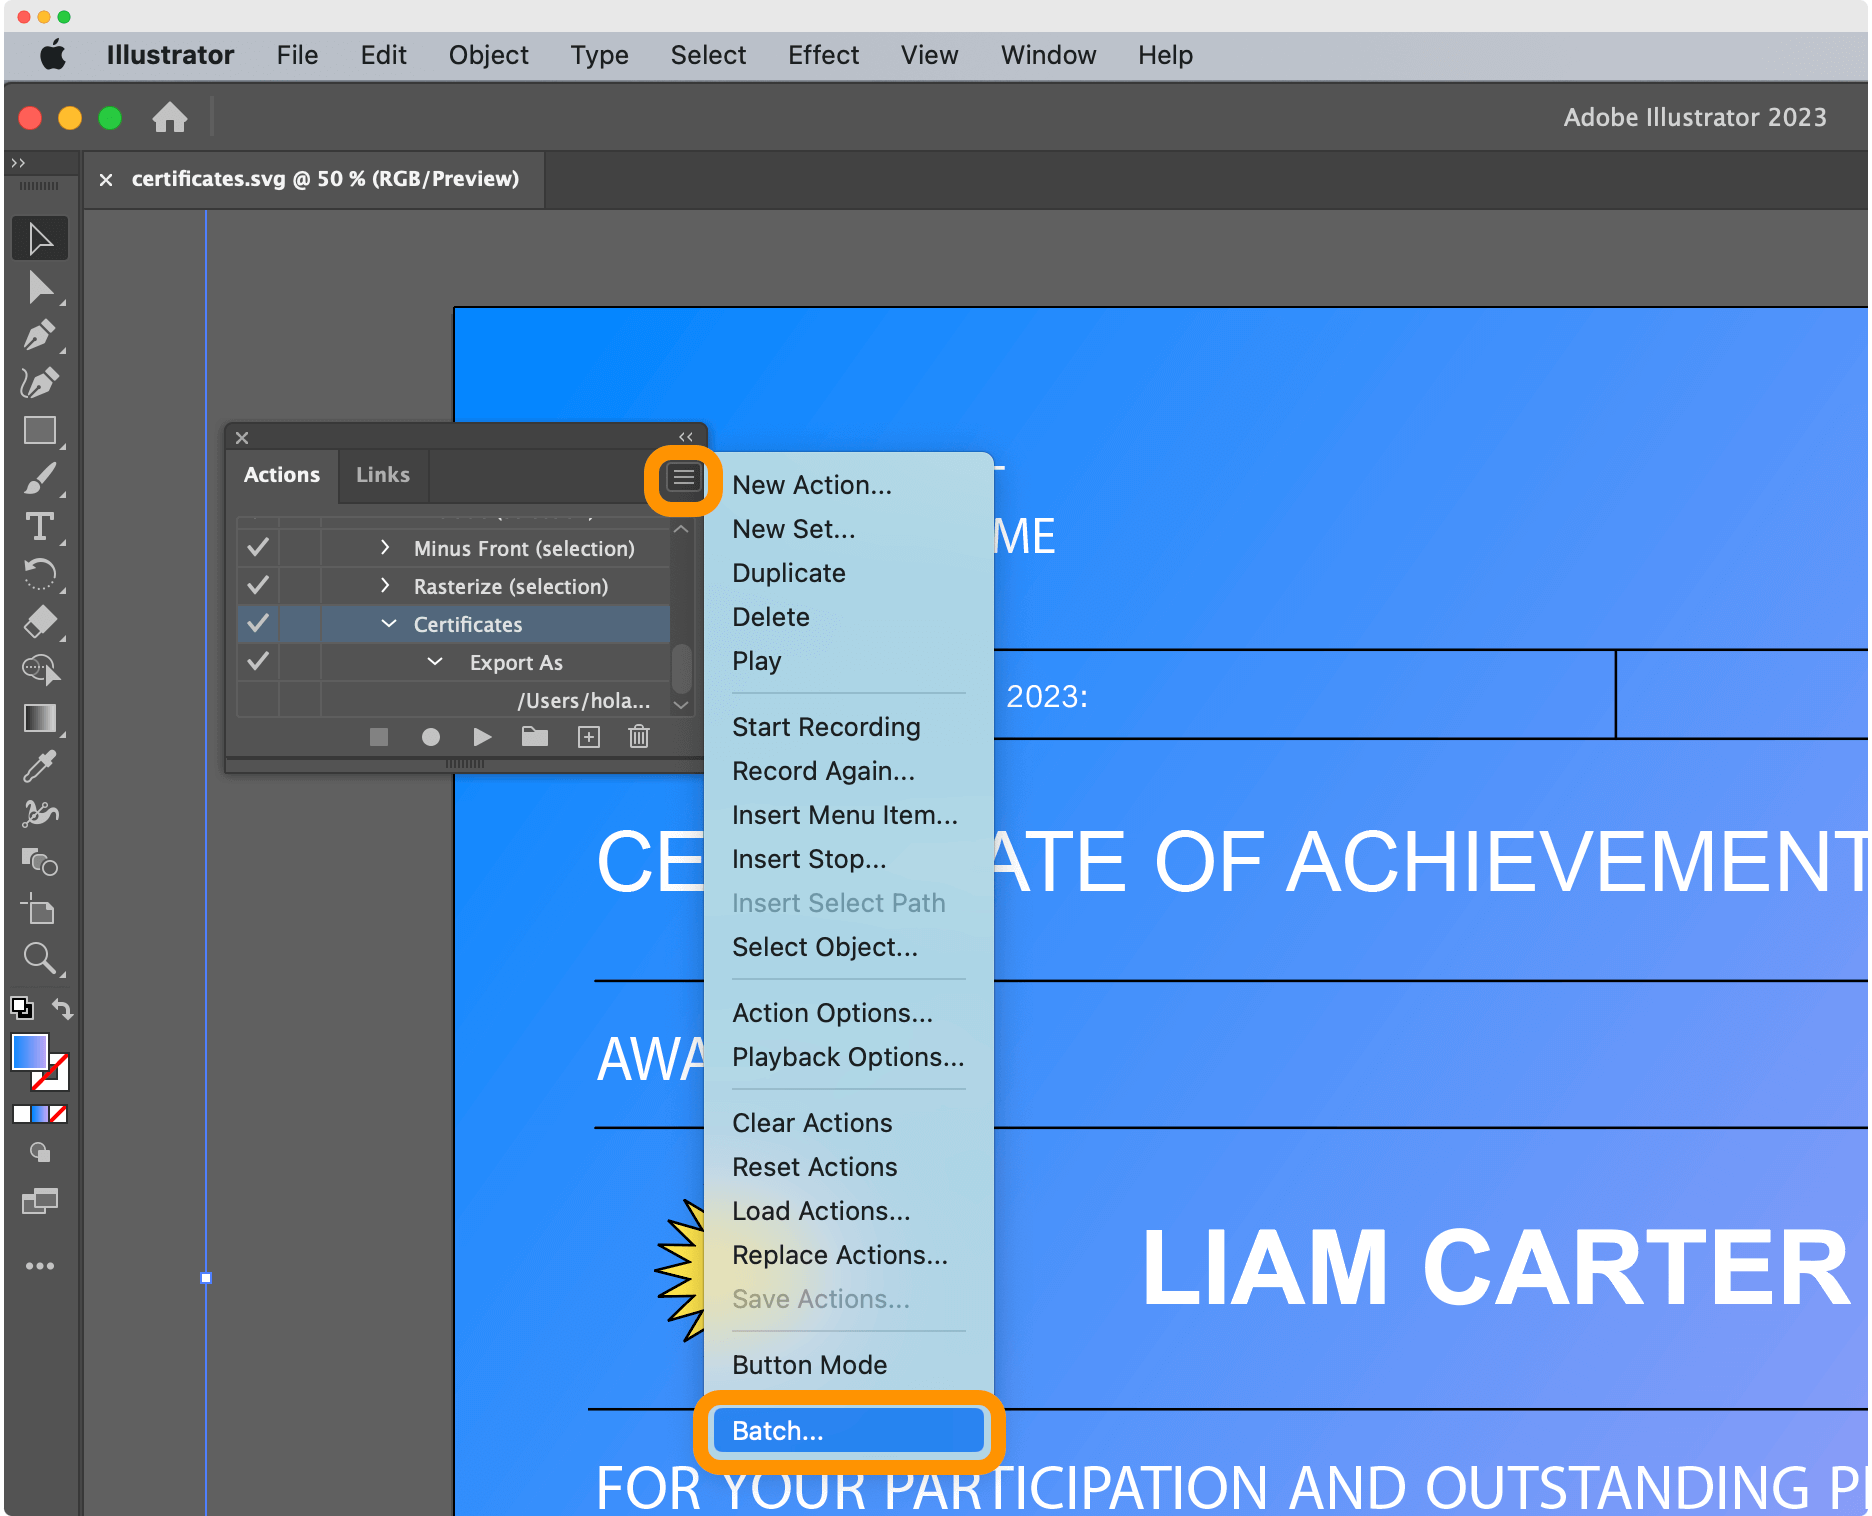
Choose "Batch" from the expand button in the Actions panel menu and pick the action you just created.
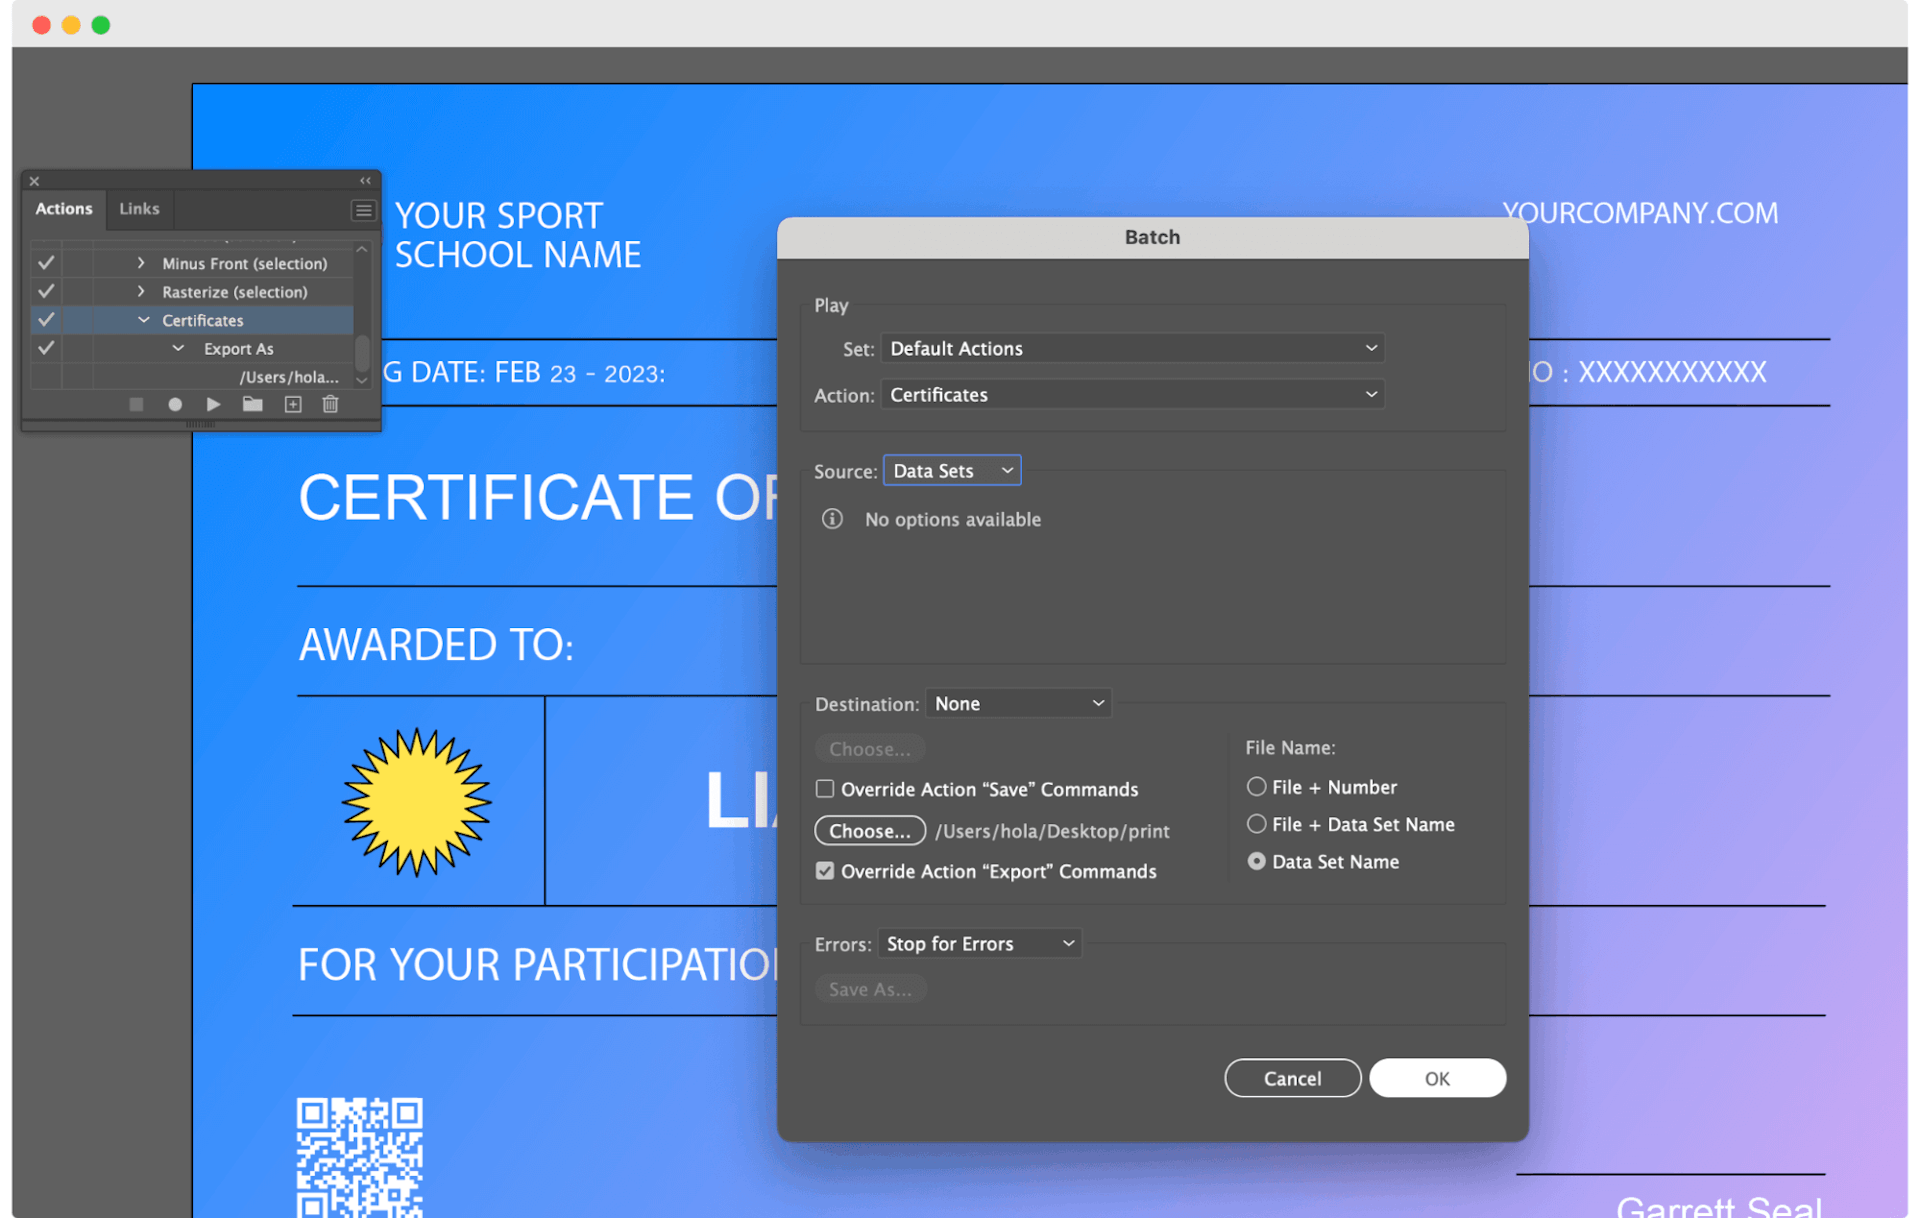
Set the source as Data Sets and tick "Override Action 'Export' Commands." Point it to where you want the certificates saved.
Click the OK button.
Illustrator will start churning out your certificates. Take a sip of your coffee and watch the magic happen. If you have many certificates to generate, it may take some time, but usually, it’s just a matter of seconds.
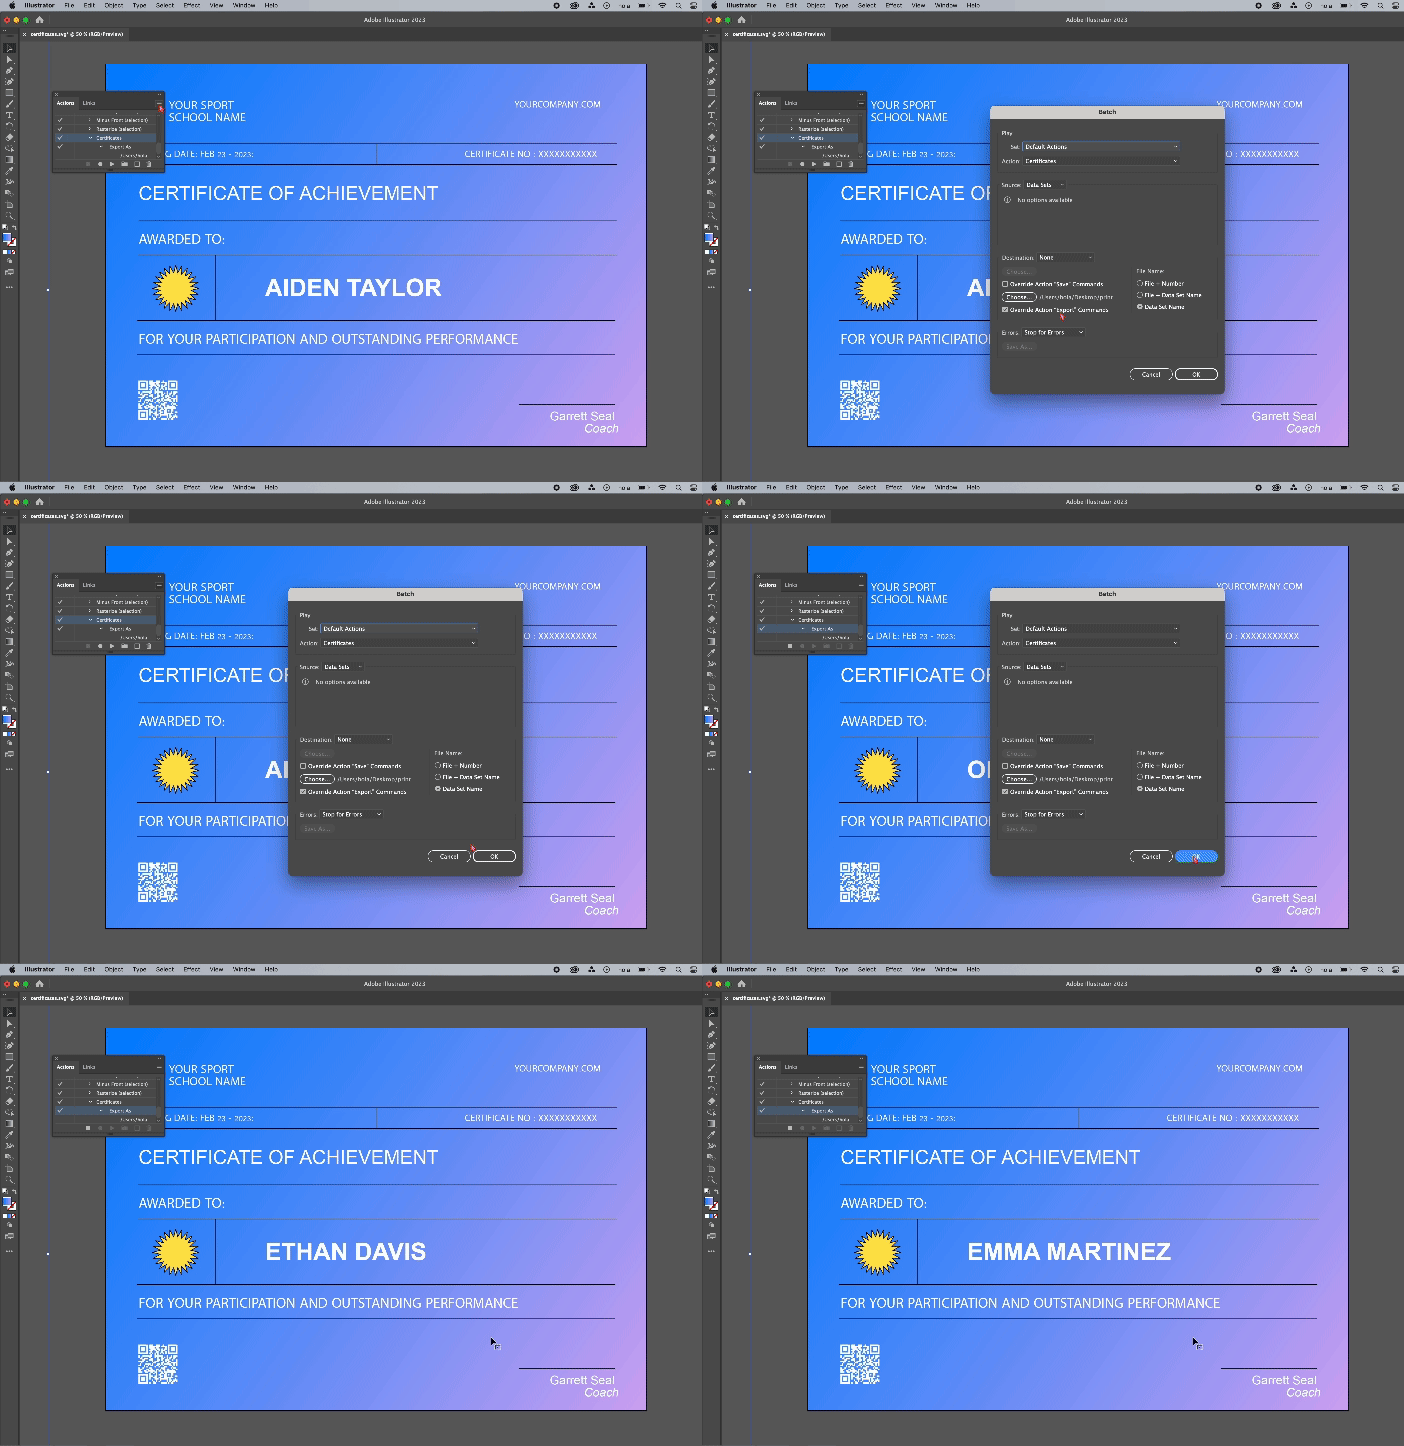
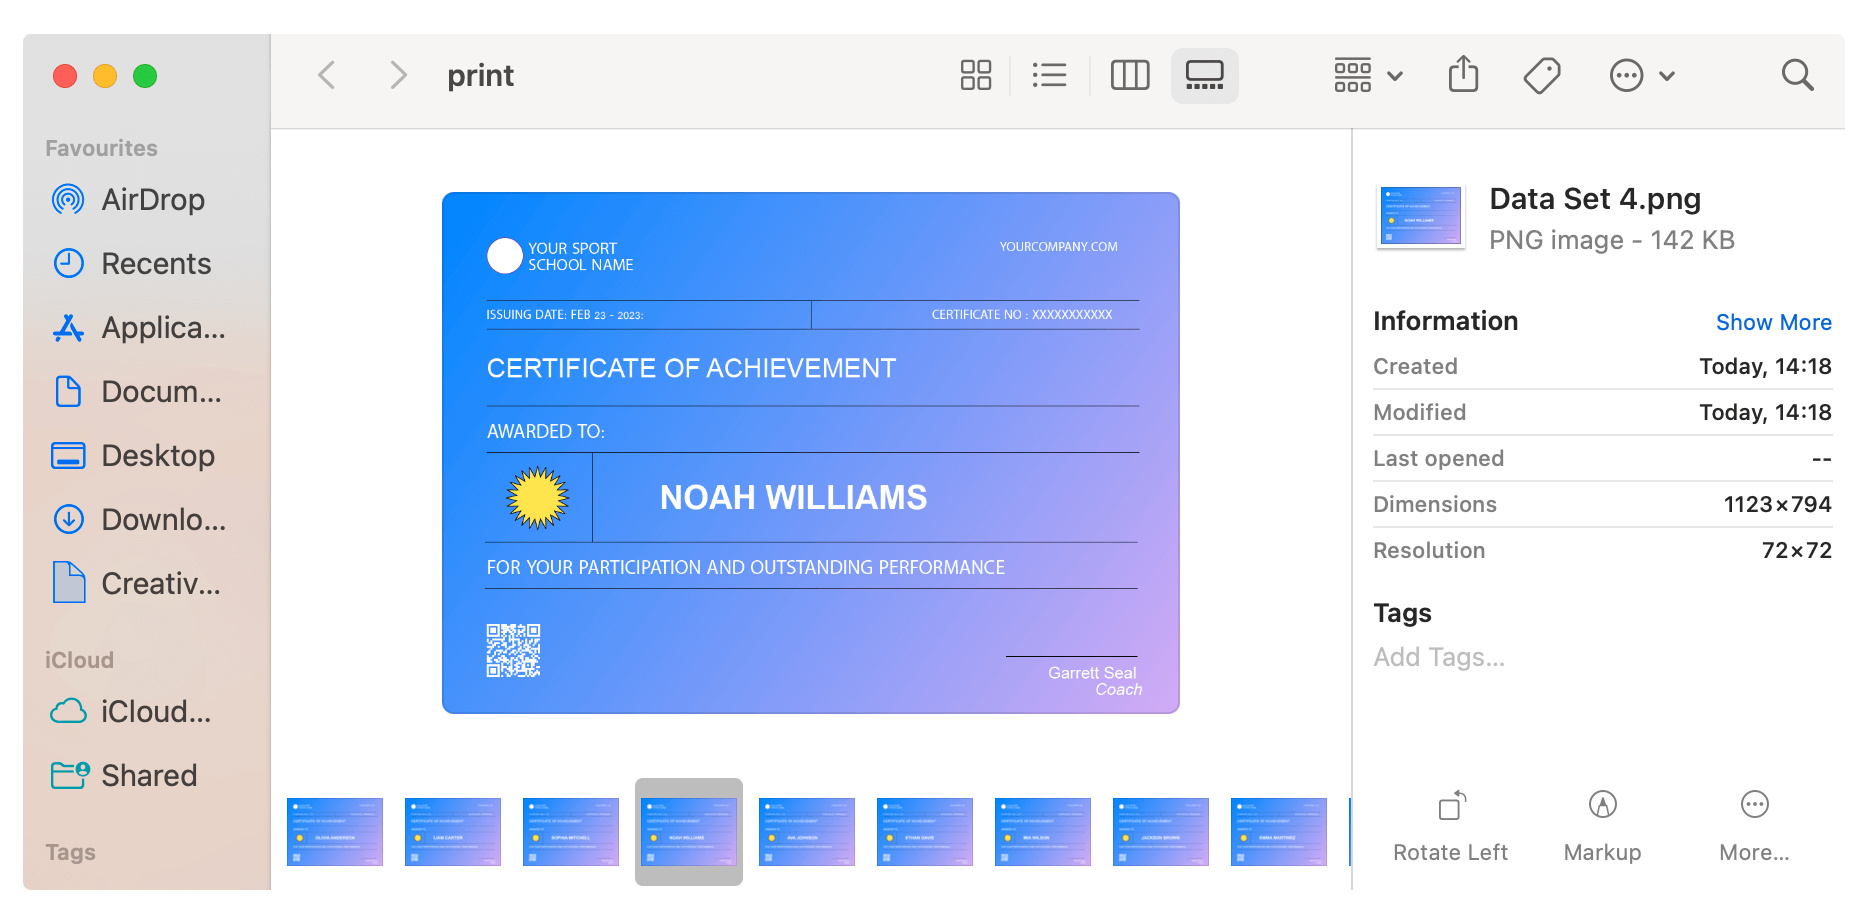
And voila! Now that you've automated the Illustrator certification process all your certificates should be in the file you selected for export.
Pro tip: Practice makes perfect. It might feel a bit overwhelming the first time, but once you get the hang of it, it's easy.
But it can be even easier! Would you like to know the cheat code? Those who enjoy a simple 2-level certification system should give Certifier Certificate Maker a try. It generates certificates with a few clicks and sends them out automatically. Sign up for free.
Bonus: Export as PDF file
If you want to save the certificates as PDF file formats (recommended especially for printing), you have to slightly change the recorded action.
Create a new action.
Go to File > Save As, choose PDF, and save. Then, repeat the batching process.
Let's talk about that CSV file format
When creating certificates in Illustrator, one of the most common errors is an incomplete file with recipients’ data (or not prepared at all). So before you import the data to Illustrator, make sure that the file in CSV (Comma-Separated Values) is ready to roll. Here's a checklist of helpful reminders.
Make the spreadsheet as straightforward as possible
Overloading your CSV with tons of data that you won't even use in your certificates can confuse Illustrator and may lead to unpredictable results. If you have fields like sneaky emails, phone numbers, or the participant's favorite ice cream flavor (unless you're awarding them for their impeccable taste in desserts) – it’s best to remove them from the CSV format. Too much irrelevant data and Illustrator might just have a tiny meltdown. Keep it clean and concise.
Name columns correctly
This step is crucial. Illustrator won’t know which data corresponds to which part of your certificate unless you spell it out. Every column in your CSV must have a clear, descriptive name (also known as a data field name). Let’s say you want the recipient's name on the certificate. Label that column "Recipient_Name" or just "Name." Avoid generic or ambiguous headers in filled columns like "Data1" or "ColumnA." We want to keep things clear and straightforward. Don't leave any blank columns as well.
Mind your formatting
Check that your data is consistently formatted throughout. If you're using dates, decide on a format (like MM-DD-YYYY or DD-MM-YYYY) and stick to it. Inconsistent data formatting can trip up Illustrator and give you results that are, well – far from expected.
Always double-check
Spend a few minutes reviewing your CSV before importing it into Illustrator. Check for any missing values, spelling errors, or inconsistencies. Remember, Illustrator will reproduce exactly what’s in the file. If there's a typo in the CSV, there will be a typo in the certificate.
Wrap up Adobe's certificate generation
With this guide, you'll know the fastest way to make certificates in Illustrator. While Adobe Illustrator CC offers a good experience, if speed is your top game, don't forget that Certifier is still the lightning-fast champ in this arena.
Feel free to share this guide with your friends or anyone stuck manually making hundreds of certificates. Enjoy!

Sergey Butko
Tech entrepreneur. Forbes 30 Under 30 Europe. At Certifier, Sergey’s work focused on revolutionizing the way credentials, certificates, and badges are issued and managed through cutting-edge APIs and software infrastructure.
Sergey Butko
Tech entrepreneur. Forbes 30 Under 30 Europe. At Certifier, Sergey’s work focused on revolutionizing the way credentials, certificates, and badges are issued and managed through cutting-edge APIs and software infrastructure.
Share this article