Trusted by:
How to Make a Certificate in Microsoft Word?
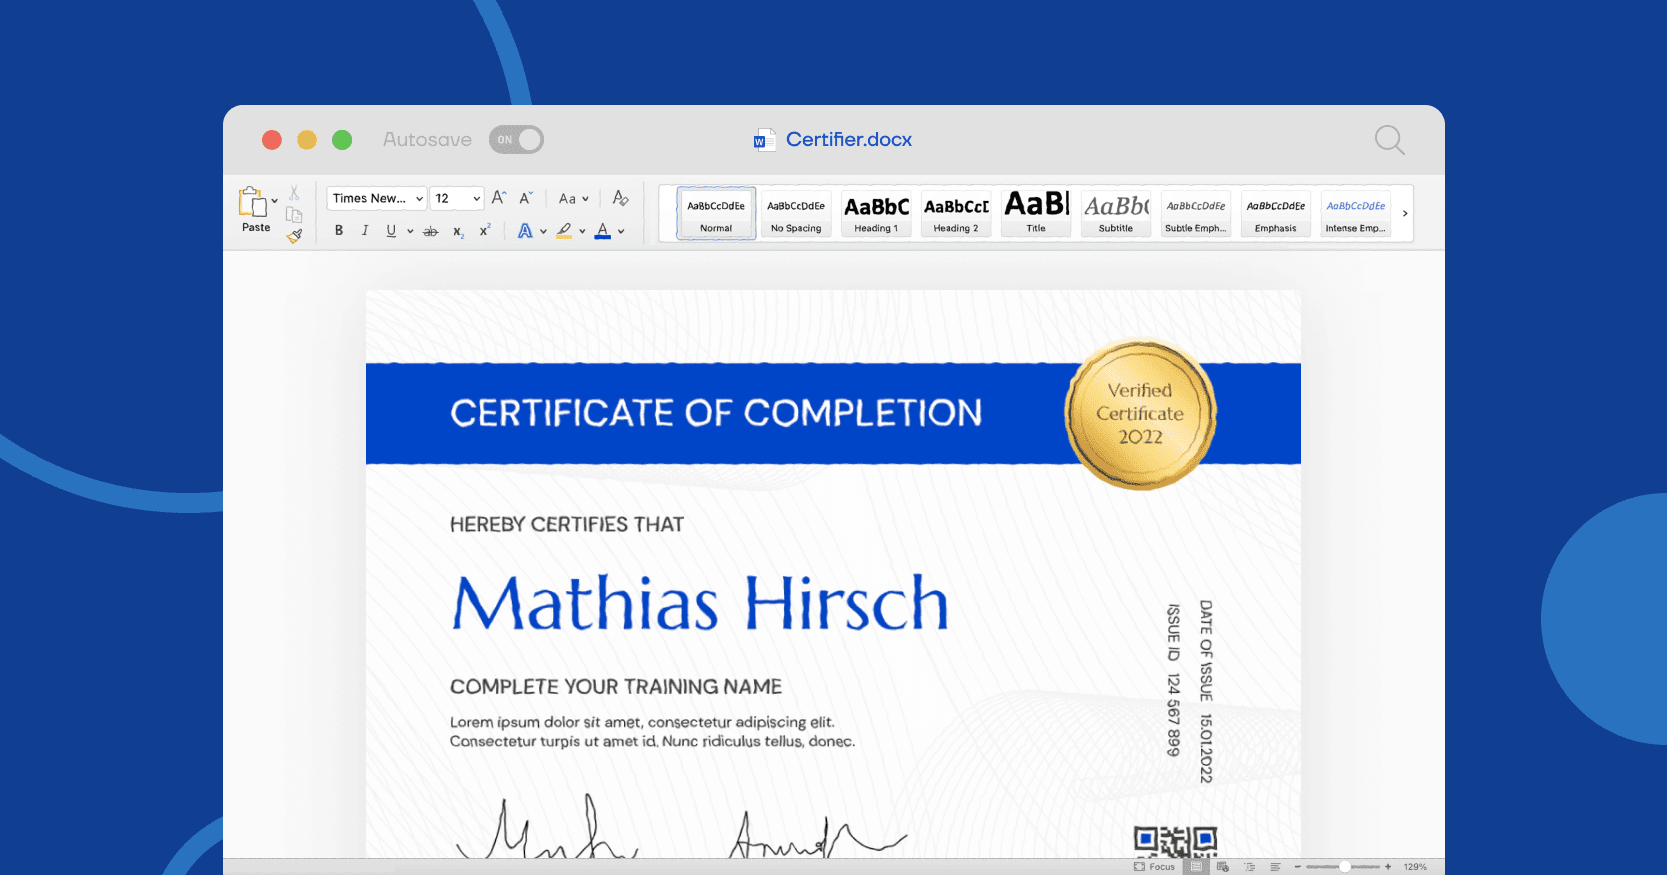
Creating certificates Word will no longer have any secrets from you. Read our article that explains how to create certificates in Microsoft Word. Two ways + bonus!
AuthorSergey Butko
Updated: April 15, 2024
15 min read
Author
Sergey Butko
Updated: April 15, 2024
15 min read
Trusted by:
There are lots of questions on how to make certificate in Microsoft Word. But we need to clear your doubts – Word is not the best option for creating a certificate, and there are much better and easier ways to take care of the certification process.
Even though Microsoft Word isn't really cut out for making professional certificates, our guide will show you how to find some free templates and generate a bunch of PDF certificates with unique names, all in under 20 minutes. Easy, right?
Keep following our step-by-step guide to learn how to make your own certificates for free using MS Word!
What if you could make certificates in less than 5 minutes?
Have you ever tried making a certificate in Word? If so, you know it can be quite a slog. Sure, figuring out how to make a certificate in Word offers a basic level of customization, but it's hardly efficient. You tweak, you adjust, you wrestle with formatting – only to end up spending more time than you anticipated. Join Certifier, a streamlined solution that revolutionizes this process.
With Certifier, you don't need to worry about the complexities of how to create a certificate in Word. It's designed specifically for quick and easy certificate creation. Whether you're handling one or hundreds, Certifier ensures that your certificates are ready to send in under 5 minutes.
#1 Find Microsoft Word certificate design
How to design a certificate in Word? Open a new Word document. First, you need to find a suitable certificate design that fits your needs.
You can do that both ways:
Go to File > New from the template. It leads you to the library of Word certificate designs. Look for the search bar at the top right corner. Type in “certificate” to find relevant results. Choose the design you’re interested in and wait until you are taken to the project.
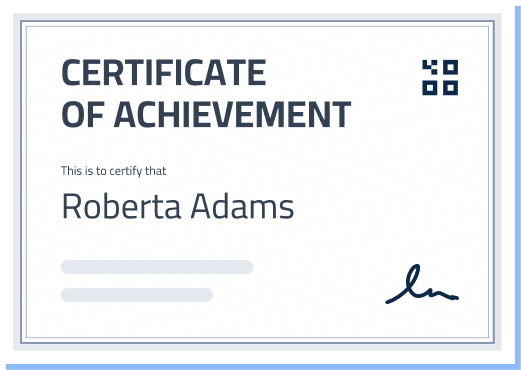
Find more advanced certificate designs in Certifier certificate library. They all contain professional certificate elements like signatures, QR codes, borders, and badges. Certifier has a bunch of MS Word templates that can be used in Figma, Google Slides, and, of course – Microsoft Word.
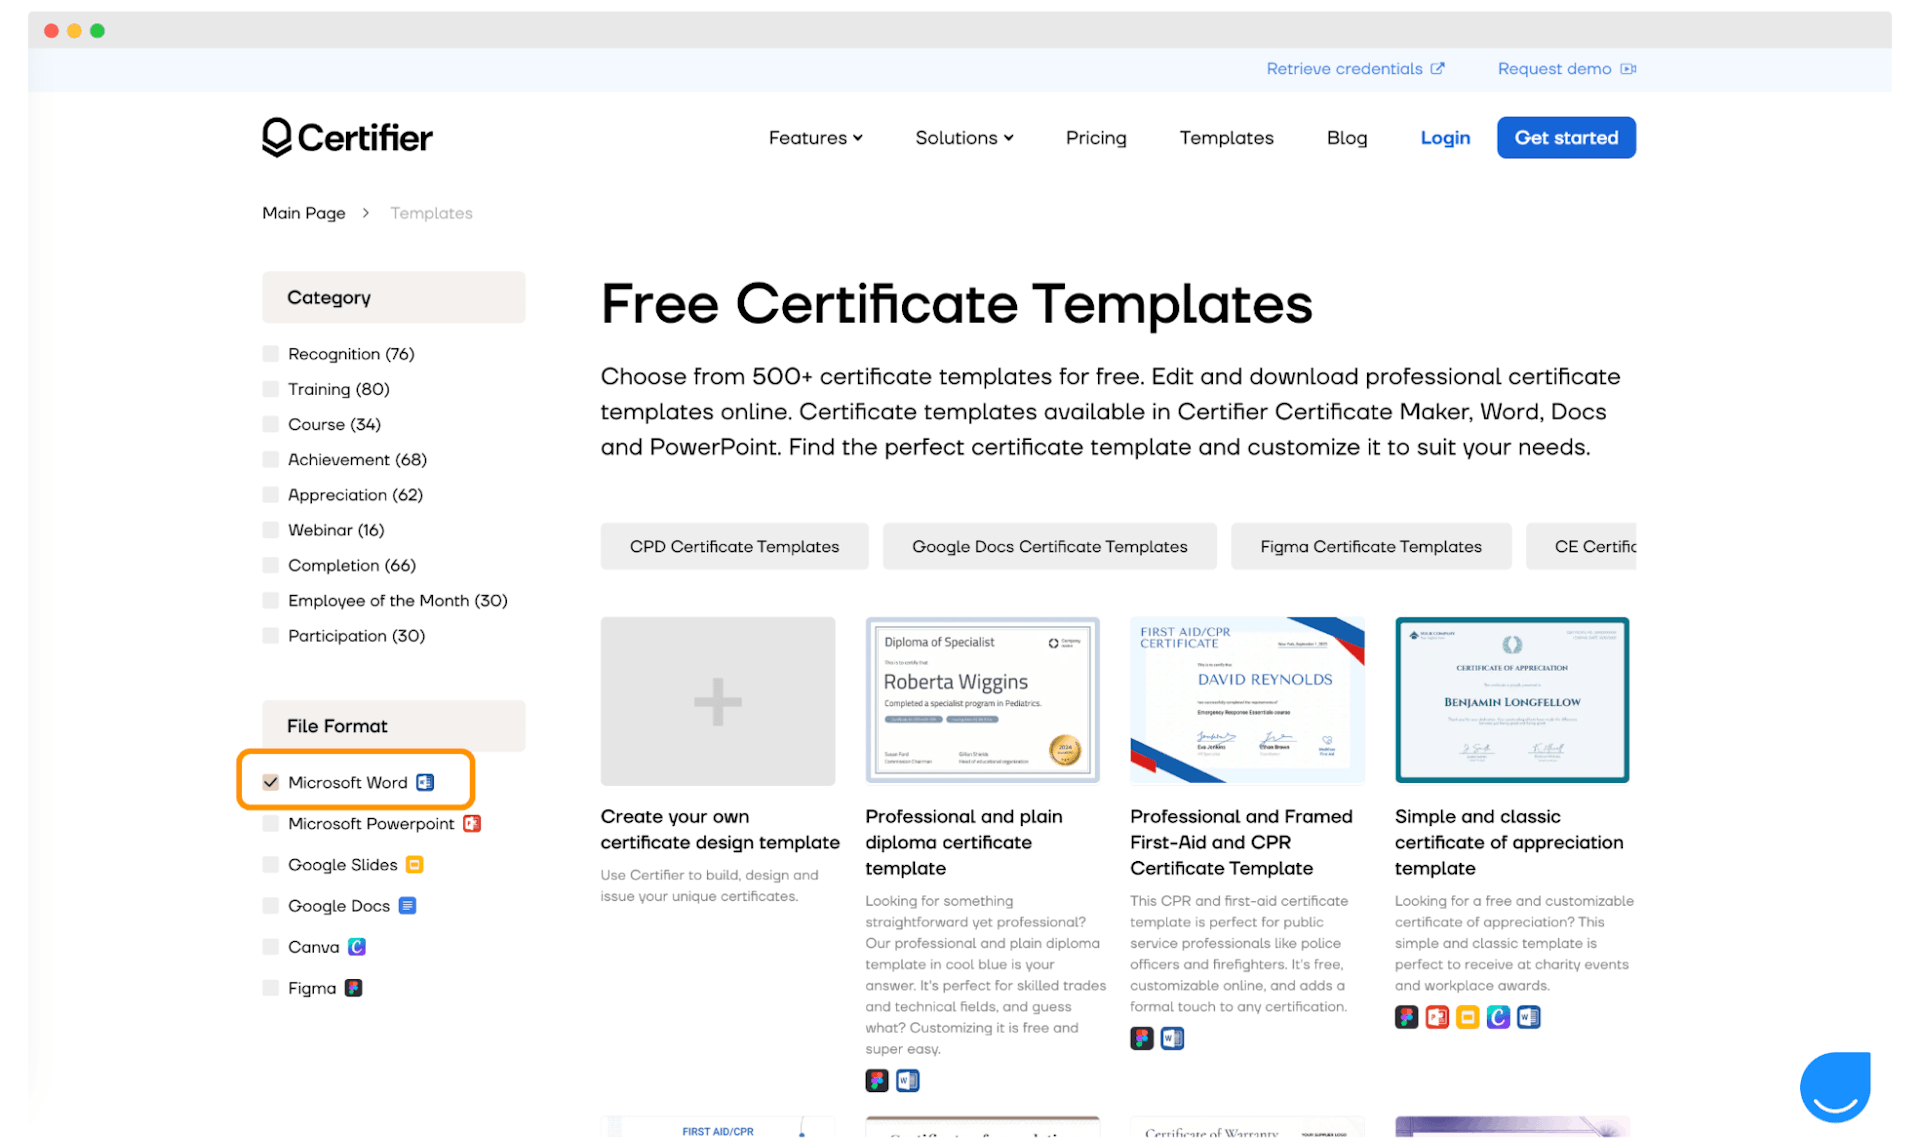
Choose the design you’re interested in. All premium ones that have a Microsoft Word logo next to them can be used. Click the Microsoft Word icon, provide your email address, and download it to your desktop. Double-click the document to open it in Microsoft Word.
Please note: The Certifier file with MS Word certificates contains fonts, landscape and portrait versions of the design. Save the fonts first (see the instructions in the video), and then open the chosen certificate as a document in Word.
Some troubles? Follow along with our YouTube video tutorial:
#2 Customize the certificate design
First, check the size of a certificate in Word. The Certifier Word certifivates go with the default A4 size, but check if everything is as it should be. Go to File > Page Setup and see the details there.
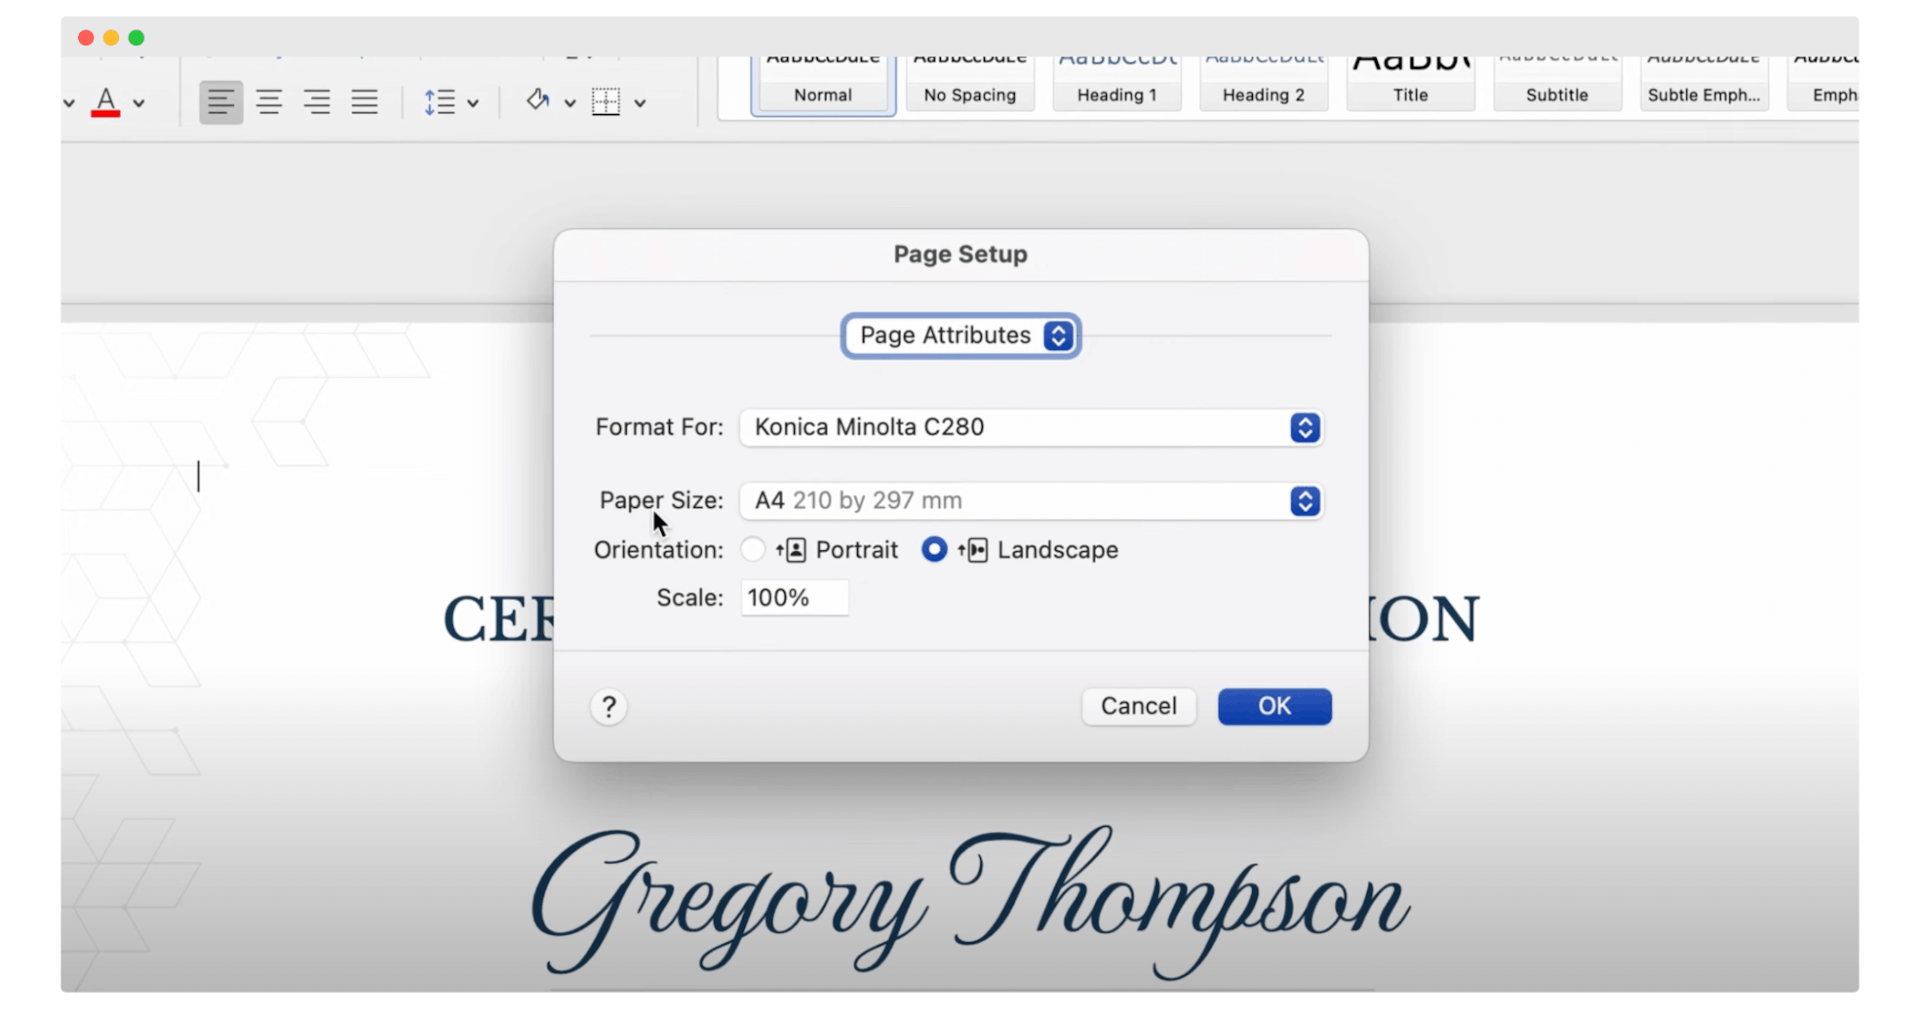
Now, it's a matter of adding elements that will shape the design. It’s all about adjusting the certificate Word to your needs. For example – if you want to build professional certificates of achievement, choose cool colors, go for minimalism, and do not clutter the background. But if you’re looking for ways on how to make a gift certificate in Word, you can go wild and bet on a colorful background.
It is only up to you how much you change the pre-made certificate design. You can even make small modifications, just change what is necessary.
#3 Change recipient’s name
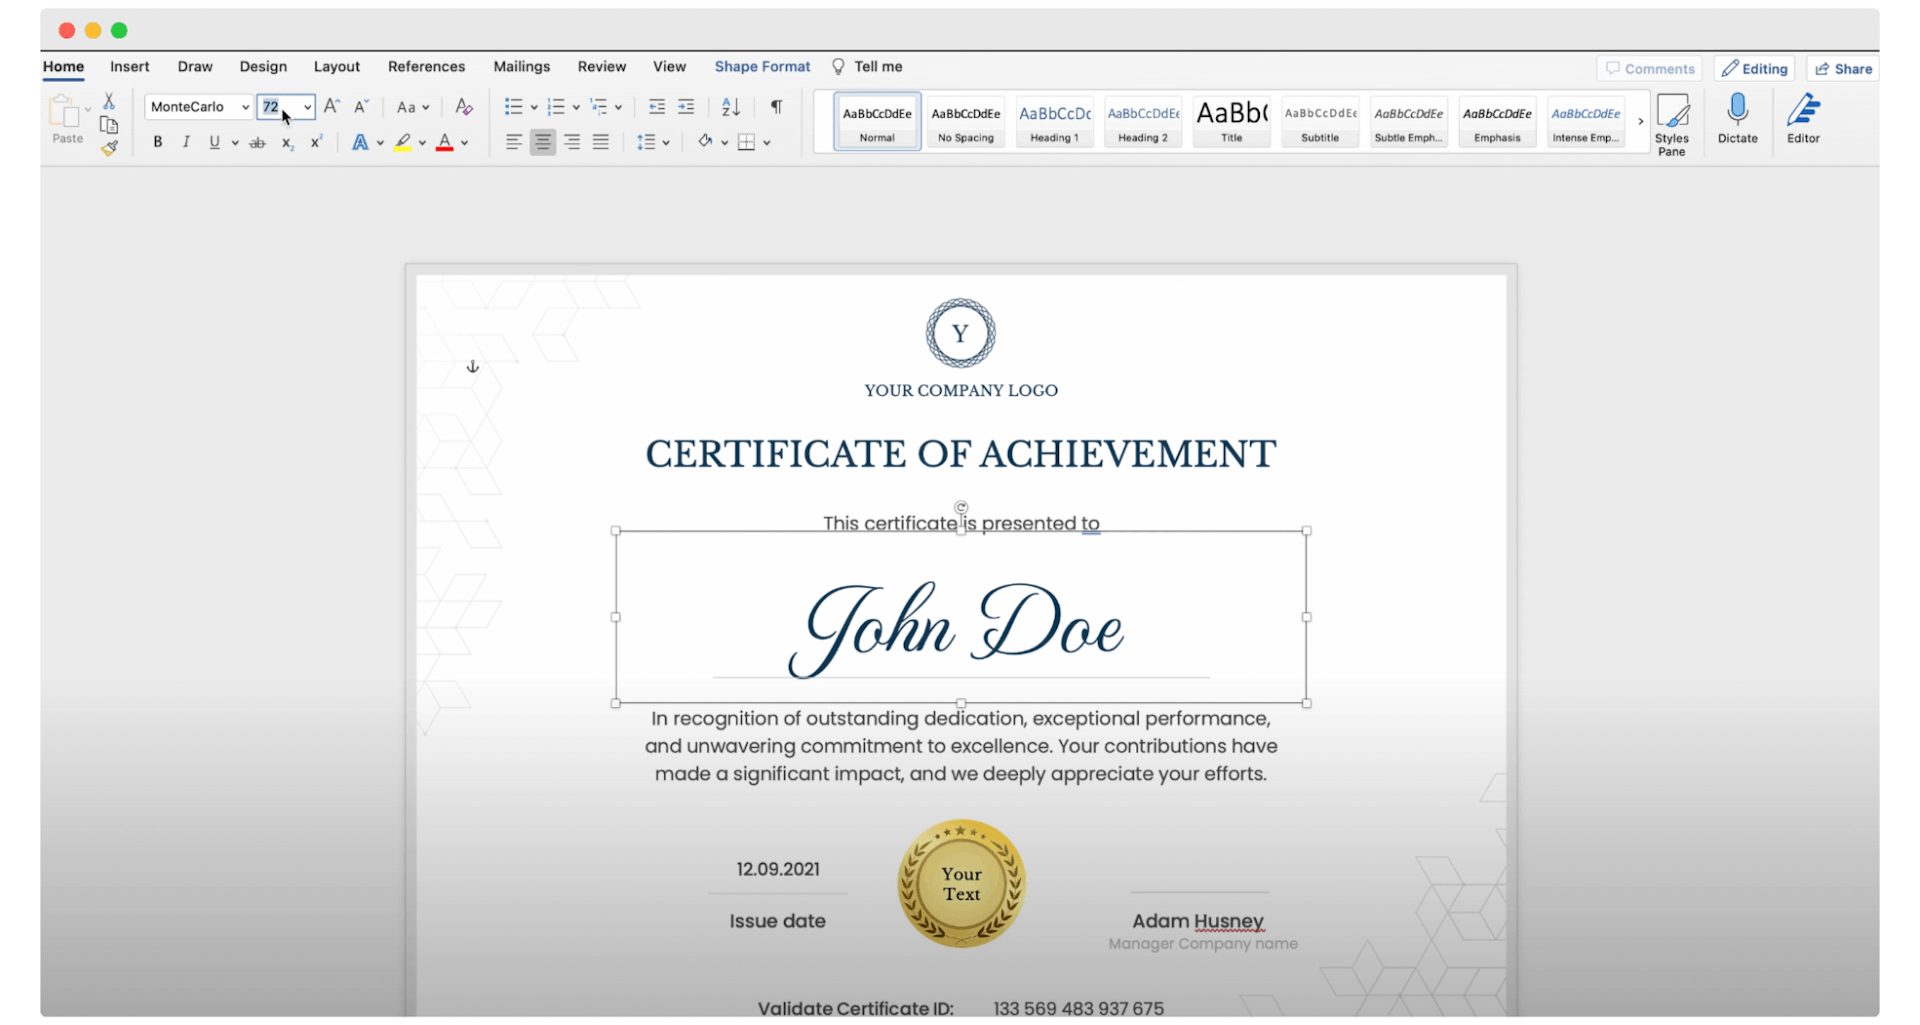
Now, it's time to update the text. In particular, the recipient's name, the reason for issuing the certificate, the date, and the issuing institution. You can use different fonts (but don't mix them too much. 2-3 should be enough), add bold, italics, etc. Combine colors and try different combinations of all elements. We use the default colors and fonts. The only details we’re going to change are the certificate title, the recipient’s name, date, certificate ID, and signatures. Just click on the element you want to adjust.
#4 Add your company’s logo
Last but not least – add the company’s logo to your Word certificate. Choose Insert > click on the picture, and choose “picture from file.”
Tip: The best way to upload the logo is in PNG because it's more flexible when adjusting to your certificate background and all the certificate elements.
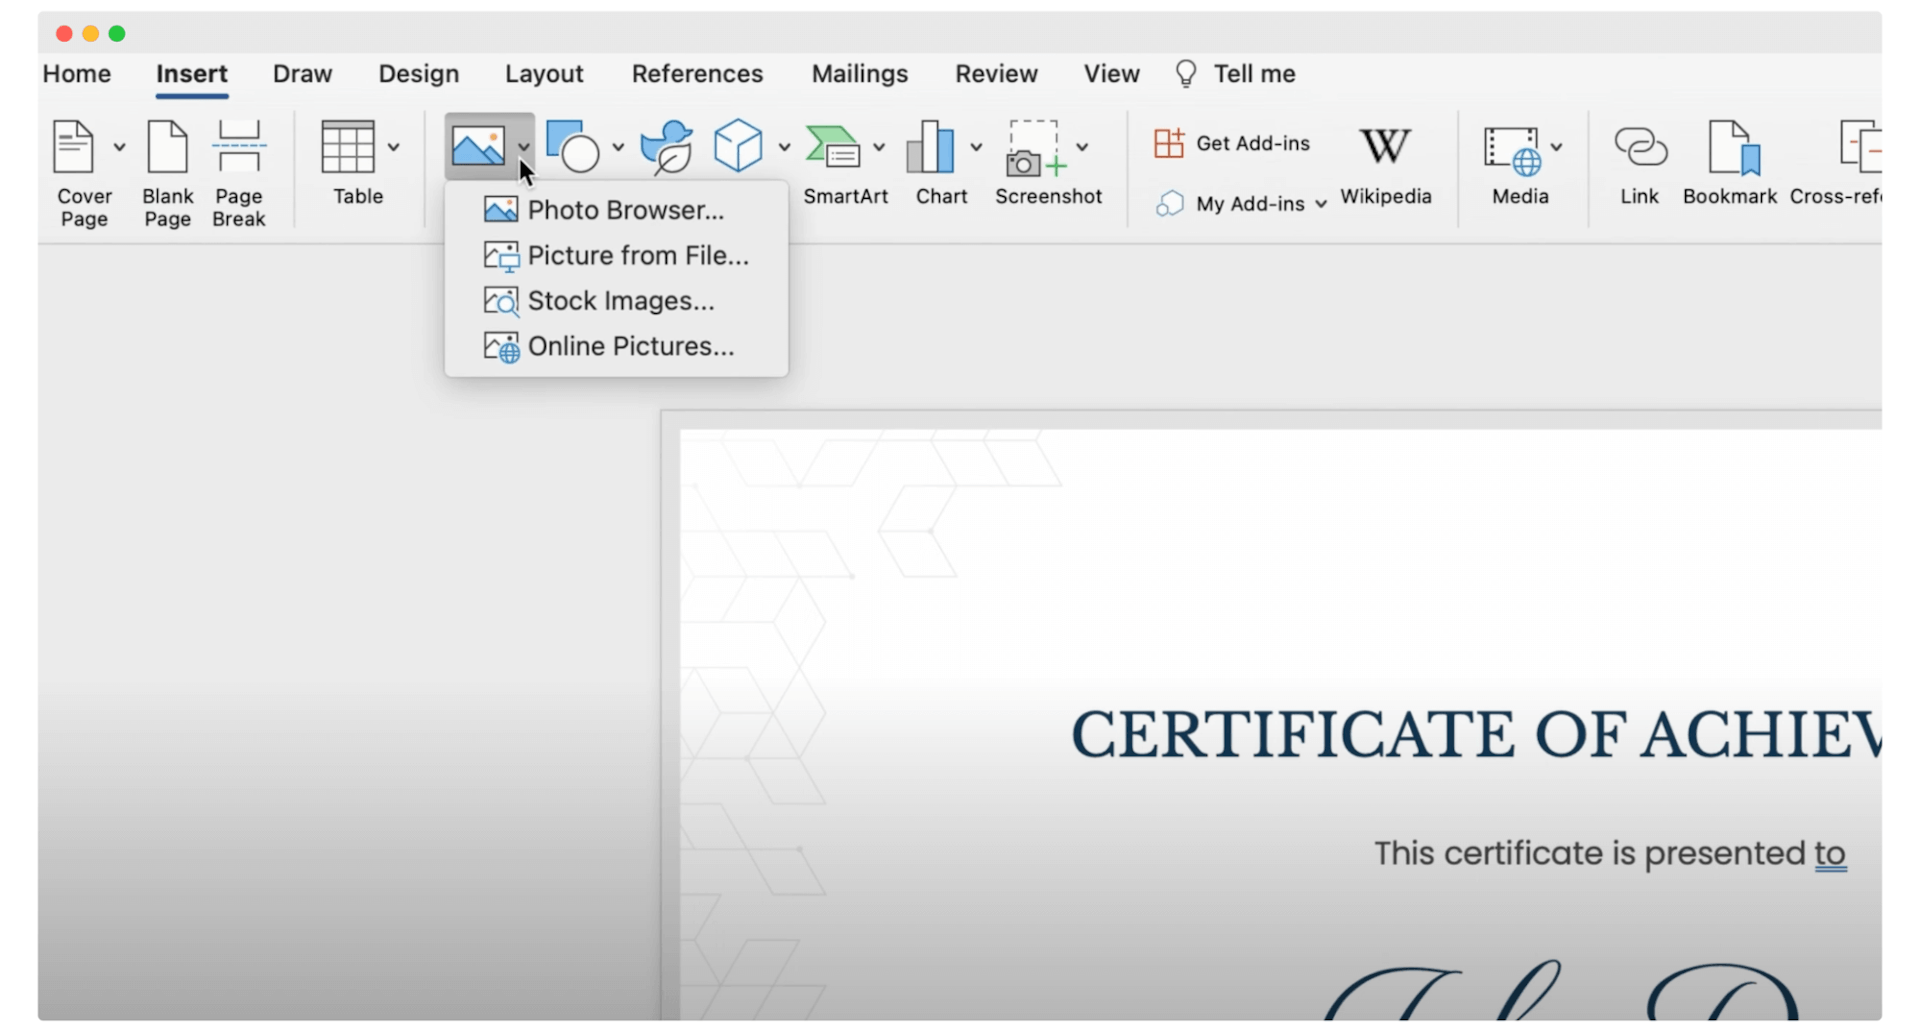
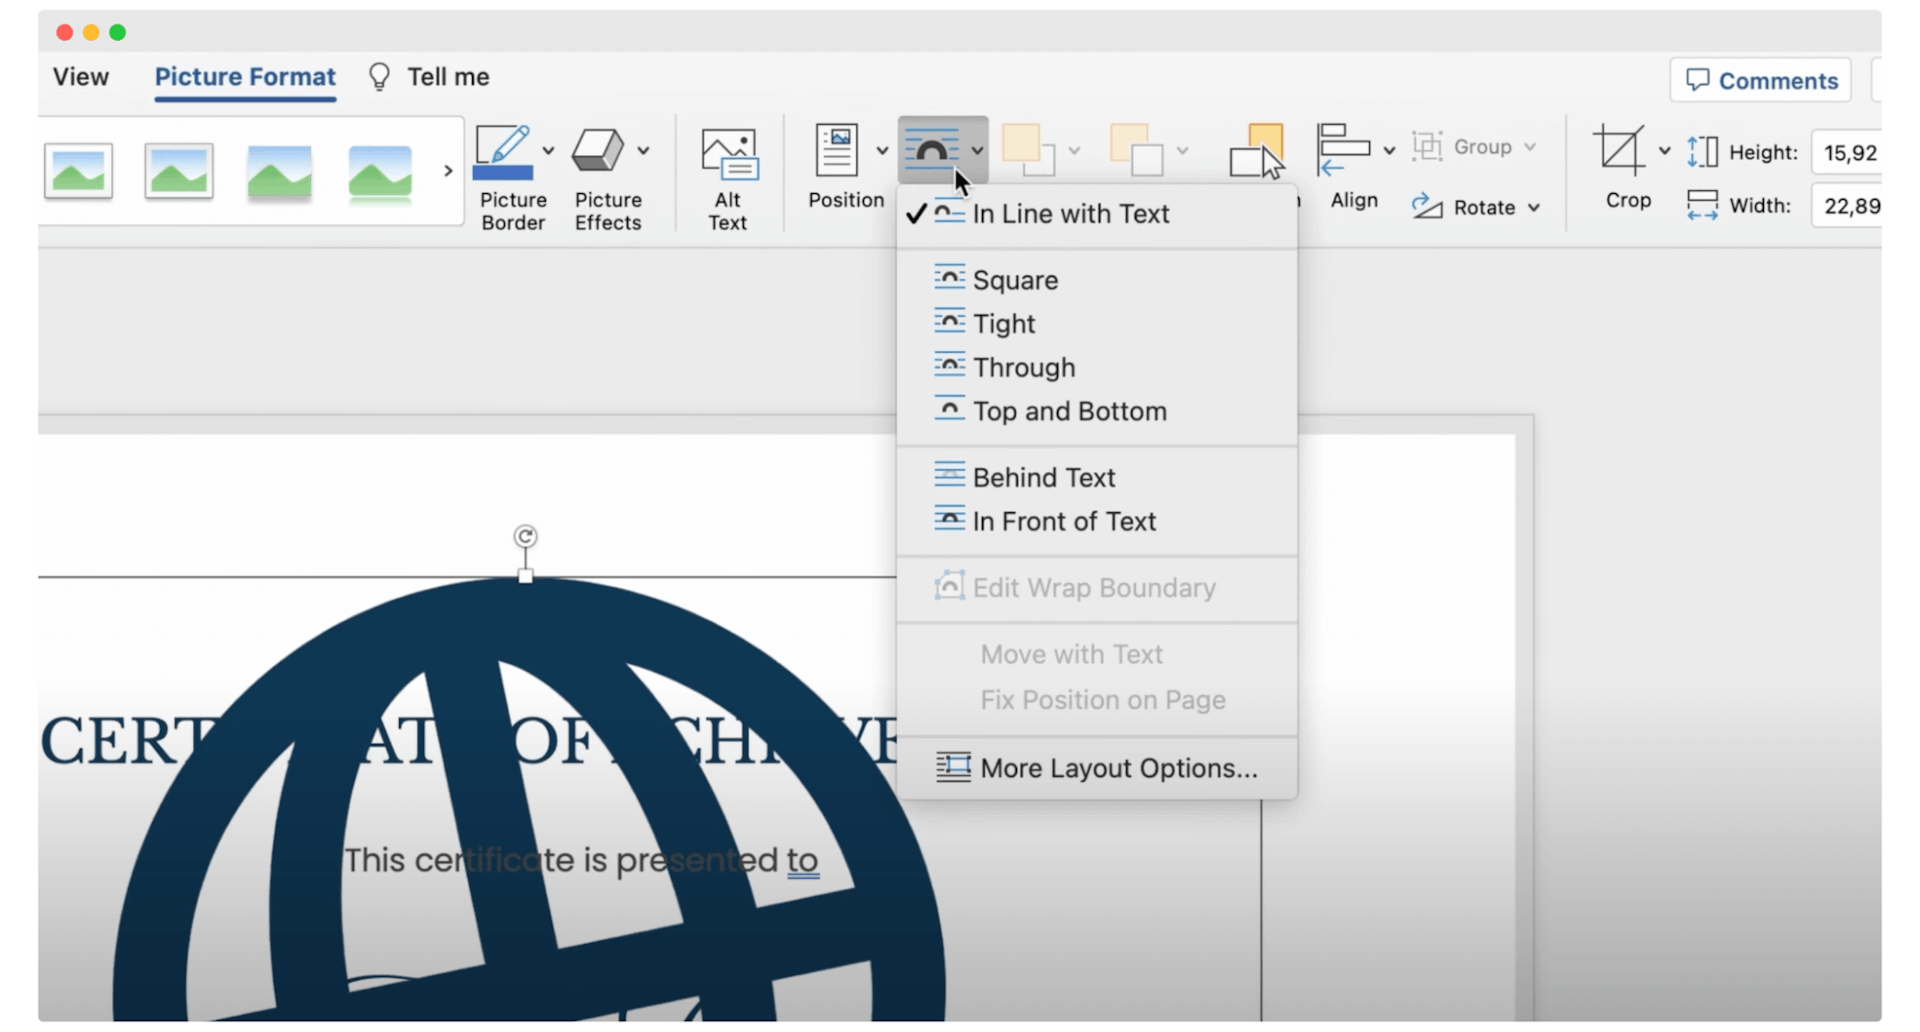
Before you start scaling your logo and changing its size, go to the Wrap Text and change the option to “In front of text.” Consequently, the logo won't affect the certificate layout or its elements.
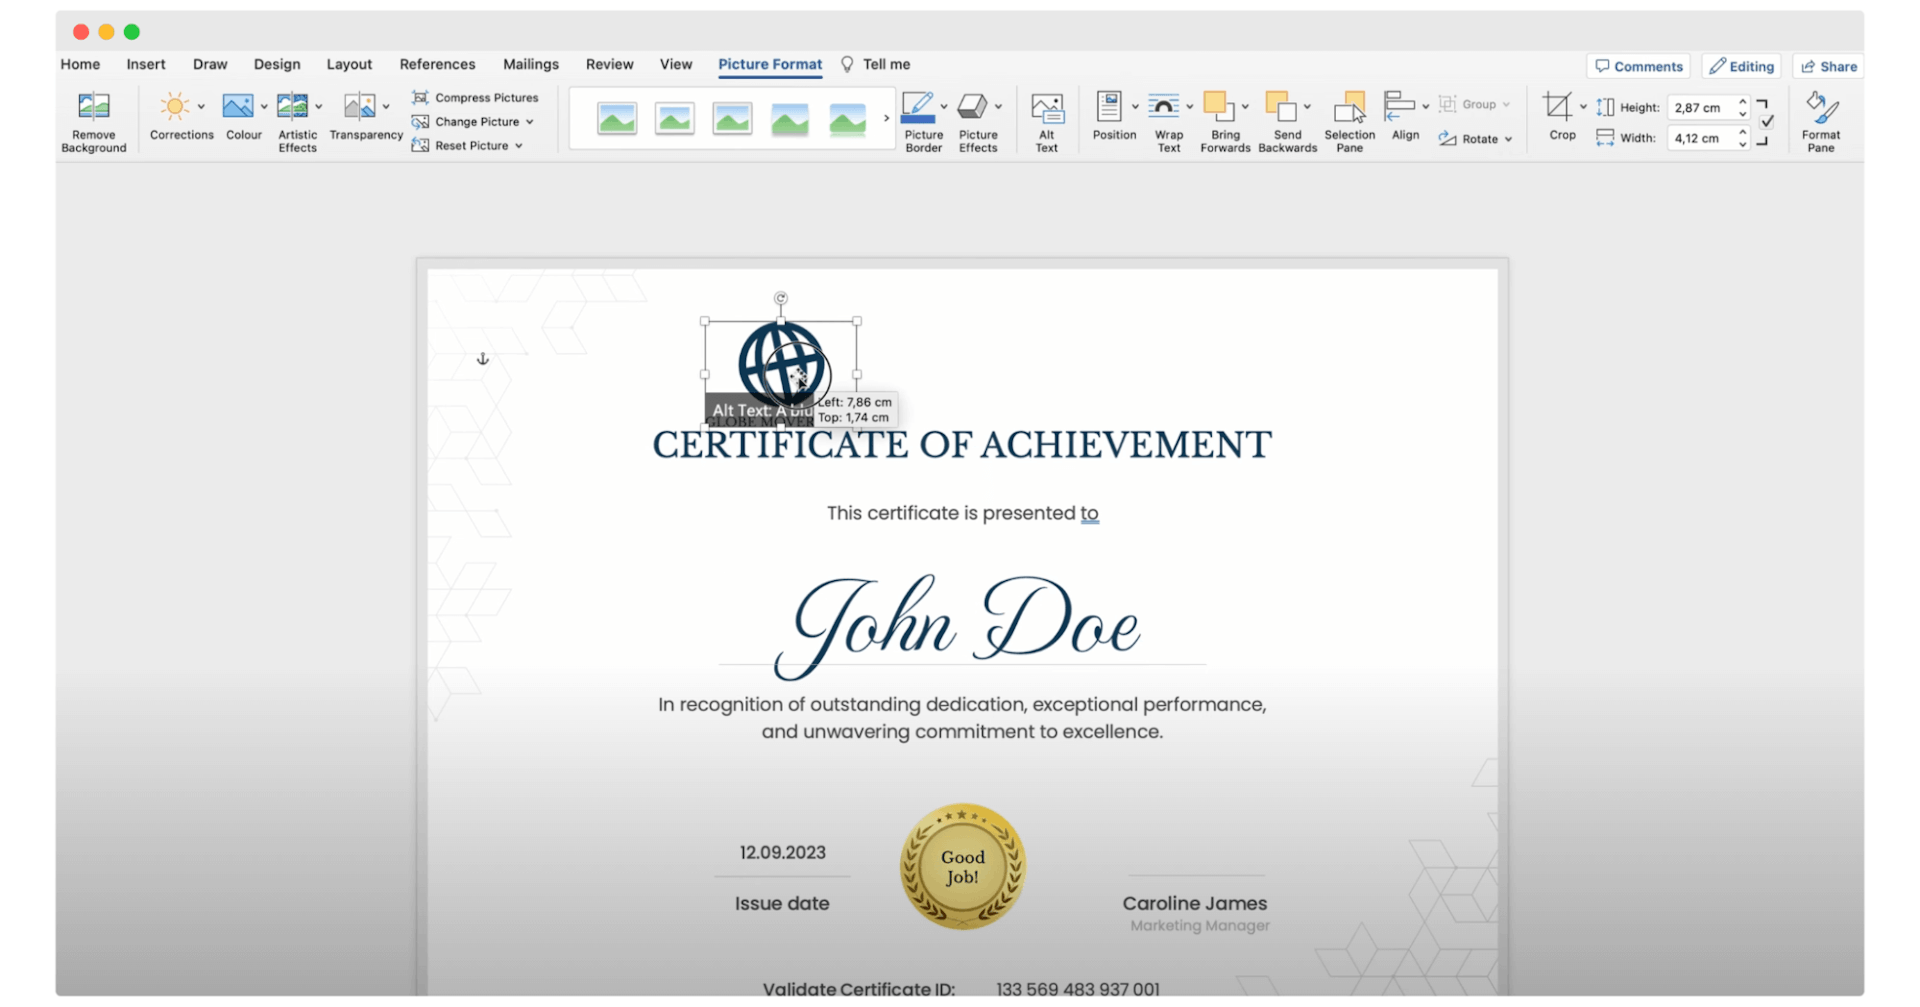
Put the logo in a suitable place. If you want to place it perfectly within the lines or in the middle, go to the Picture Format and choose align to center.
#5 Add your signature
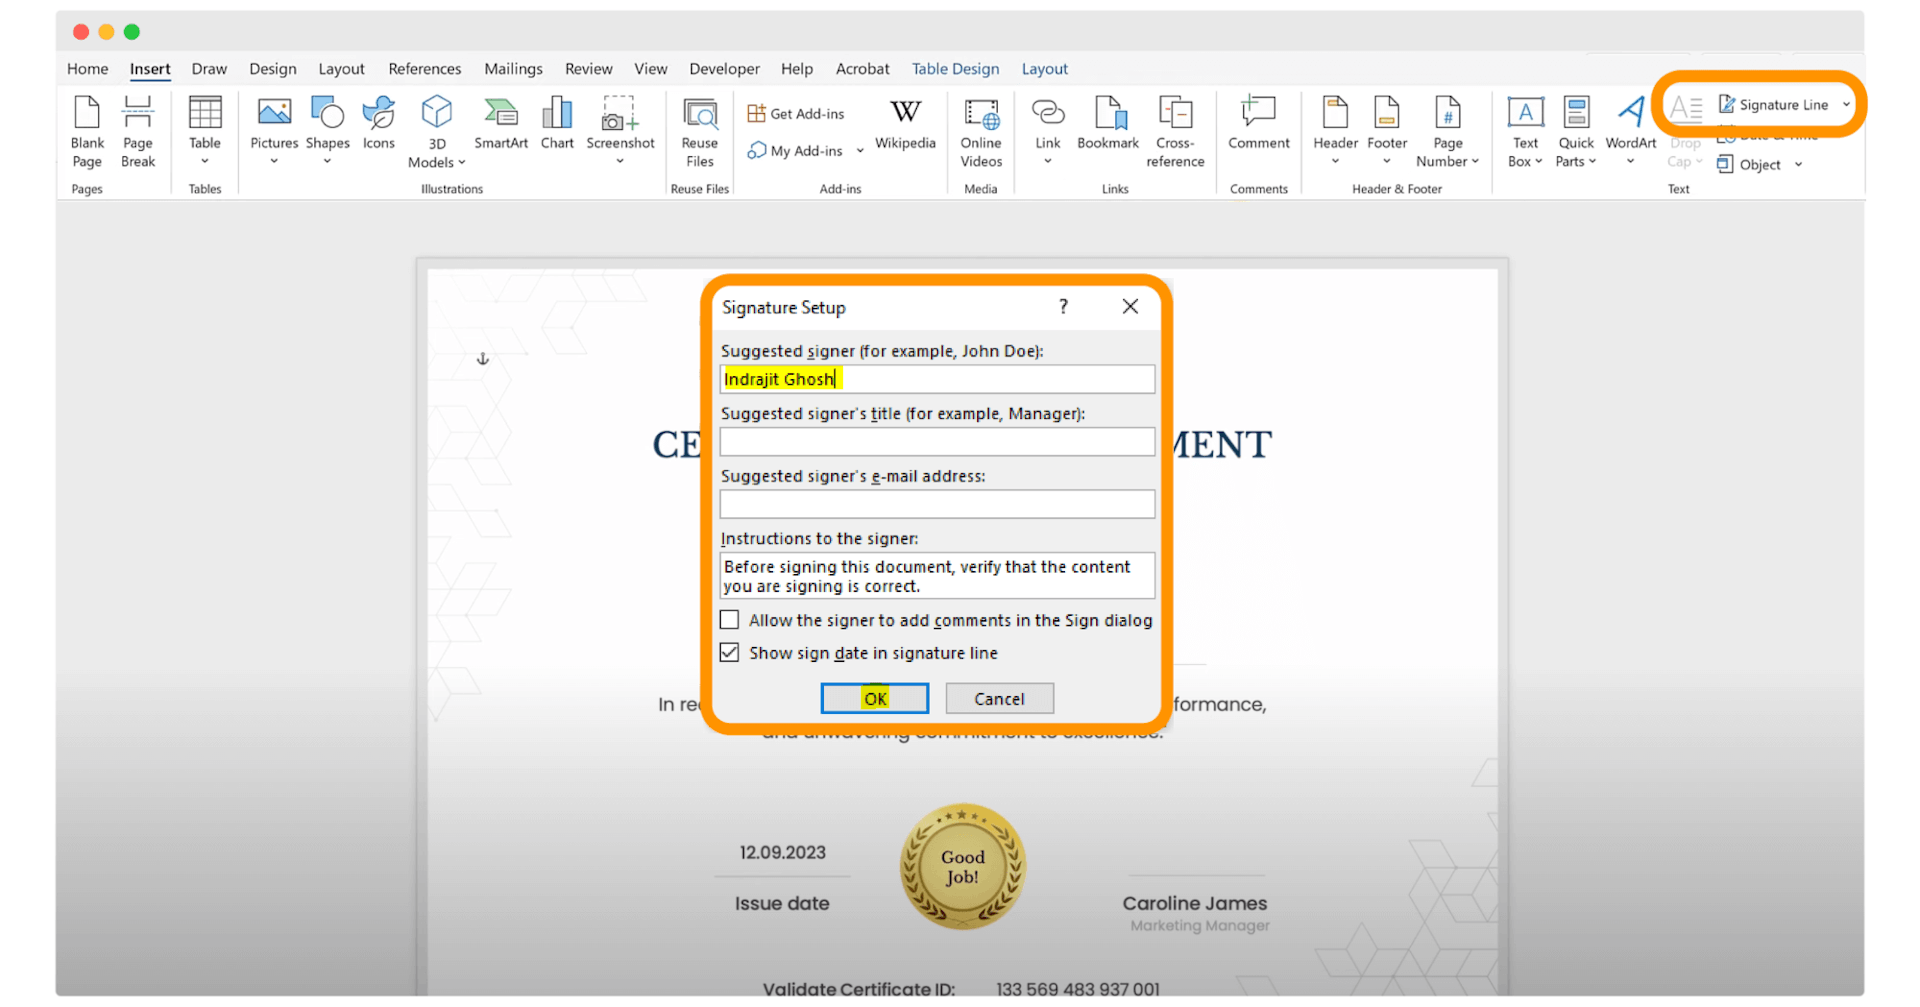
Making a certificate in Word requires one more element – signatures. But how to insert a digital signature into a Word document? Select the place on the certificate where you want to add the signatures. Click on it. On the Insert tab, select Signature Line in the Text group. It will trigger the pop-up window.
Under the signature line, type the following information that appears beneath the signature:
Please note: Newer versions of Word might include a feature that lets users create a digital signature that looks like a handwritten one by drawing it right in the app with their mouse or trackpad. This could be handy to improve the possibilities on how to create certificate in Word that is professional.
If you need a simpler way to create signatures in a Microsoft Word certificate, just click Insert and choose the Image with the signature. You can also use the handwritten fonts provided by the tool. There are many possibilities, choose the one that suits you best.
#6 Save your new certificate
The certificate with custom design can now be saved on your desktop and used whenever you want. You can save the Word certificate to PDF or any other format you wish.
Do you want to print your Word certificate? Go to the File > Save as > choose the file format and name it.
That’s all! Your certificate is ready to go live.
Bulk certificate generation in Word
How to make certificate in Word with Excel – but not just one, but hundreds at once? It's doable, though it requires a bit of setup. Here's a simple guide to help you create an award certificate in Word for every participant.
Create an Excel file
Start by preparing an Excel spreadsheet for current project. This file will contain the data for each certificate you want to create, like names, dates, and any other details you need. Each column should represent a different field (e.g., First Name, Last Name, Date of Award), and each row will represent a different certificate recipient.
Your recipients name and surname are in the separate columns? See how to easily combine first and last name together.
Prepare certificate for mail merge
Once your certificate design is ready, you need to prepare it for bulk generation. Delete all the individual data, such as name or certificate ID.
Go to the “Mailings” tab.
Click “Start Mail Merge” and choose “Step-by-Step Mail Merge Wizard.”
Select “Letters” as your document type (even though you are creating certificates, this option works best for inserting fields).
Link your Excel file
The next step is to link the Excel file to the certificate so that Word can pull out the appropriate data to fill out the certificate.
Continue in the Mail Merge Wizard under “Select recipients.”
Choose “Use an existing list” and then browse to select your Excel file.
Insert merge fields
Place your cursor in the certificate where you want a piece of data to appear.
Click “Insert Merge Field” under the “Mailings” tab again and choose the field from your Excel file (like First Name).
Repeat for each piece of data you want to include on the certificate.
Preview and complete the merge
Click “Preview your letters” to see how your certificates will look. You can toggle through different records to make sure everything aligns correctly before you finish the process of making certificates in Word.
Once satisfied, click “Complete the merge” and select “Print Documents” or “Edit individual letters” if you need to make final adjustments.
Are you lost? See the detailed guide on how to generate certificates with Excel.
Why is Microsoft Word not the best option to create certificates?
Microsoft Word is pretty easy to use, and you are probably already familiar with its interface. But, its not an ideal application to create visual documents. Modern certificates require a blend of visual appeal and professional design that goes beyond simple text formatting.
Word is a great program for many things – but making a certificate is not one of them.
Let's break down why Microsoft Word might not be your best bet for creating those stunning certificates:
Word is not a design tool. There are many other options it’s better suited for – writing notes, resumes, newsletters, business reports, marketing materials, calendars, team collaborations, and many more. It’s great to have that many opportunities, but it is easy to get lost.
The designs are not suitable for businesses. Making the certificates from scratch is possible, but you need to write all the details manually. Even if you have a list, you need to copy and paste each entry, name by name.
No bulk features to create a batch of certificates. To make certificates for a bigger group of attendees, you have to fill out the certificate data manually. You have to copy the names from your list and paste them into a Word document, one by one. If you have lots of participants, it can take hours to create certificates for them in Word.
Word is not intended to be used as a certificate generator. The possibility of generating the diplomas are rather one of the options than the purpose of it. That is why you can face some troubles while creating certificates for your attendees.
What if you could make certificates automatically? Certifier is a certificate maker that provides options to create, generate, distribute, and track credentials all within one platform. Use ready-made templates, customize them to your needs, and send them out with a click. All of that for free!
Bet on Certifier rather than on Microsoft Word
Meet Certifier. It’s a specialized tool for certification (and Word is not even close to its capabilities). Certifier will make sure that from today, every certificate of achievement will be completed quickly, beautifully, and efficiently. We are not just talking empty words here but once you use the features we provide, you'll be convinced.
Certifier can serve you with both its basic and advanced features.
Digital credentials that are sharable and verifiable. They’re a more effective alternative to traditional PDF Word certificates that are not so secure and easy to manage. Not to mention that digital certificates are more eco-friendly!
Certifier certificates are easier for a mass generation. You can easily create and generate even thousands of certificates in one go. You no longer have to deal with certificate bulk generation in Word.
Secure hub for managing all certificates under one roof. It’s super powerful to track the whole certification process – all shares and email statuses.
Forever-free plan (up to 250 certificates without any extra charge). It allows you to create, generate, send and track, all from one single dashboard.
Thus, if you dream of building your own gift certificate templates, nothing stands in the way! So? Bet on the professional certification process, and you will increase the satisfaction of your audience! If you have any questions or concerns, feel free to contact our team!
Conclusion
As you can see, Microsoft Word can handle making digital certificates, but why do it if you can make certificates in Word easier and faster?
Use a professional certificate maker for MS Word like Certifier to make modern certificates in bulk.
With it, you will know how to make an award certificate in Word, deliver certificates faster, and gain a lot of valuable data reflecting the documents sent. Create an account and enjoy the new possibilities of Word certificates.
FAQ

Sergey Butko
Tech entrepreneur. Forbes 30 Under 30 Europe. At Certifier, Sergey’s work focused on revolutionizing the way credentials, certificates, and badges are issued and managed through cutting-edge APIs and software infrastructure.
Sergey Butko
Tech entrepreneur. Forbes 30 Under 30 Europe. At Certifier, Sergey’s work focused on revolutionizing the way credentials, certificates, and badges are issued and managed through cutting-edge APIs and software infrastructure.
Share this article