Trusted by:
How to Make Badges in Bulk with Certifier?
In this tutorial, you will learn how to create and issue digital badges for your employees, online school students, webinar attendees, or course graduates with just a few clicks using Certifier.
AuthorSergey Butko
Updated: April 16, 2024
6 min read
Author
Sergey Butko
Updated: April 16, 2024
6 min read
Trusted by:
Due to their flexibility and ease of use, digital badges gained popularity in recent years. With digital badges, learners can showcase their achievements and skills online, making them more visible to peers in their field. Certifier makes it easy for you to create and issue digital badges to your learners, simplifying the credentialing process and saving you time and effort.
What is Certifier free online badge maker?
Certifier maker is an online platform that allows you to easily create and issue custom badges to your learners or event participants. With Certifier, you can design custom event badges that represent specific skills or achievements and issue them in bulk to your learners via email.
Certifier simplifies the process of creating badge logo design, making it easy for educators, trainers, and organizations to recognize their learners' accomplishments and enhance their professional development. Whether you run an online school, training program, or webinar, Certifier can help you improve your learners' engagement and motivation by providing them with digital badges that showcase their achievements and skills.
The creating and issuing process includes three easy steps, namely creating a design for your future badge, attaching it to a course, and issuing your badges via email.
Step 1: Choose a digital badge template
How to create badges?
Create a forever free Certifier account. Once you are signed in, you will be automatically redirected to the Designs tab. The first thing you should do is to click on the Create Design > Badge Design button, which will lead you to our badge design builder.
Our badge maker works just like any standard builder. Most of our users prefer to go directly to the Templates tab and choose a pre-made digital badge template that has been professionally designed and prepared for you.
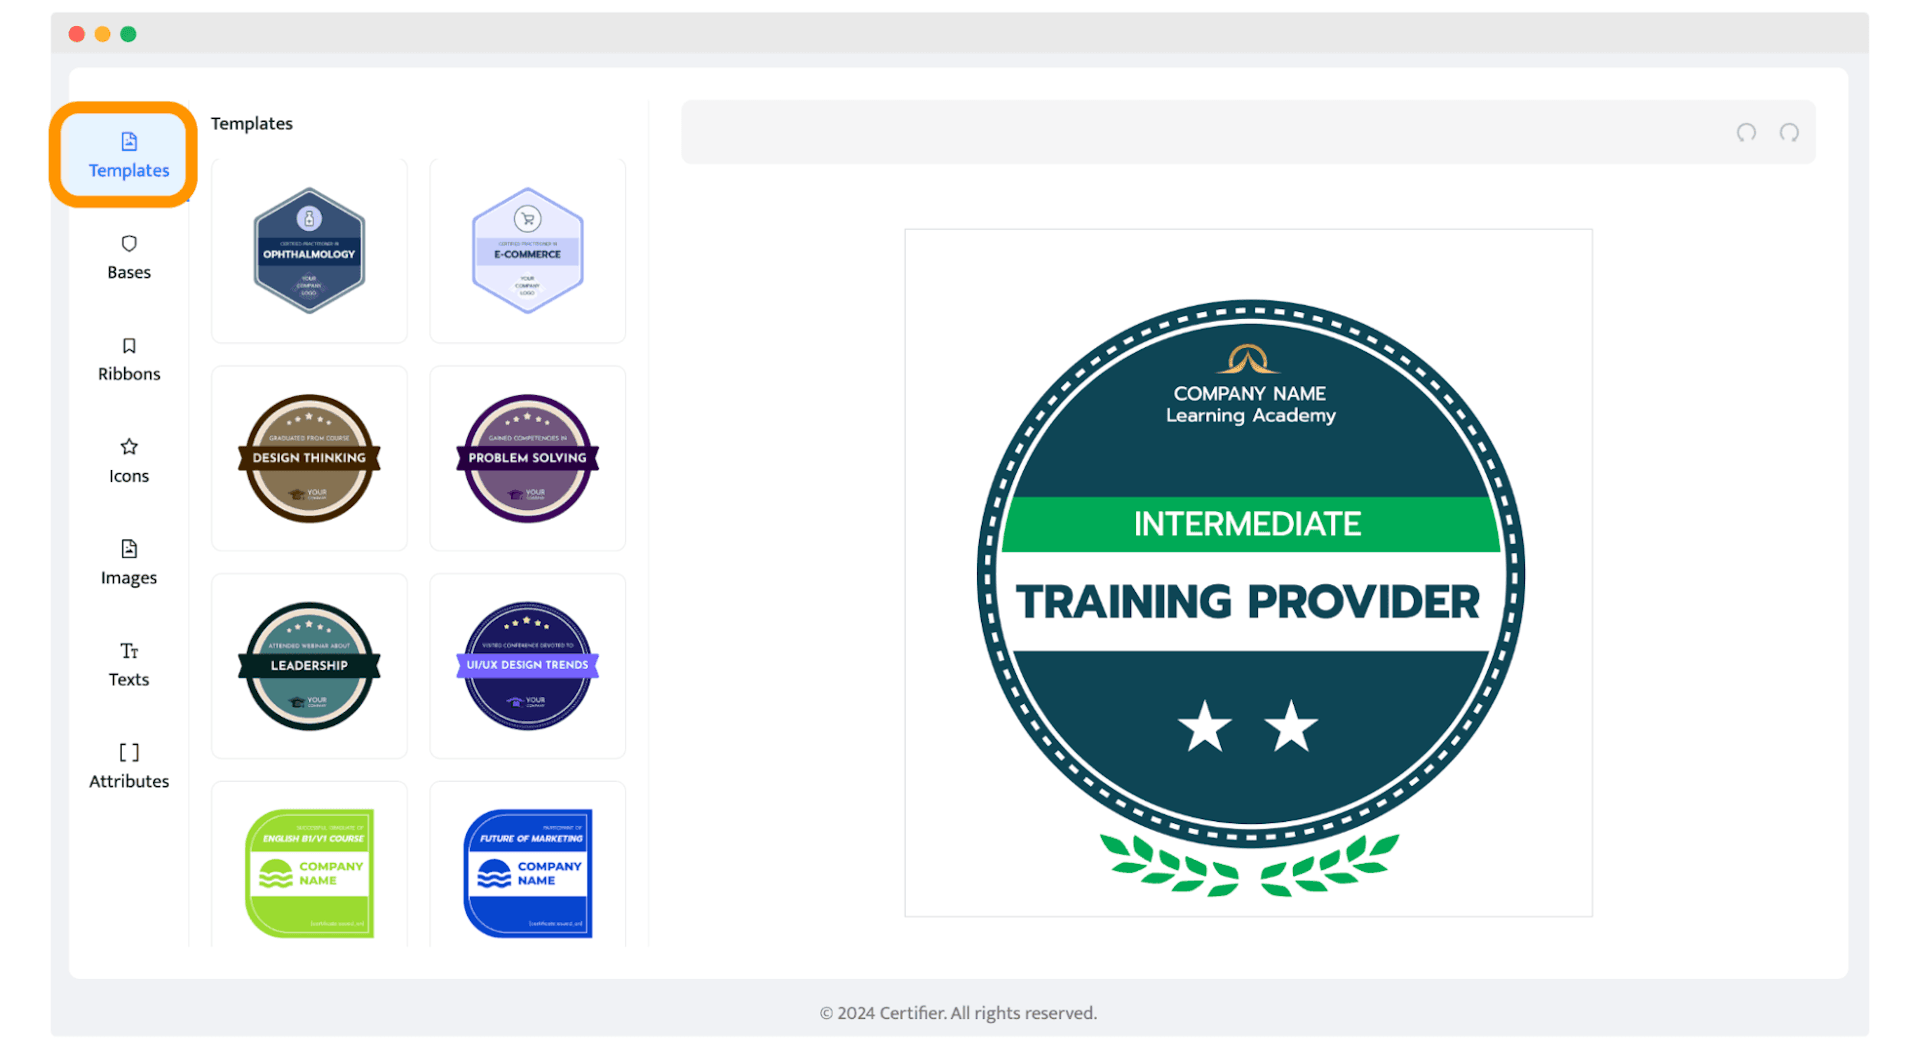
However, you can create your perfect badge from scratch by using icons, digital badge images (badge graphics), ribbons, and bases from the collection. The choice is up to you.
Step 2: Adjust the badge design to your needs
Once you choose a badge online template, you will see that each of them includes a generic description that you can adjust to your needs. These are called Attributes.
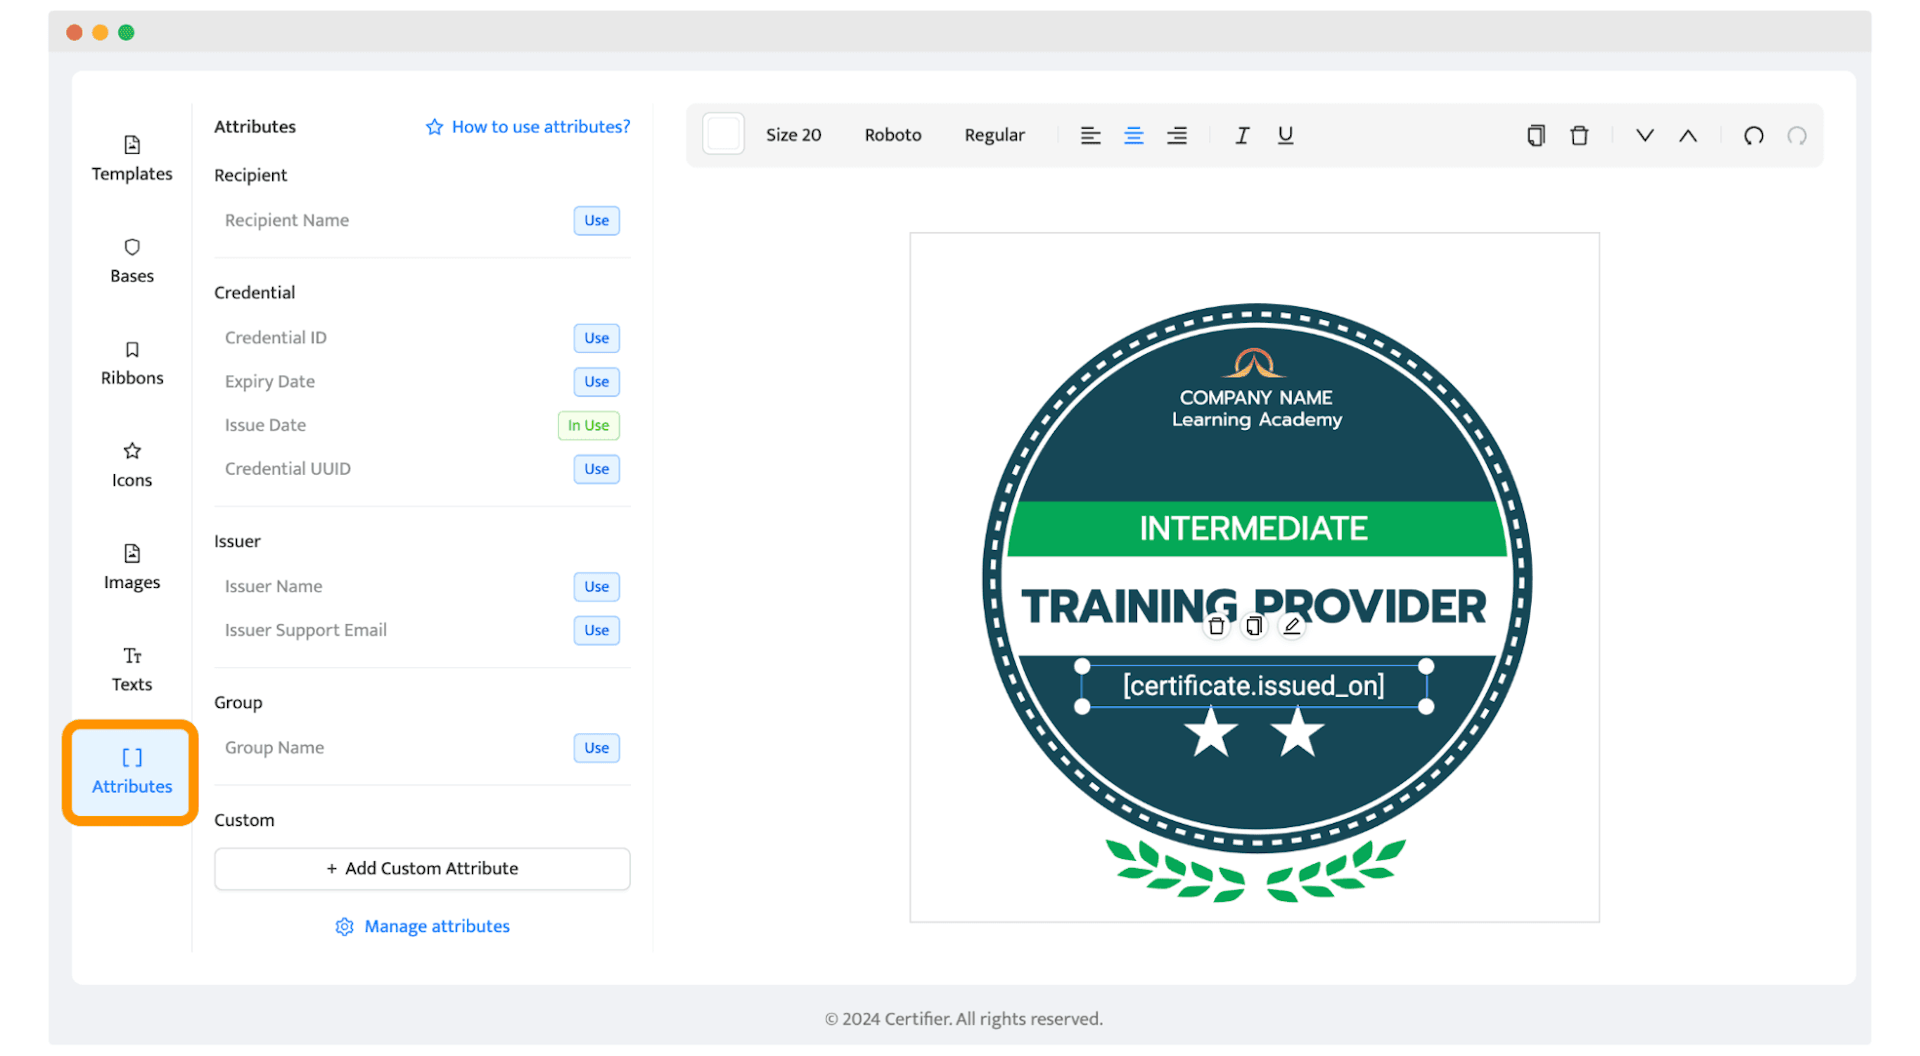
The possibility to add dynamic attributes is the feature that makes Certifier exceptional among other apps because it enables our customers to send dozens of badges to different recipients in just one click.
To make a long story short, you can think of an attribute as a placeholder for the information that will be derived from a spreadsheet that you will upload during Step 3. This dynamic attribute will be automatically replaced by your data, which will be taken from the spreadsheet (we will get to this very soon).
Do not forget to go to our Bases (badge shape), Ribbons, Icons, and Images from our badge editor if you need to place or remove some badge objects or specific images on your badge, i.e., your logo or signature. Remember that you can also change color patterns to adjust the badge design to your corporate colors.
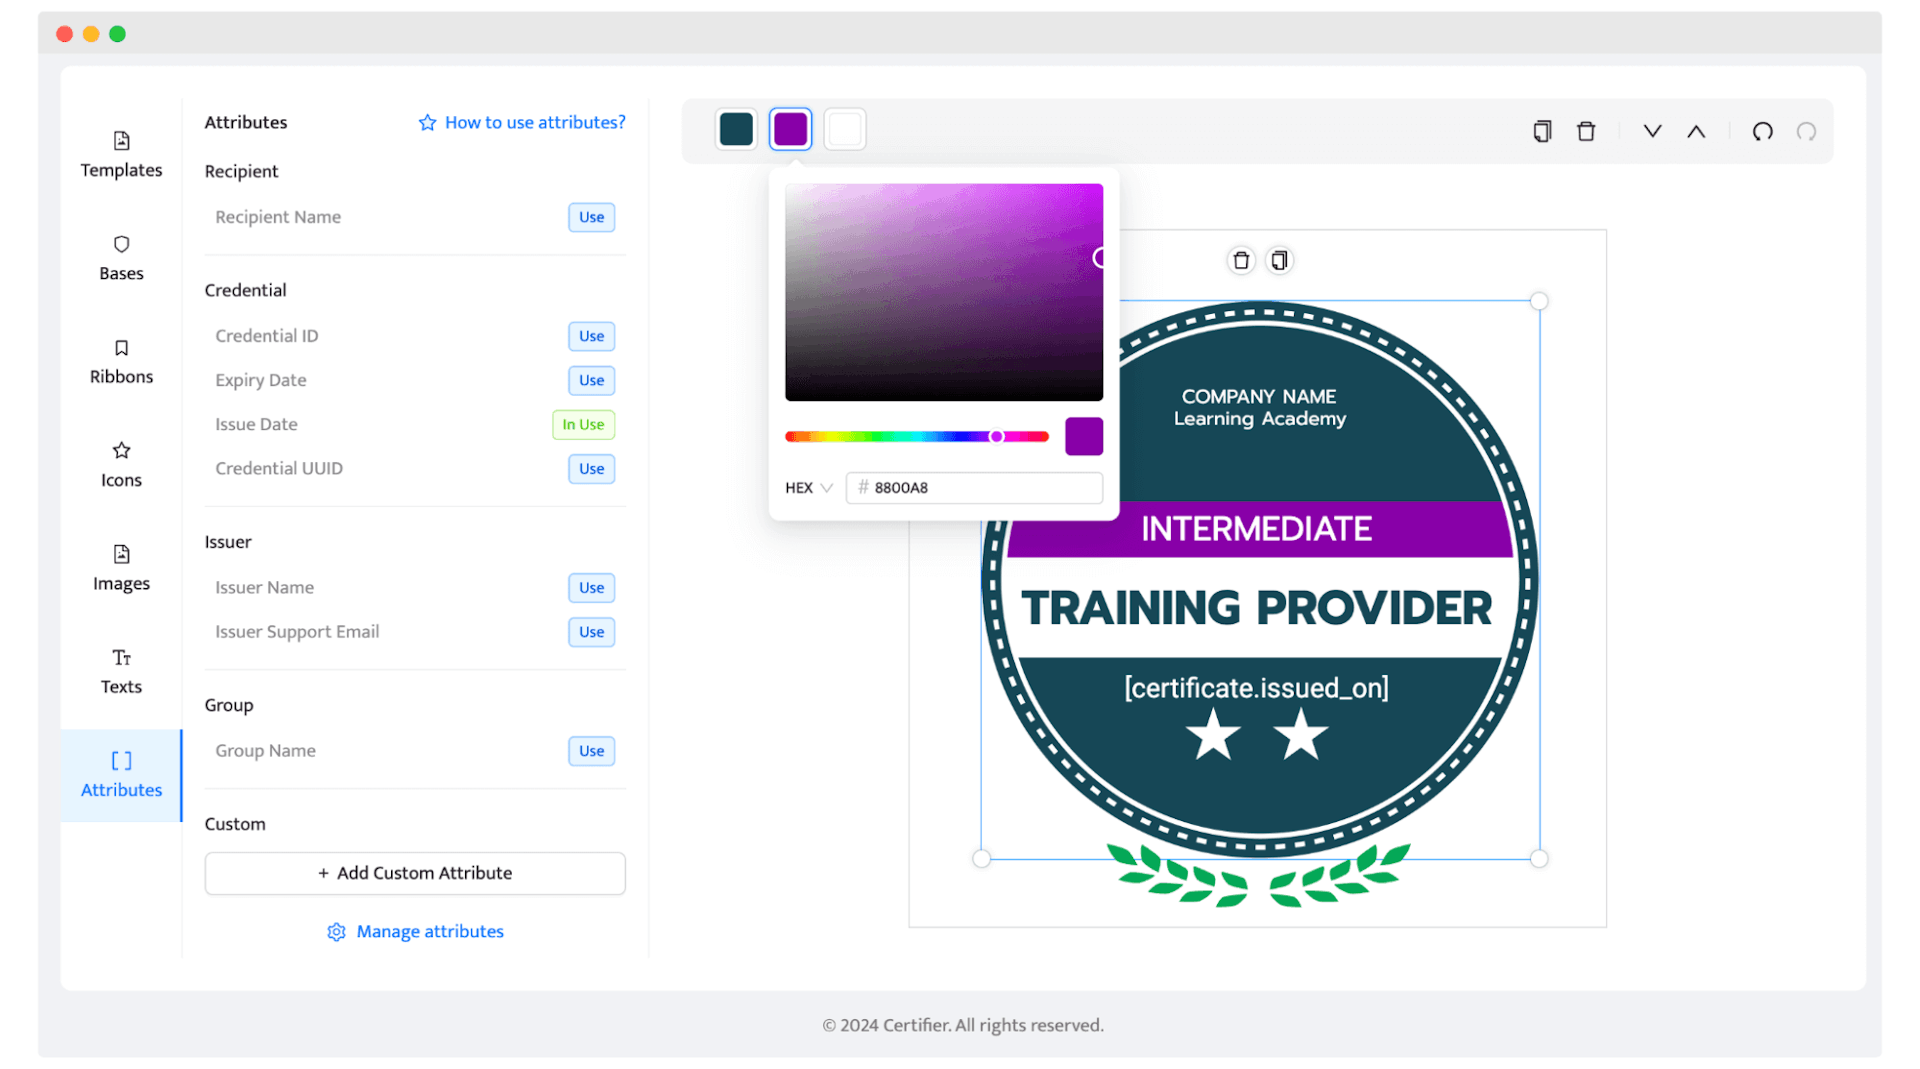
Once you are done with a template for your badge, you should name your design using the empty field in the upper right corner of the builder and press the Create Badge Design button. We recommend naming the designs using the names of a course/webinar/or any other occasion that you want to issue your badges.
Important: Do not start looking for a Download button, or try downloading your badge template because this is not how Certifier badge maker works. A possibility to save your badges will become available only once these very badges are issued. All the designs that you create and save are stored in the Designs tab so that you can reuse your templates in the future.
Step 3: Issue badges in bulk
This is exactly the moment when Certifier magic begins.
You are now asked to upload a spreadsheet that we have already mentioned earlier in the tutorial. Our helper on the right will suggest you download the template of this spreadsheet to simplify the process.
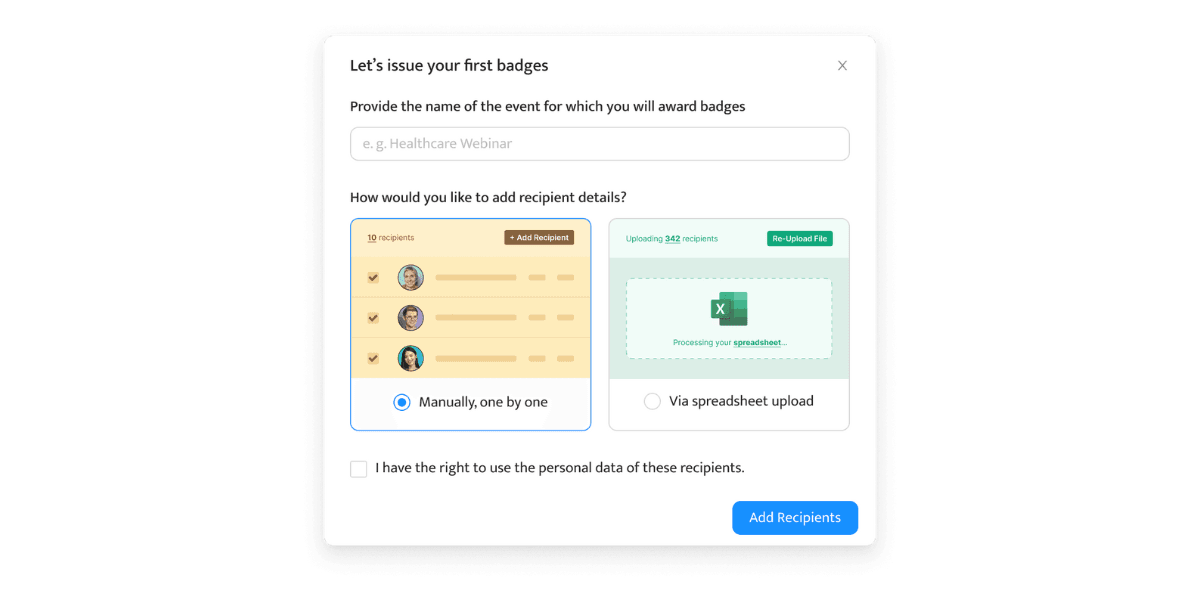
If you launch webinars using Zoom, WebinarJam, or ClickMeeting, then you can export a list of your attendees directly from the platforms. Our spreadsheet template includes two required columns called Recipient Name and Recipient Email. Remember to combine first and last names in the spreadsheet.
You may have already guessed that the entities from the Recipient Name column will replace the [recipient.name] attribute, while the emails from the Recipient Email column will be used to send your badges to lots of learners with just one click. You can adjust our spreadsheet template to your needs, for example, by adding the columns that you used as attributes on your design template.
Once a spreadsheet is uploaded, you will be asked to map the columns from your document with the attributes in Certifier.
Once you have mapped the attributes and columns together, you should press the Preview before issuing button, so that our system can check whether everything is alright.
Press the Save and Publish button and the badges you have just created will be sent directly to the emails of your learners in seconds!
So now, when your badges are issued, you can manage, resend, or delete them.
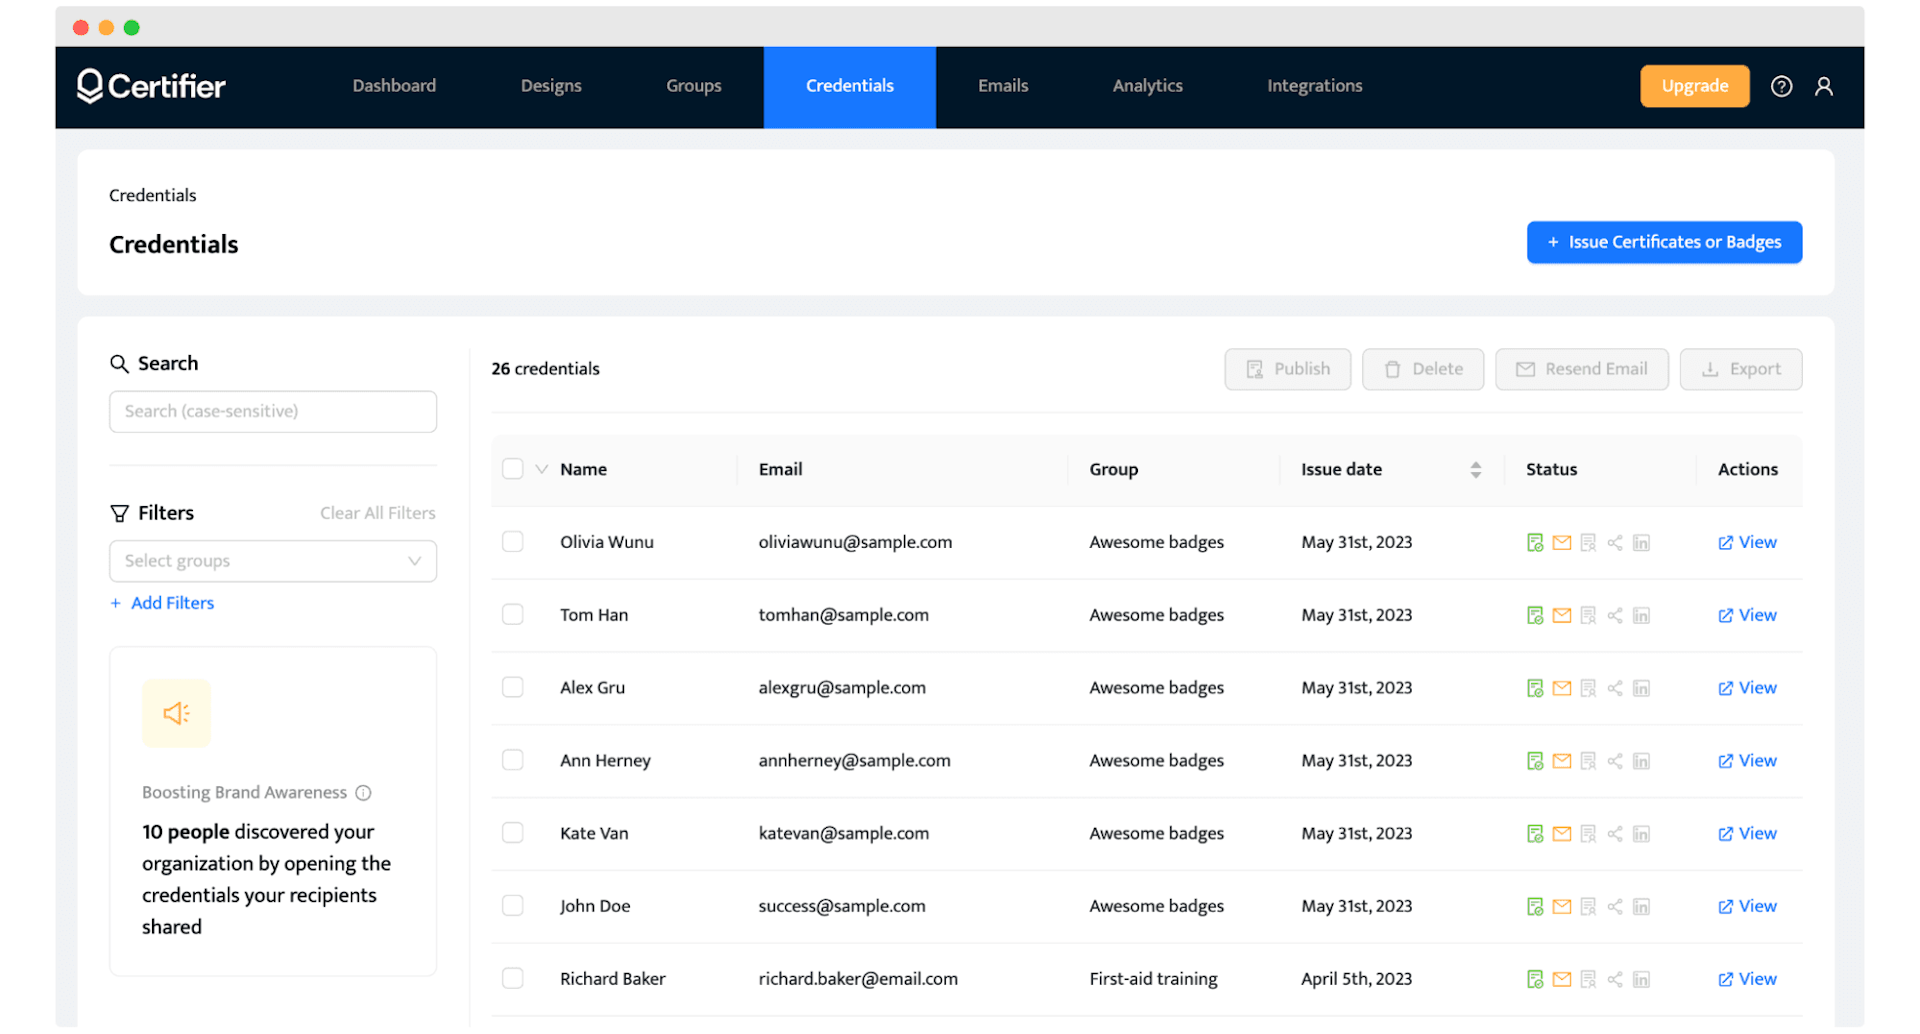
Be careful: once you delete a badge from the dashboard of Certifier, your learners will not be able to open them through their email anymore!
Would you like to go through the process all again? In this video, Uliana will show you how to create digital badges in detail:
Tutorial summary
We outlined the three easy steps to create simple badges using Certifier.
The first step: involves designing the badge using Certifier's design-builder tool. This step includes selecting a template, adding dynamic attributes, and uploading your logo.
The second step: adjust the badge design template within the badge designer and include dynamic attributes.
The final step: issue the badges in bulk using Certifier badge creator. This step involves uploading a spreadsheet with recipient names and email addresses, mapping the attributes to the columns in the spreadsheet, and validating the information before issuing the badges.
If you have any queries, our team is always available to provide answers. Alternatively, you can register for a free Certifier account and explore its features firsthand. Take advantage of this opportunity and join Certifier for free today. You can begin issuing digital badges and enhancing your online presence.

Sergey Butko
Tech entrepreneur. Forbes 30 Under 30 Europe. At Certifier, Sergey’s work focused on revolutionizing the way credentials, certificates, and badges are issued and managed through cutting-edge APIs and software infrastructure.
Sergey Butko
Tech entrepreneur. Forbes 30 Under 30 Europe. At Certifier, Sergey’s work focused on revolutionizing the way credentials, certificates, and badges are issued and managed through cutting-edge APIs and software infrastructure.
Share this article