Trusted by:
Create Certificates Without a Graphic Designer. Here’s How to Do It
In this article, you will learn how to create and design certificates without a graphic designer's help.
AuthorSergey Butko
Updated: January 30, 2024
9 min read
Author
Sergey Butko
Updated: January 30, 2024
9 min read
Trusted by:
Certificate design is usually the most costly part of the whole certificate creation process. And rightfully so, because it’s the design that is the most important element of each certificate in most cases.
The certificate look attracts attention and plays a role in building your brand image and strengthening the relationship between your organization and the certificate holder.
The better the certificate design, the higher the satisfaction of a person who received it. Certificates that look professional and have every detail refined, especially the design, are more likely to get shared and reach wider audiences.
But not every company or every solopreneur can afford to hire a graphic designer. In this post, I want to show you how to create outstanding certificates without a graphic designer. It’s not only possible, but it’s also easier than you think.
We will briefly describe how you can create certificates on your own using three tools: Certifier, Canva, and Google Slides. Let’s start with Certifier.
Create certificates without a graphic designer using Certifier
Here are the steps you need to take to design certificates independently.
1. Log in to your account
Go to the certifier website and click the “Log in” link in the upper right corner of the website. If you don’t have an account, select the “Get started” button and create an account.
When you log in or create an account (it literally takes a few seconds), you will automatically land in the Design tab. You have to click the “Create Design” button to start the work.
2. Design a certificate
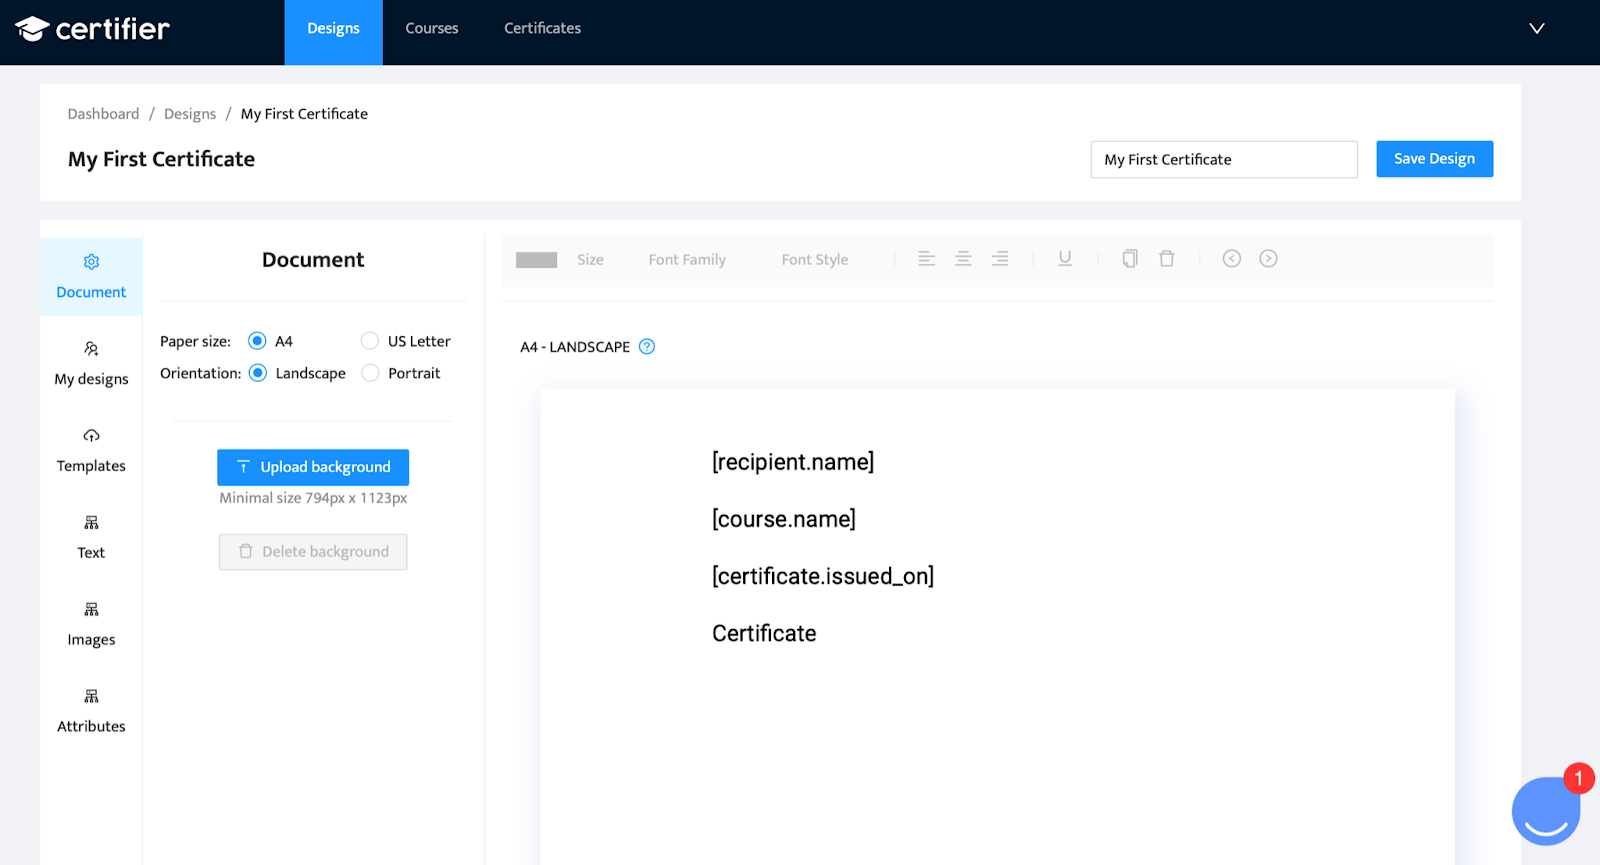
After clicking the button, you will be moved to the certificate creator. First, add a certificate name by writing it in a small window next to the blue “Save Design” button.
You can either choose to create your own certificate design from scratch or use a pre-made template in this dashboard. If you decide to create your own design, you have to select your certificate's paper size and orientation.
The next step is uploading a background. Without that step, you won’t be able to alter text size, or font, or make any other edits to text.
After uploading the background, you can fill the certificate design with text fields, and upload additional images like a logo or abstract images.
3. Choose a certificate template
You can also choose a pre-made template from Certifier’s huge template library.
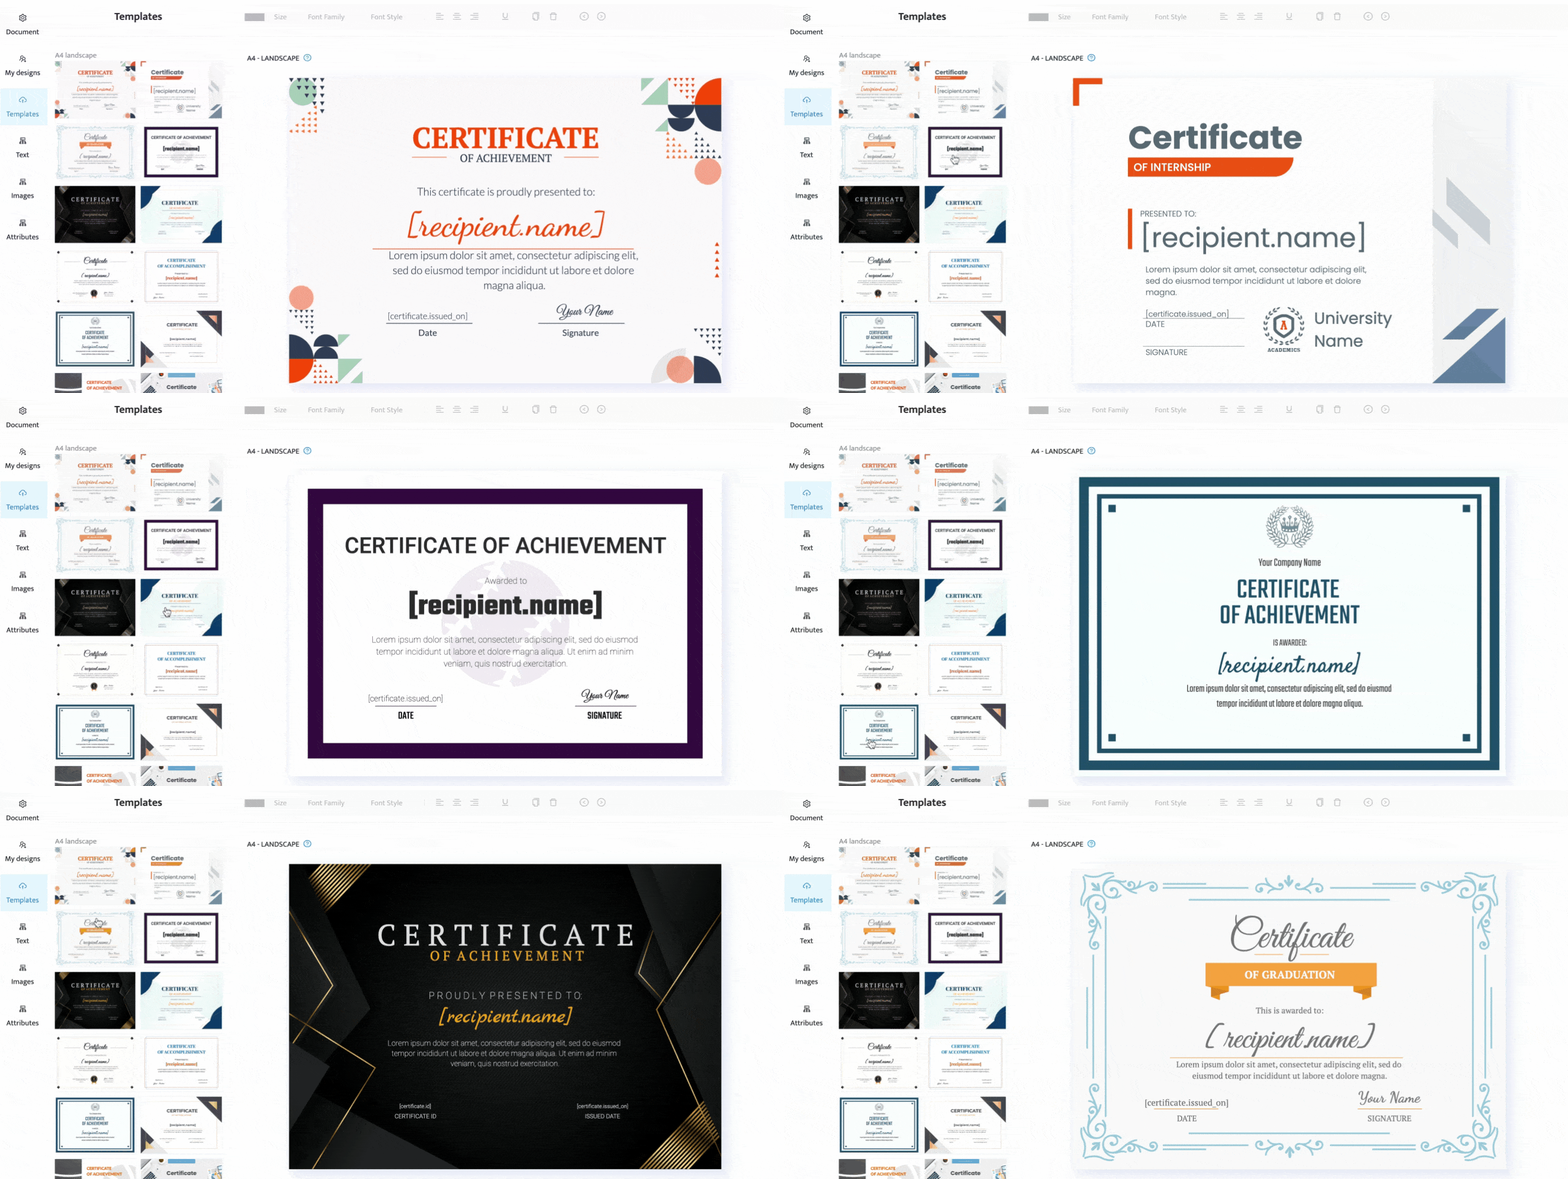
Go through the library and find a template that fits your purpose best. You may be looking for a certificate for webinar attendees, online school students, digital course alumni.
Each probably requires a different design, so invest some time in finding a template that will satisfy those who will receive the certificate.
Remember that you can always alter a template a bit by adding images or changing font style, color or size.
Get inspired: 30+ best certificate design ideas for your online course
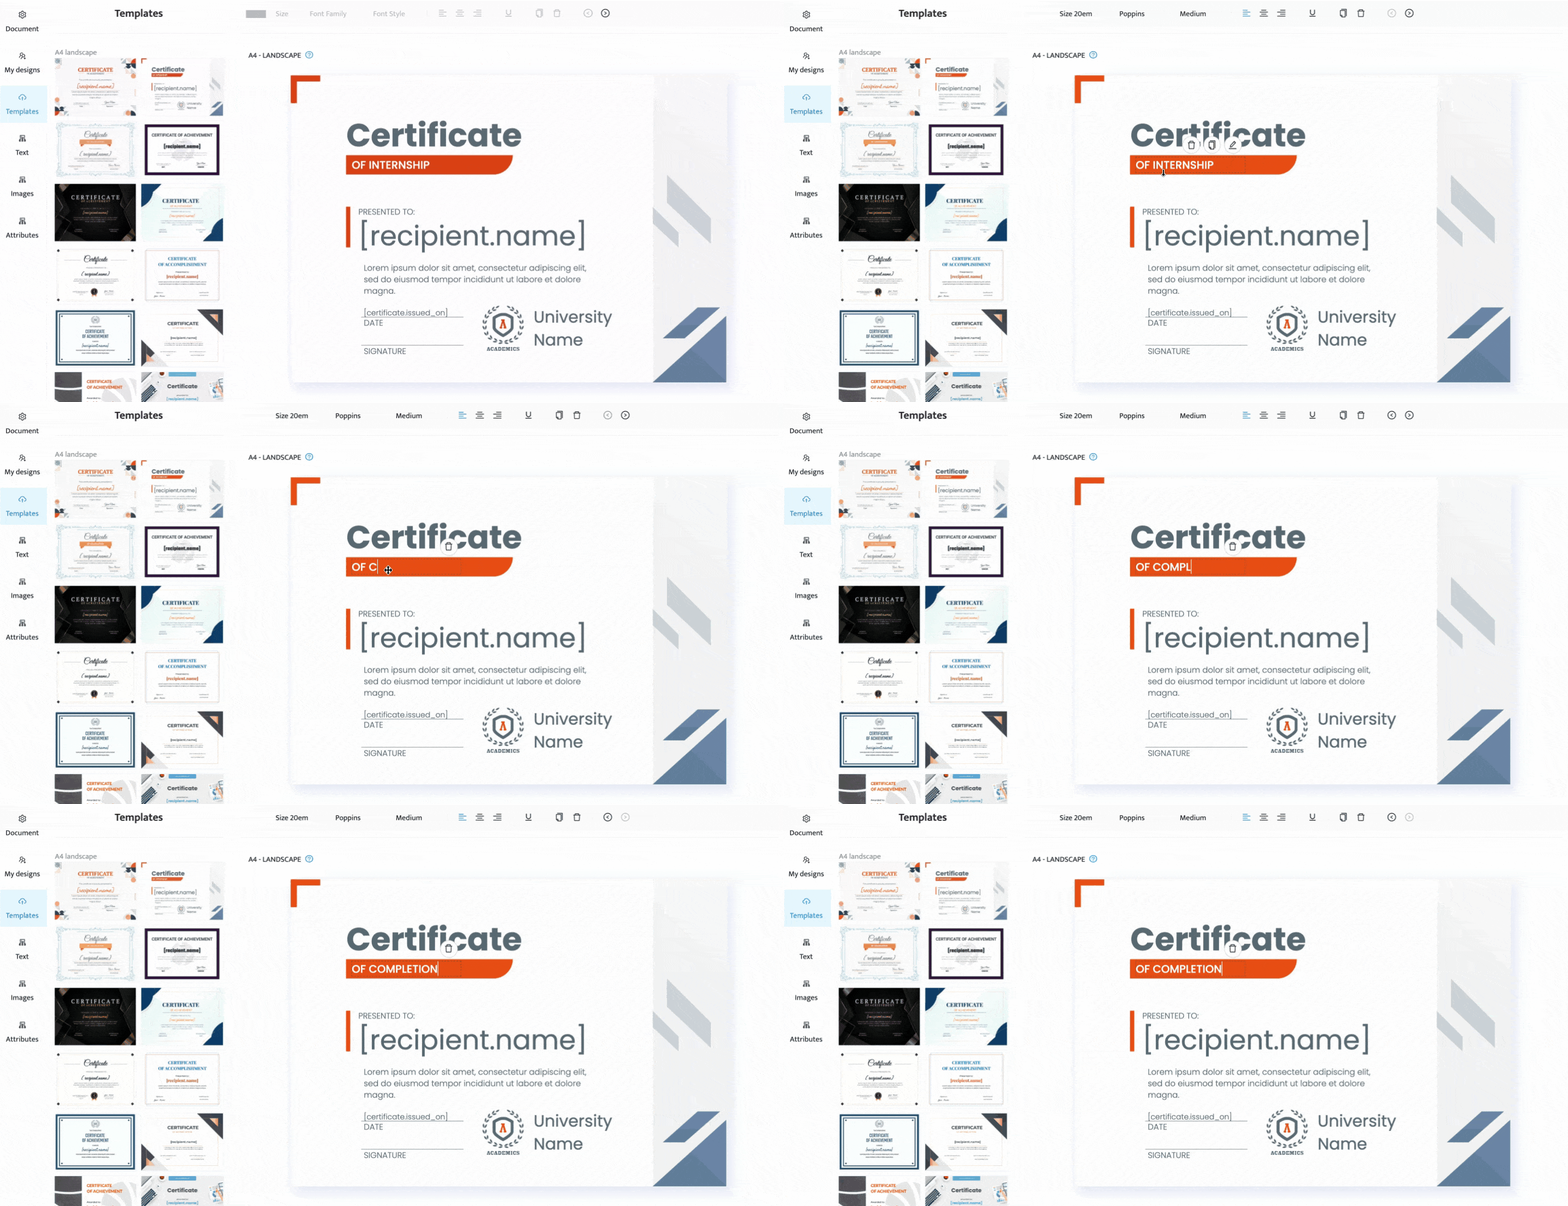
Now it’s time to fill the certificate out with information.
5. Customize the certificate design
The next step is about deciding which text fields you are going to use. This step is the same for both pre-made templates and certificate designs created from scratch.
You can add Repetitive text fields and Unique text fields. Repetitive text fields, as the name indicates, include information that appears multiple times on different certificates. It includes heading, issue date, course name, course ID. The Unique text field covers data like the recipient name or certificate ID.
Learn more: 14 best practices of certificate design
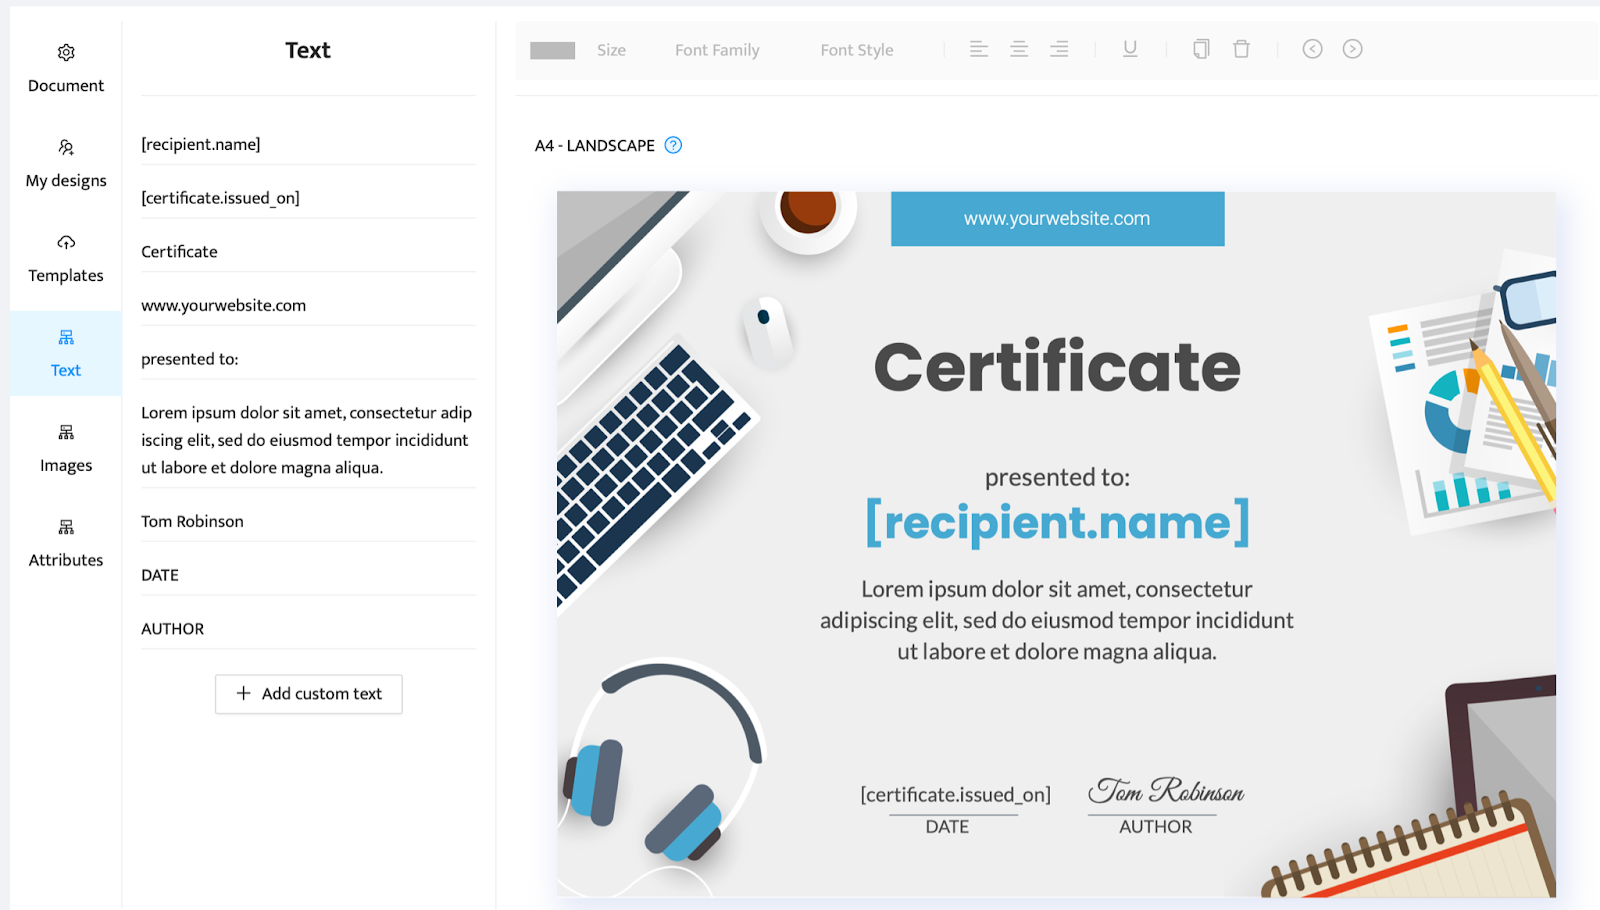
The Unique text field is the feature that enables you to customize and personalize certificates. It’s also the element that automates the whole certificate creation process.
Data used to fill unique text fields out is sourced from a CSV file you provide. So it’s up to you what information to present on certificates.
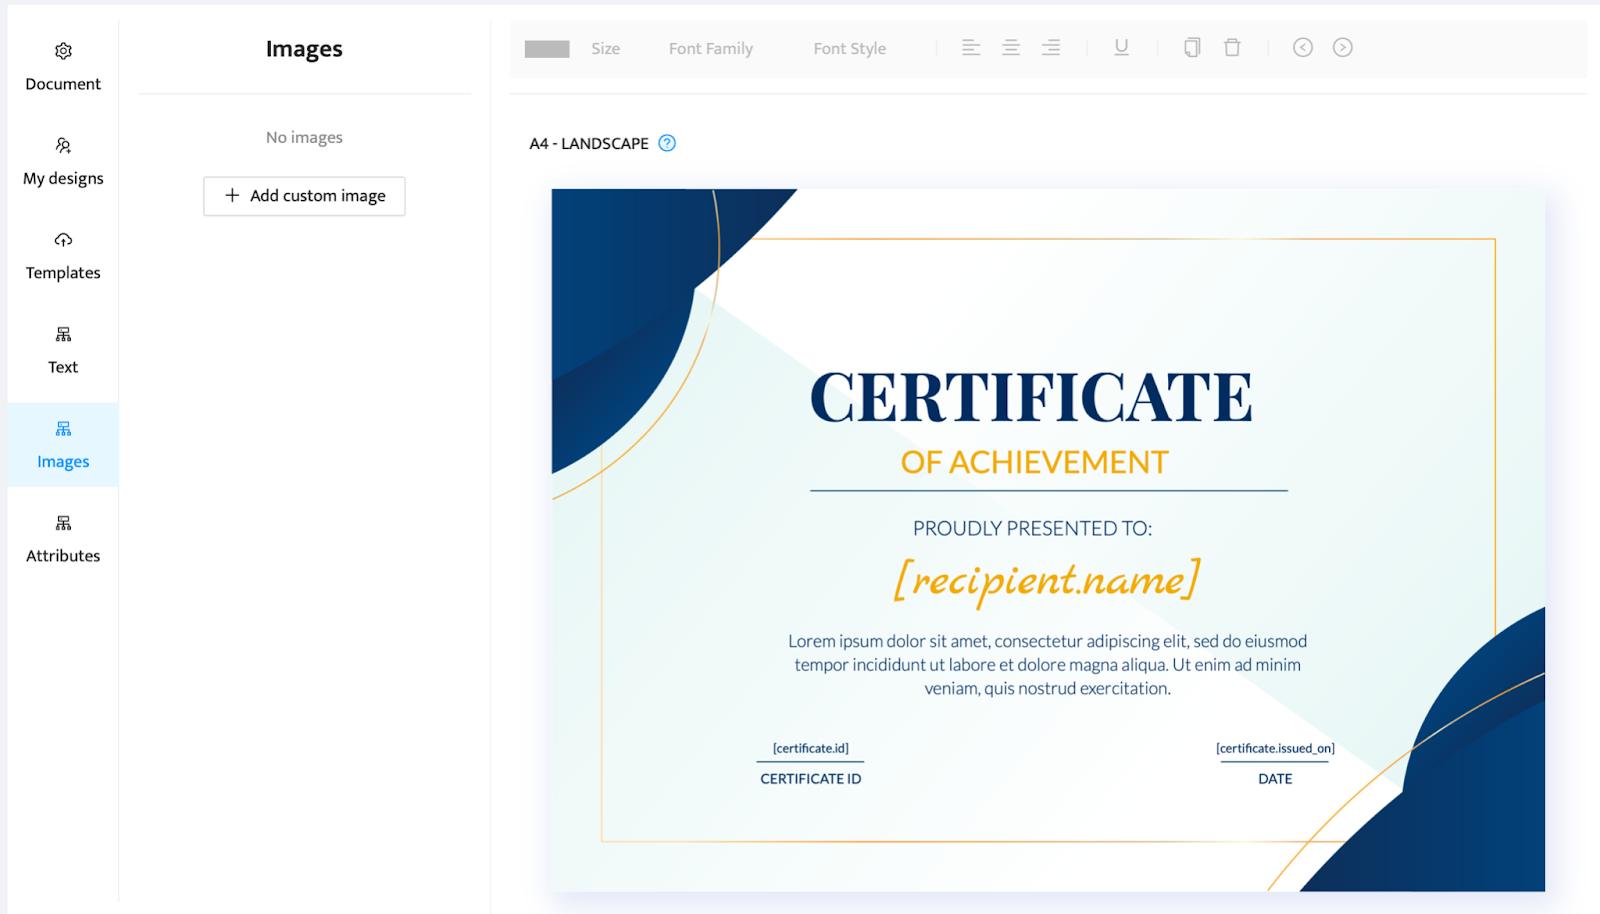
Certificate customization, besides using text fields, includes adding images. You just have to go to the Image tab in the Certifier dashboard and upload an image or images you want to use on your certificate.
It can be a logo, custom design, a photo - whatever you like. A signature can also be another graphic element you want to add to a certificate.
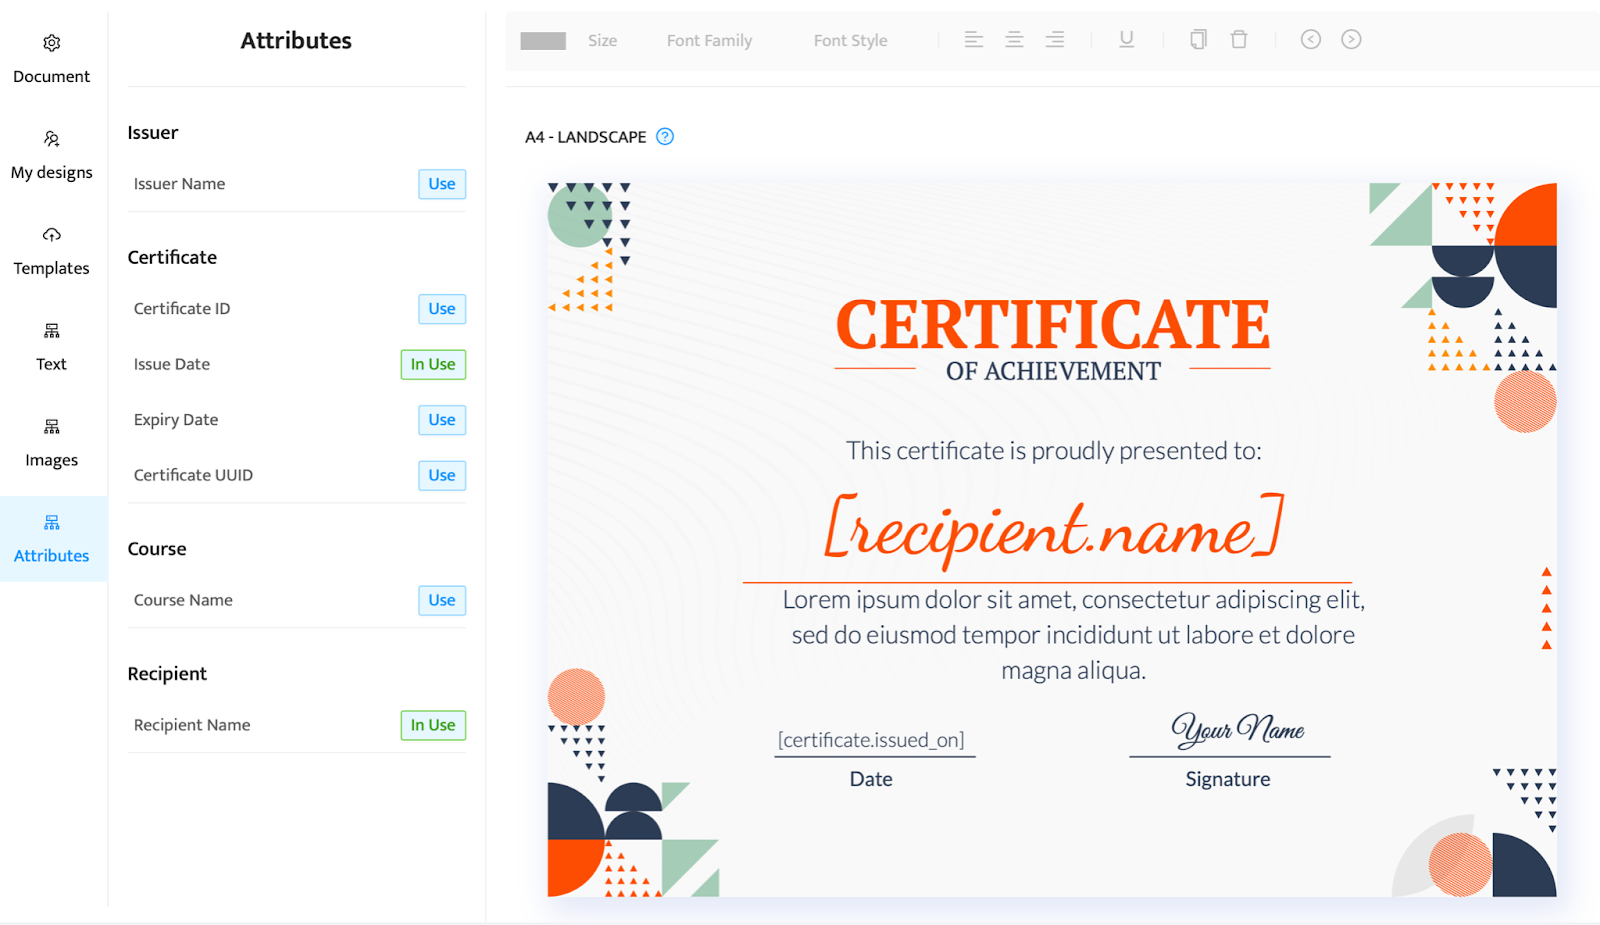
Then, there’s a step of adding Attributes. These can include:
Issuer Name
Certificate ID
Issue Date
Expiry Date
Certificate ID
Course Name
Recipient Name.
As already mentioned, Attributes enable you to customize the certificate design and fill it out with unique data.
And this is where your designer work finishes. You have a design ready. You just need to hit “Save Design”. If you want to proceed with the certificate creation process, go to the “Courses” tab, add a new course and connect the design with it.
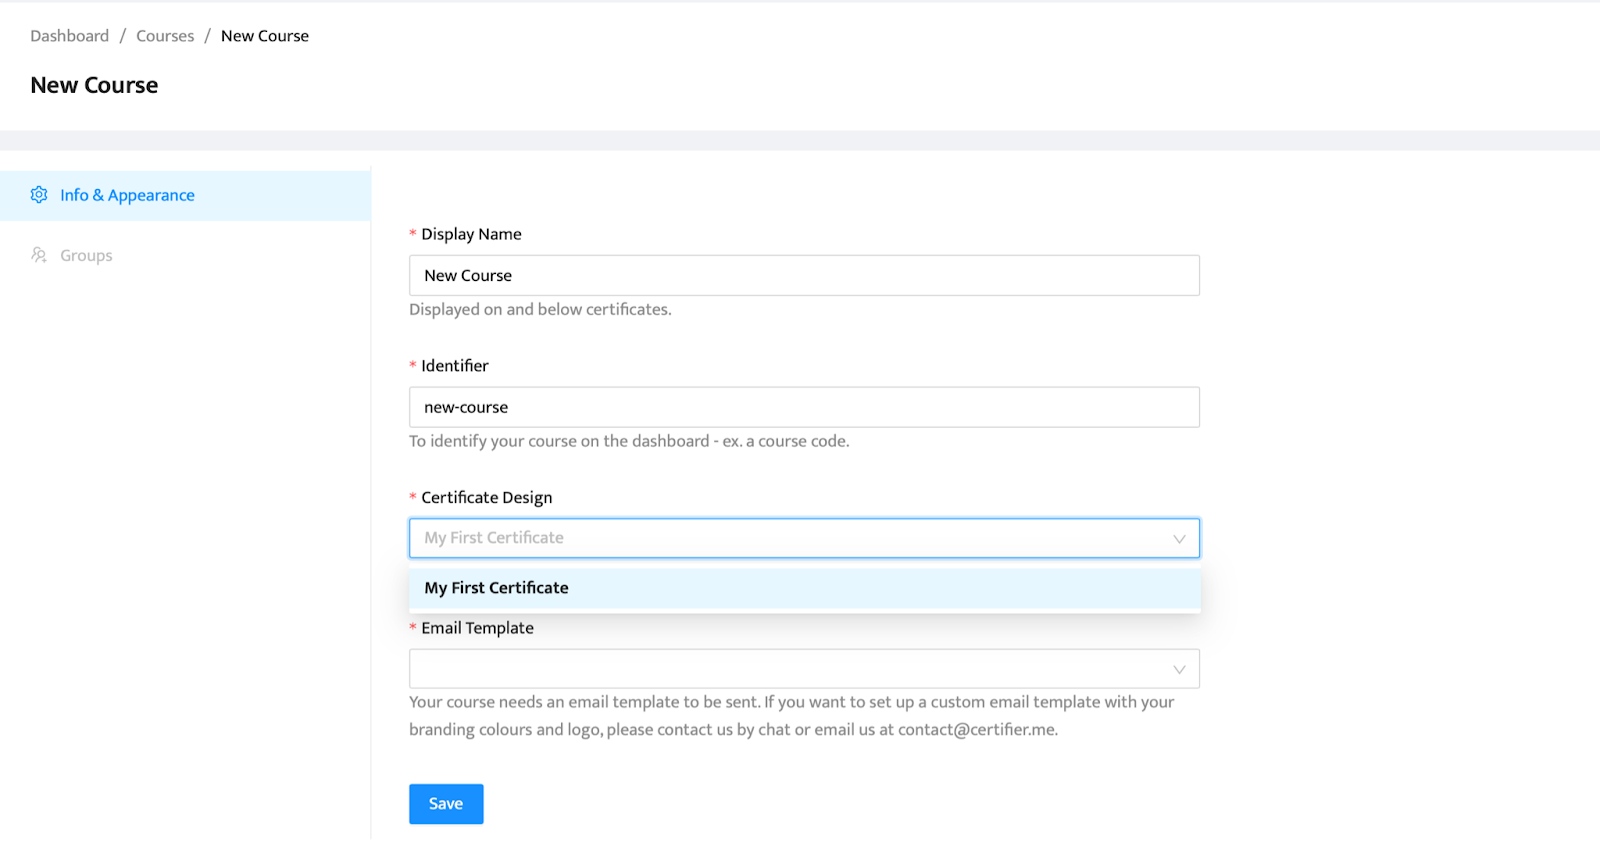
Also, don’t forget to create a Group within a course to segment recipients. There may be various groups within one course, right? Then the creator will help you follow next steps that include providing unique data to personalize certificates and sending them in bulk as PDFs.
Other ways of creating certificates without a graphic designer
Canva
Canva is a popular design tool for non-designers that you can use to create certificates. It offers a library of certificate templates you can slightly edit and adjust to your needs.
However, templates are the thing that makes the Canva editor pretty limiting. You have to either choose pre-made templates and alter them in accordance with Canva settings.
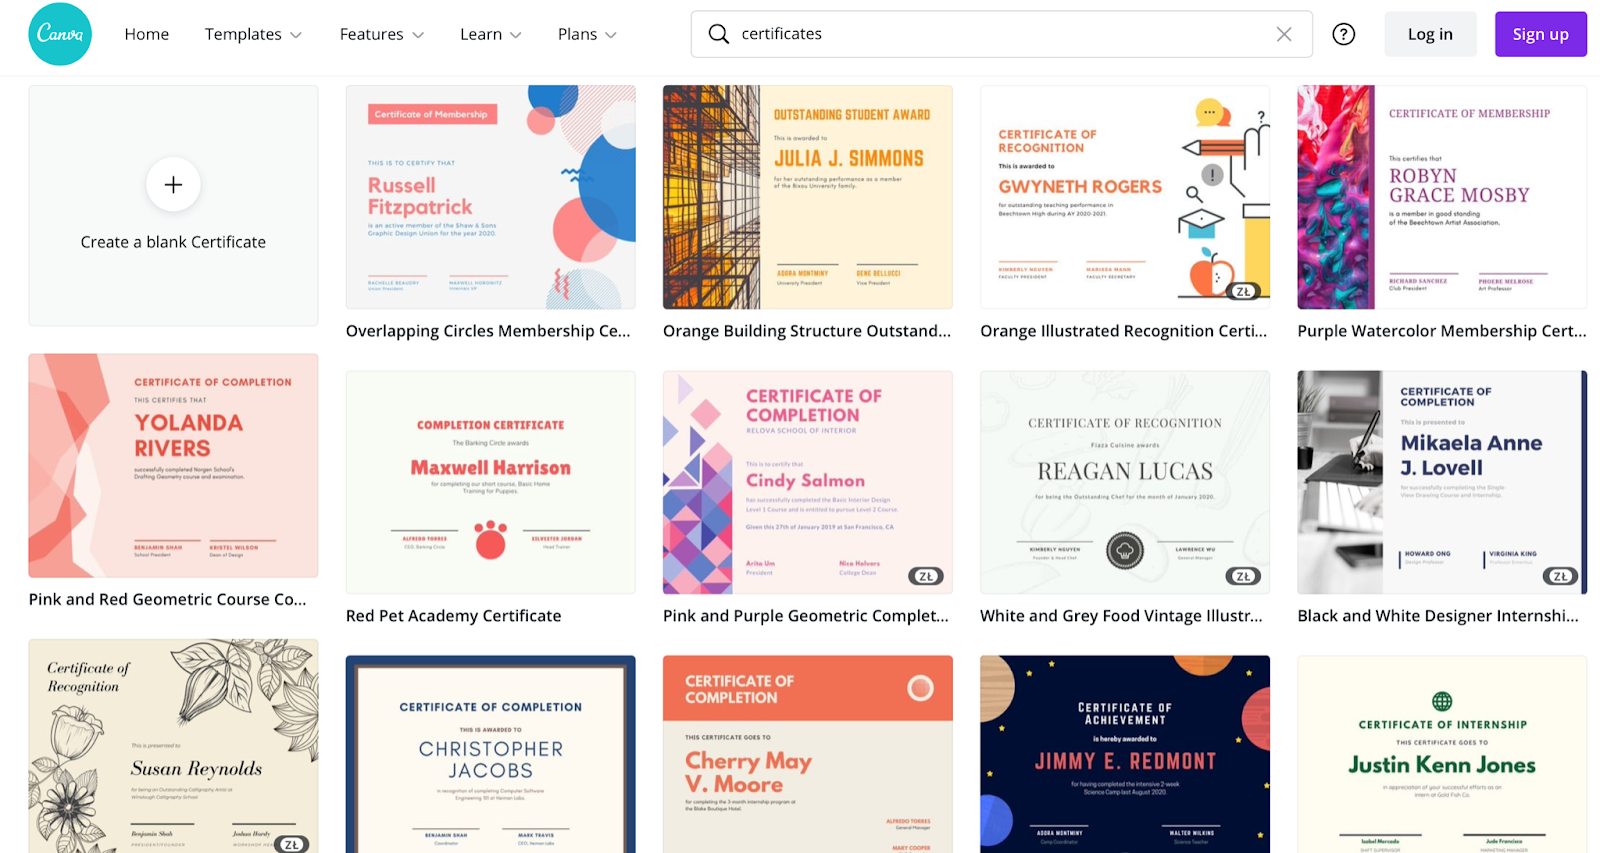
You can adjust the background, upload your own visuals, font size and color. But this is where the certificate creation process stops. Then, you have to fill out every certificate with information manually, download it in a preferred format and send it to recipients.
May be interesting for you: The Best Online Software to Create Certificates
Google Slides
Using Google Slides, a part of the Google Drive package is another way to design certificates without a need to engage a graphic designer.
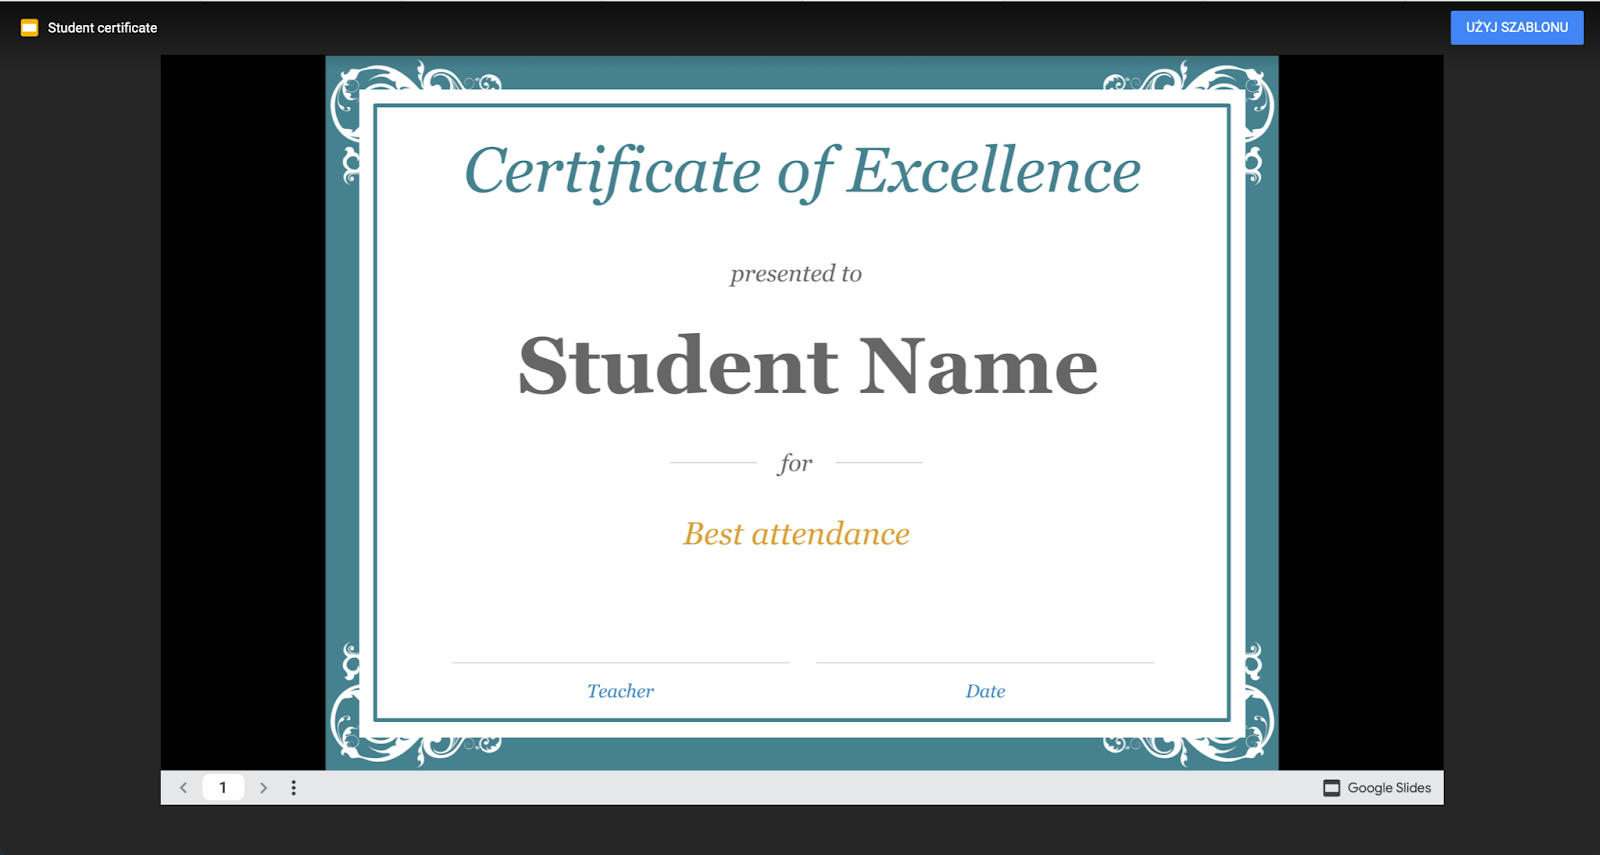
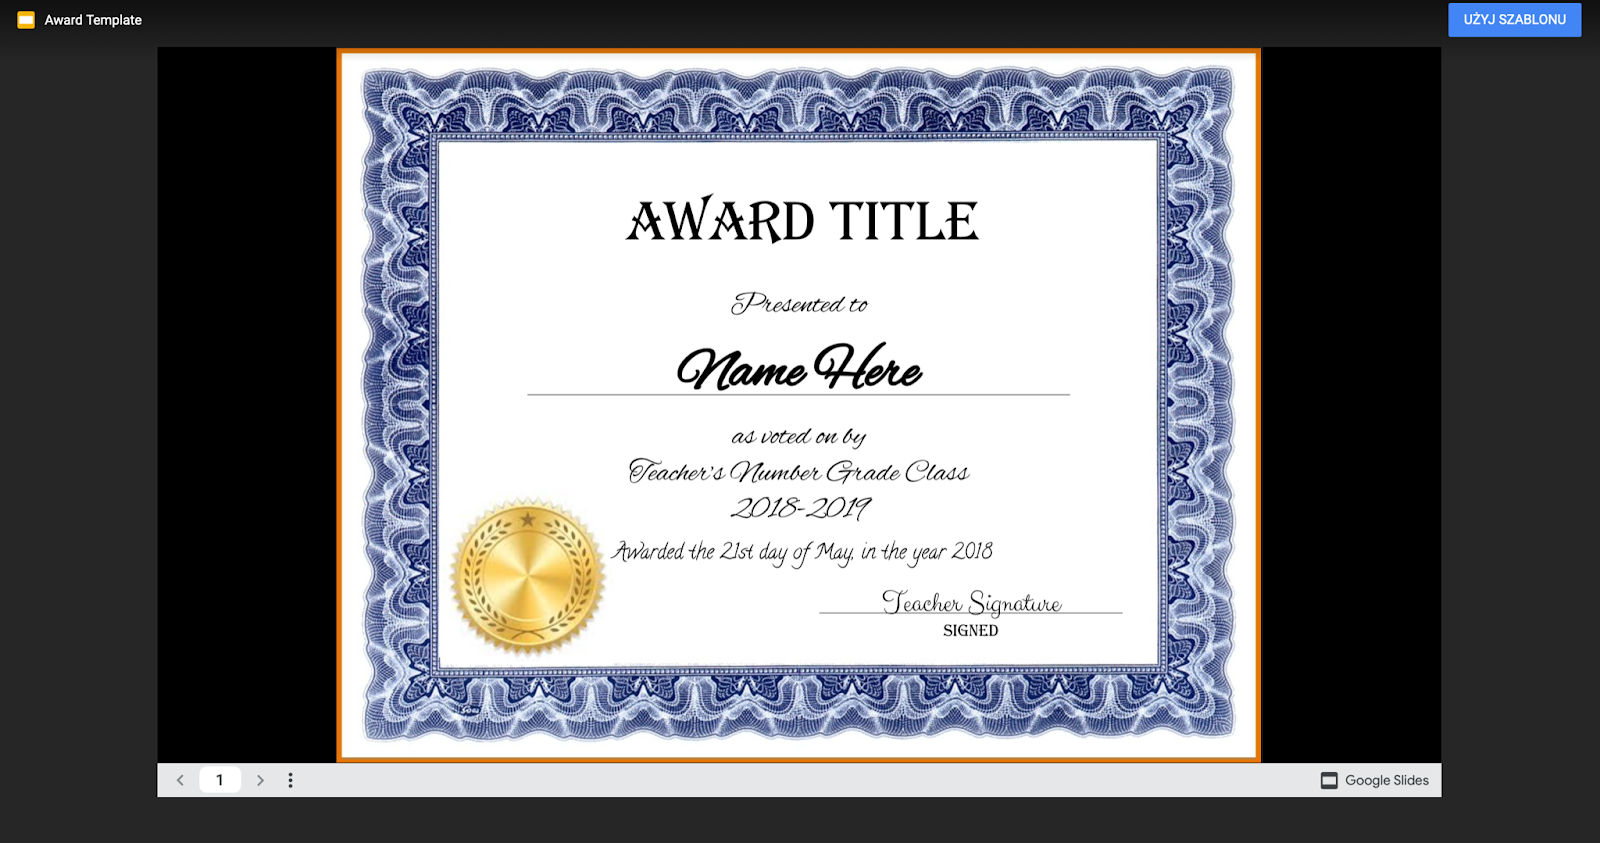
Unfortunately, Google Slides are even more limiting than Canva. As you may see below, certificates offered by Google slides are rather simple and don’t have a modern feel.
You can change the background, change visuals used in a template or add text fields. You can then copy a design and fill out each field with text manually. No automation is possible when using Google Slides.
Visme
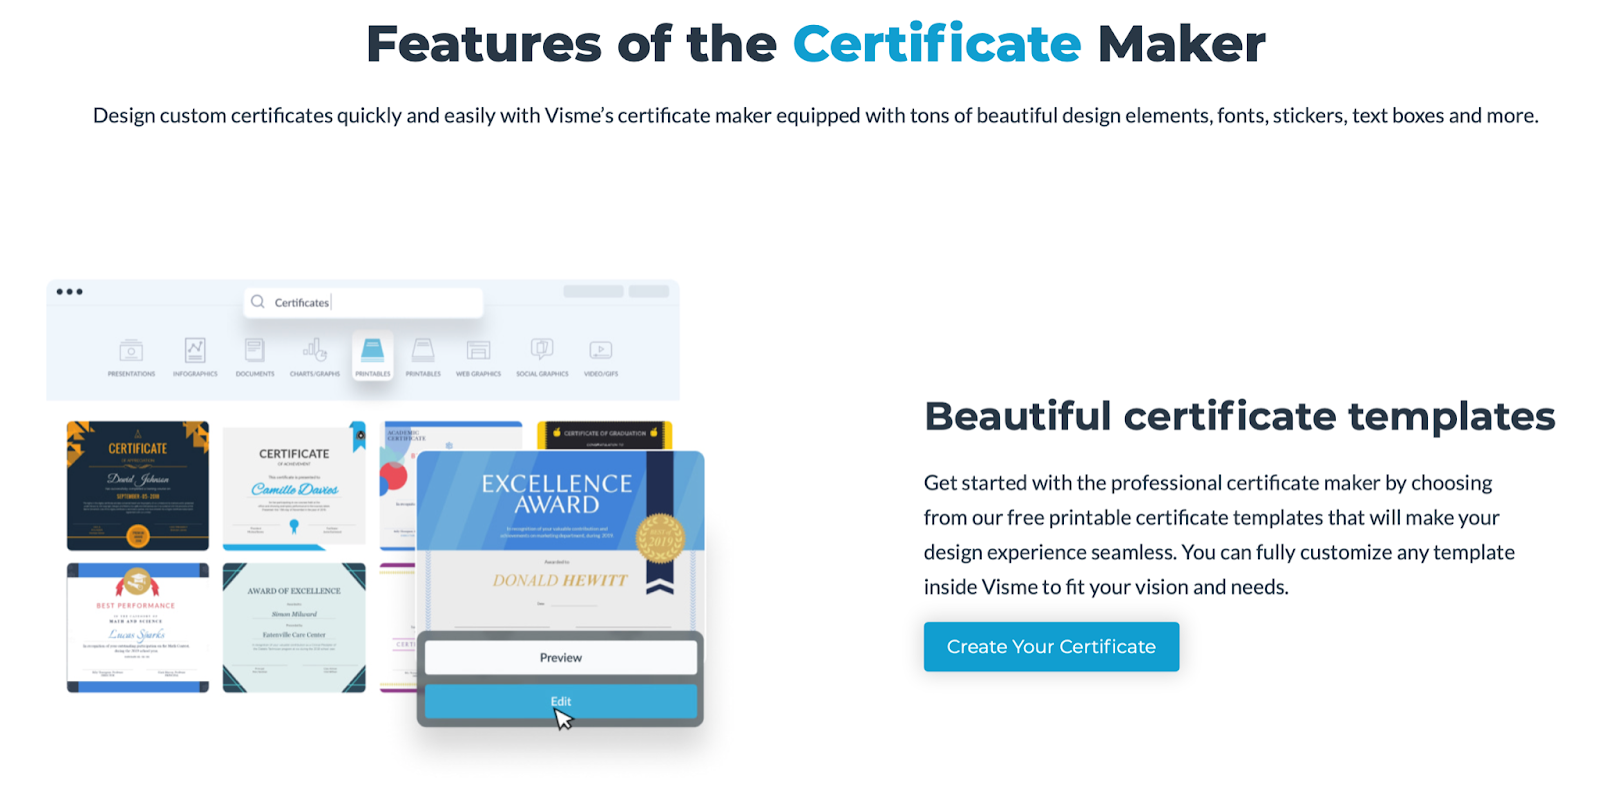
Visme is yet another solution you can use to design certificates. It offers a drag-and-drop certificate creator and also provides customizable templates that can be edited according to your needs or branding guidelines.
You can alter colors or upload images (e.g., logo). It’s also possible to upload your own fonts or colors. It’s worth noting that Visme offers high-quality, printable templates that work well for certificates created to use offline.
What’s missing in the Visme list of features is the possibility to send certificates to recipients via email automatically. With this tool, you can design and download certificates.
Wrapping up
You don’t need to engage a graphic designer to create a beautiful and eye-catching certificate design.
However, you need a reliable and user-friendly tool to achieve that. Luckily, there’s Certifier, a certificate maker you can use to create, design, issue, and send certificates in bulk, hassle-free!
The tool provides a free version and also offers a free trial to let you test this solution and decide whether it’s something for you. Click here to create an account.

Sergey Butko
Tech entrepreneur. Forbes 30 Under 30 Europe. At Certifier, Sergey’s work focused on revolutionizing the way credentials, certificates, and badges are issued and managed through cutting-edge APIs and software infrastructure.
Sergey Butko
Tech entrepreneur. Forbes 30 Under 30 Europe. At Certifier, Sergey’s work focused on revolutionizing the way credentials, certificates, and badges are issued and managed through cutting-edge APIs and software infrastructure.
Share this article